Wrapped Around The Axle. . .Literally
It was only supposed to take 60 minutes. Ninety at the most.
It took eight hours and twenty minutes over the course of two days.
My son-in-law asked me to help him replace his brakes.
How do you know your brakes need to be replaced?
Because they are soft when I step on the brake pedal.
Okay, I’ve had worse diagnoses. Brakes are easy. I had all the tools. He had already bought all the parts. I loaded up my 1/2″ socket set. Threw in some 3/8″ sockets. Jack stands. A floor jack. Wheel blocks. Torque wrench. Gloves. Grease. A “C” clamp (really important!) A heavy mallet. A couple of screw drivers. A battery powered impact driver.
The hardest part was getting it all in the back of my BMW. My lovely wife needed her Suburban. It was okay. . .mostly. The jack handle hung out the window, but the weather was only in the low 40s. He lives in Payson about 30 minutes from our home in Pleasant Grove.
Thirty minutes there. An hour for the job. Thirty minutes back.
But, honey you promised to pick up the new shower doors at Home Depot today.
No problem. Once I get Julian’s brakes done I’ll have him pick them up and deliver.
(Spoiler alert: The shower doors don’t appear in this story again!)
I get to my son-in-laws house and the first thing I notice is that although he lives in an apartment, he has A TWO CAR GARAGE! And since they just moved in, it’s not full of junk. LOTS of room to work and we don’t have to be out in the 40 degree weather.
SWEET!
Okay, no worries. We pull the tire off. Easy peasy. And the rotor. . .(That’s the big plate that your brake pads press against). . .it was literally the worst rotor I had ever seen.
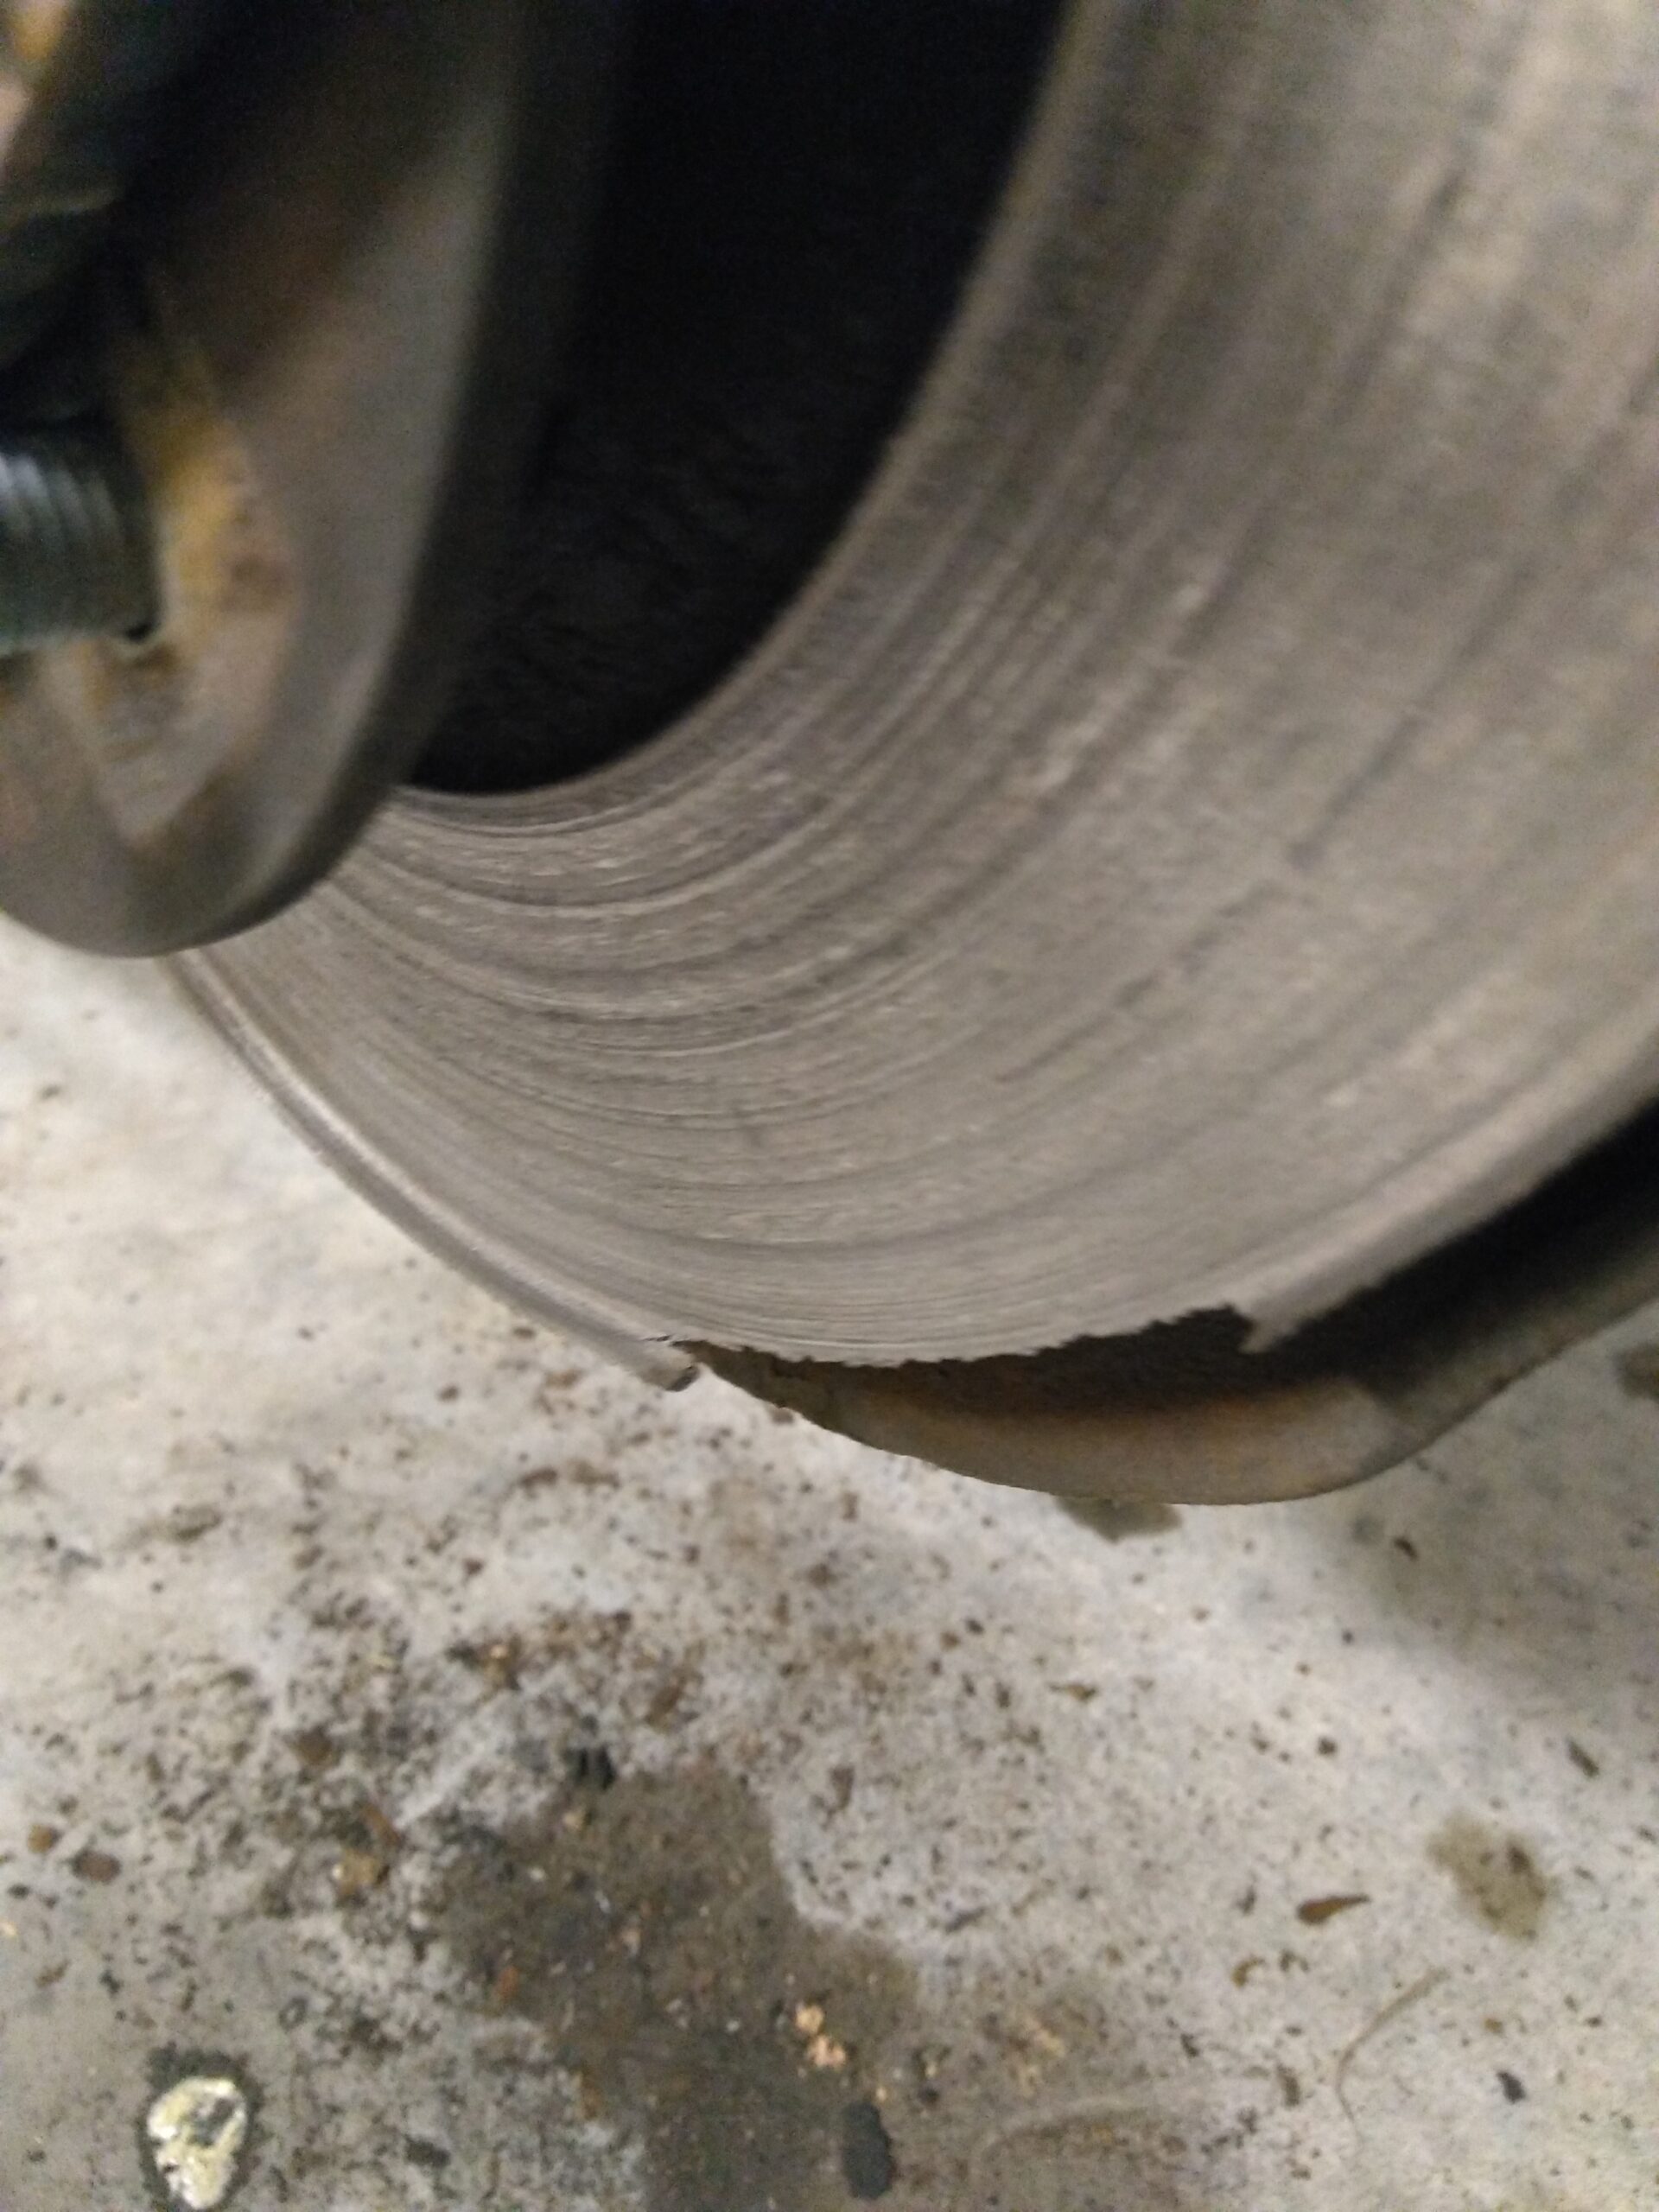
They are NOT supposed to have a lip around the outside.
When was the last time these brakes were changed?
Well, the people I bought it from got it new in 2006 and I don’t think they ever changed the brake pads.
Like ONE HUNDRED AND SEVENTY THOUSAND MILES AGO!
Brakes should typically be changed every 40,000 miles or so. Okay, no worries. He’s already bought the new rotors. I disassembled the caliper. (And gave him the good news that he was going to get back the $300 he spent on new calipers.) Then, I took off the brake bracket.
See these two brake pads?
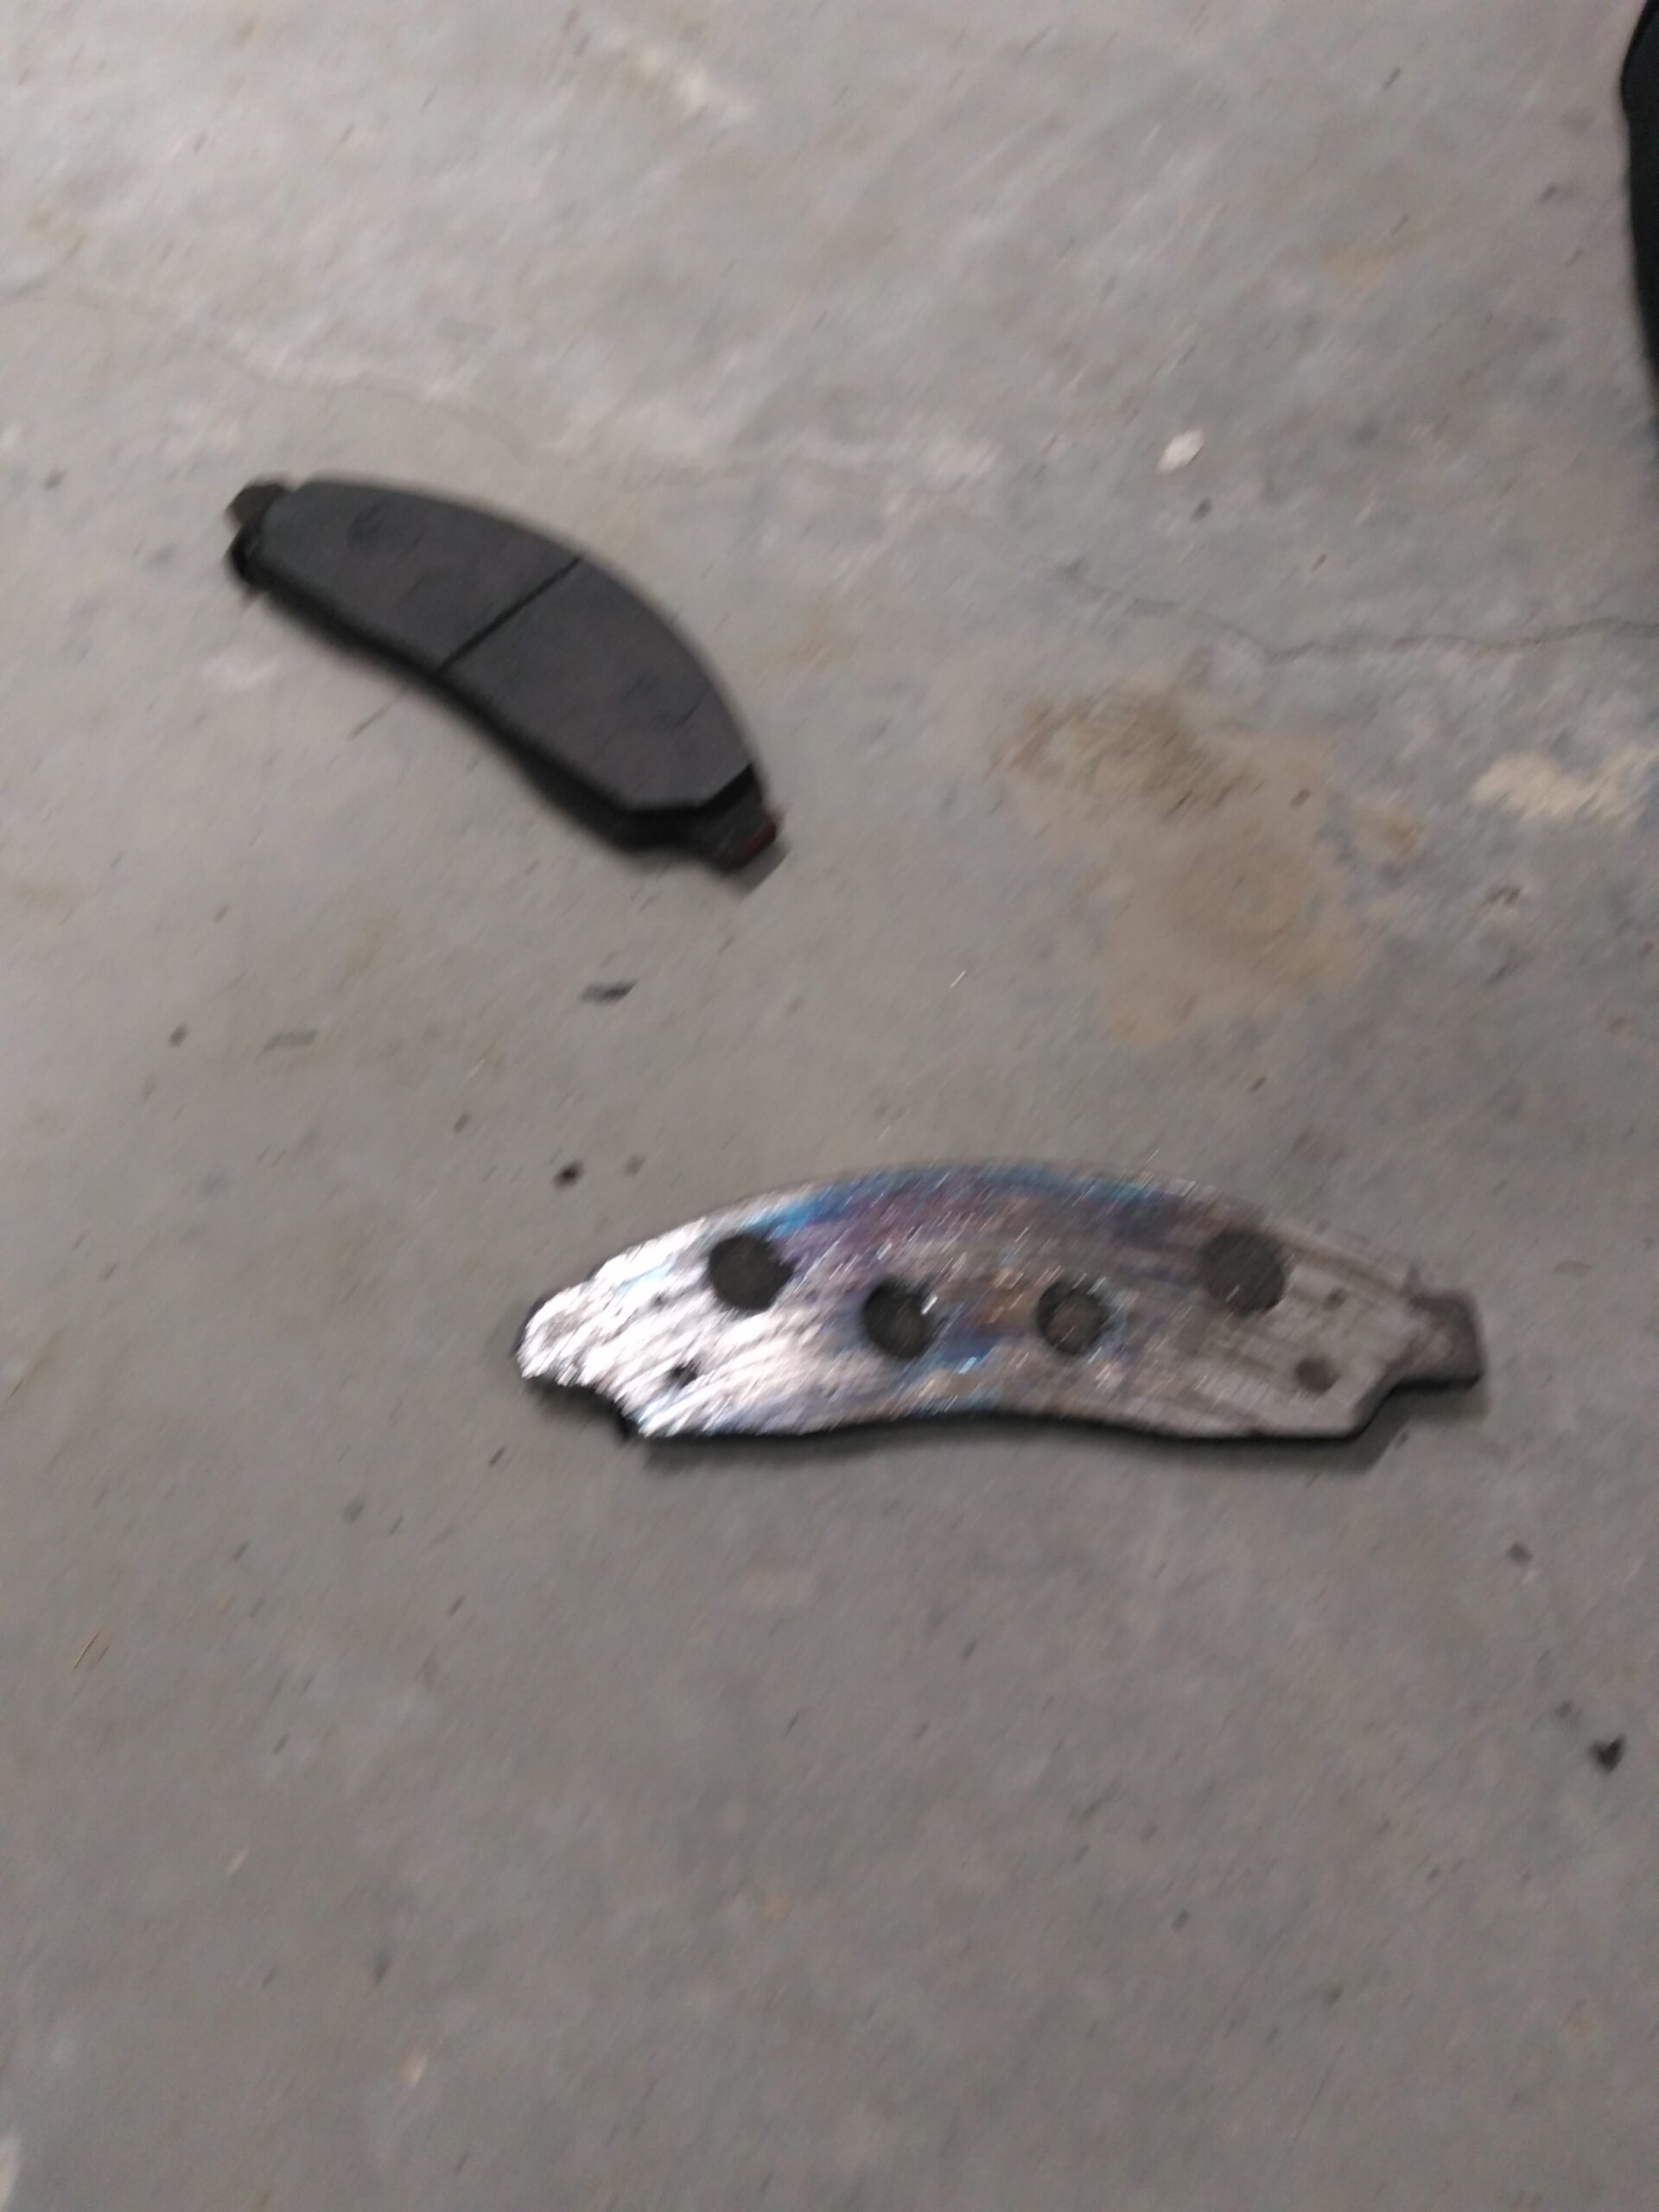
Yeah, they aren’t supposed to be shiny. That brake pad had worn through the padding and down to the metal and then THAT metal rubbed on the metal rotor and wore it down.
Okay, No worries. Now we just have to take off the rotor.
Just one problem. On a car the rotor sits on the OUTSIDE of the hub. The hub is what holds your lugs. On a car the rotor has holes for the lugs to fit through. Not on this.
On the 2006 Chevy Colorado the rotor sits BEHIND the hub. So, what do you have to do? You have to remove the hub to get to the rotor. This SOUNDS simple enough. Unfortunately, it’s not. To get the hub off you have to first remove the axle nut. It literally holds the hub onto the axle. Without it your wheel would fall off.
Well, not THIS wheel, but we’re getting to that.
The axle hub is torqued to about 190 ft/lbs. As a comparison, most lug nuts on a car are at about 100 ft/lbs. So, imagine how hard it is to take off a lug nut and then double that. The problem is that the hub is free spinning. (Remember we took off the brake pads already.
So, how do you secure a free spinning disk? Fortunately, there was plenty of construction material around. I grabbed a piece of rebar (long piece of steel.) And I secured that to the hub, locking it in with the lug nuts.
And I discovered that
- My son-in-law and I are strong enough to bend steel
- One piece of rebar isn’t enough
We literally wrapped it around the axle.
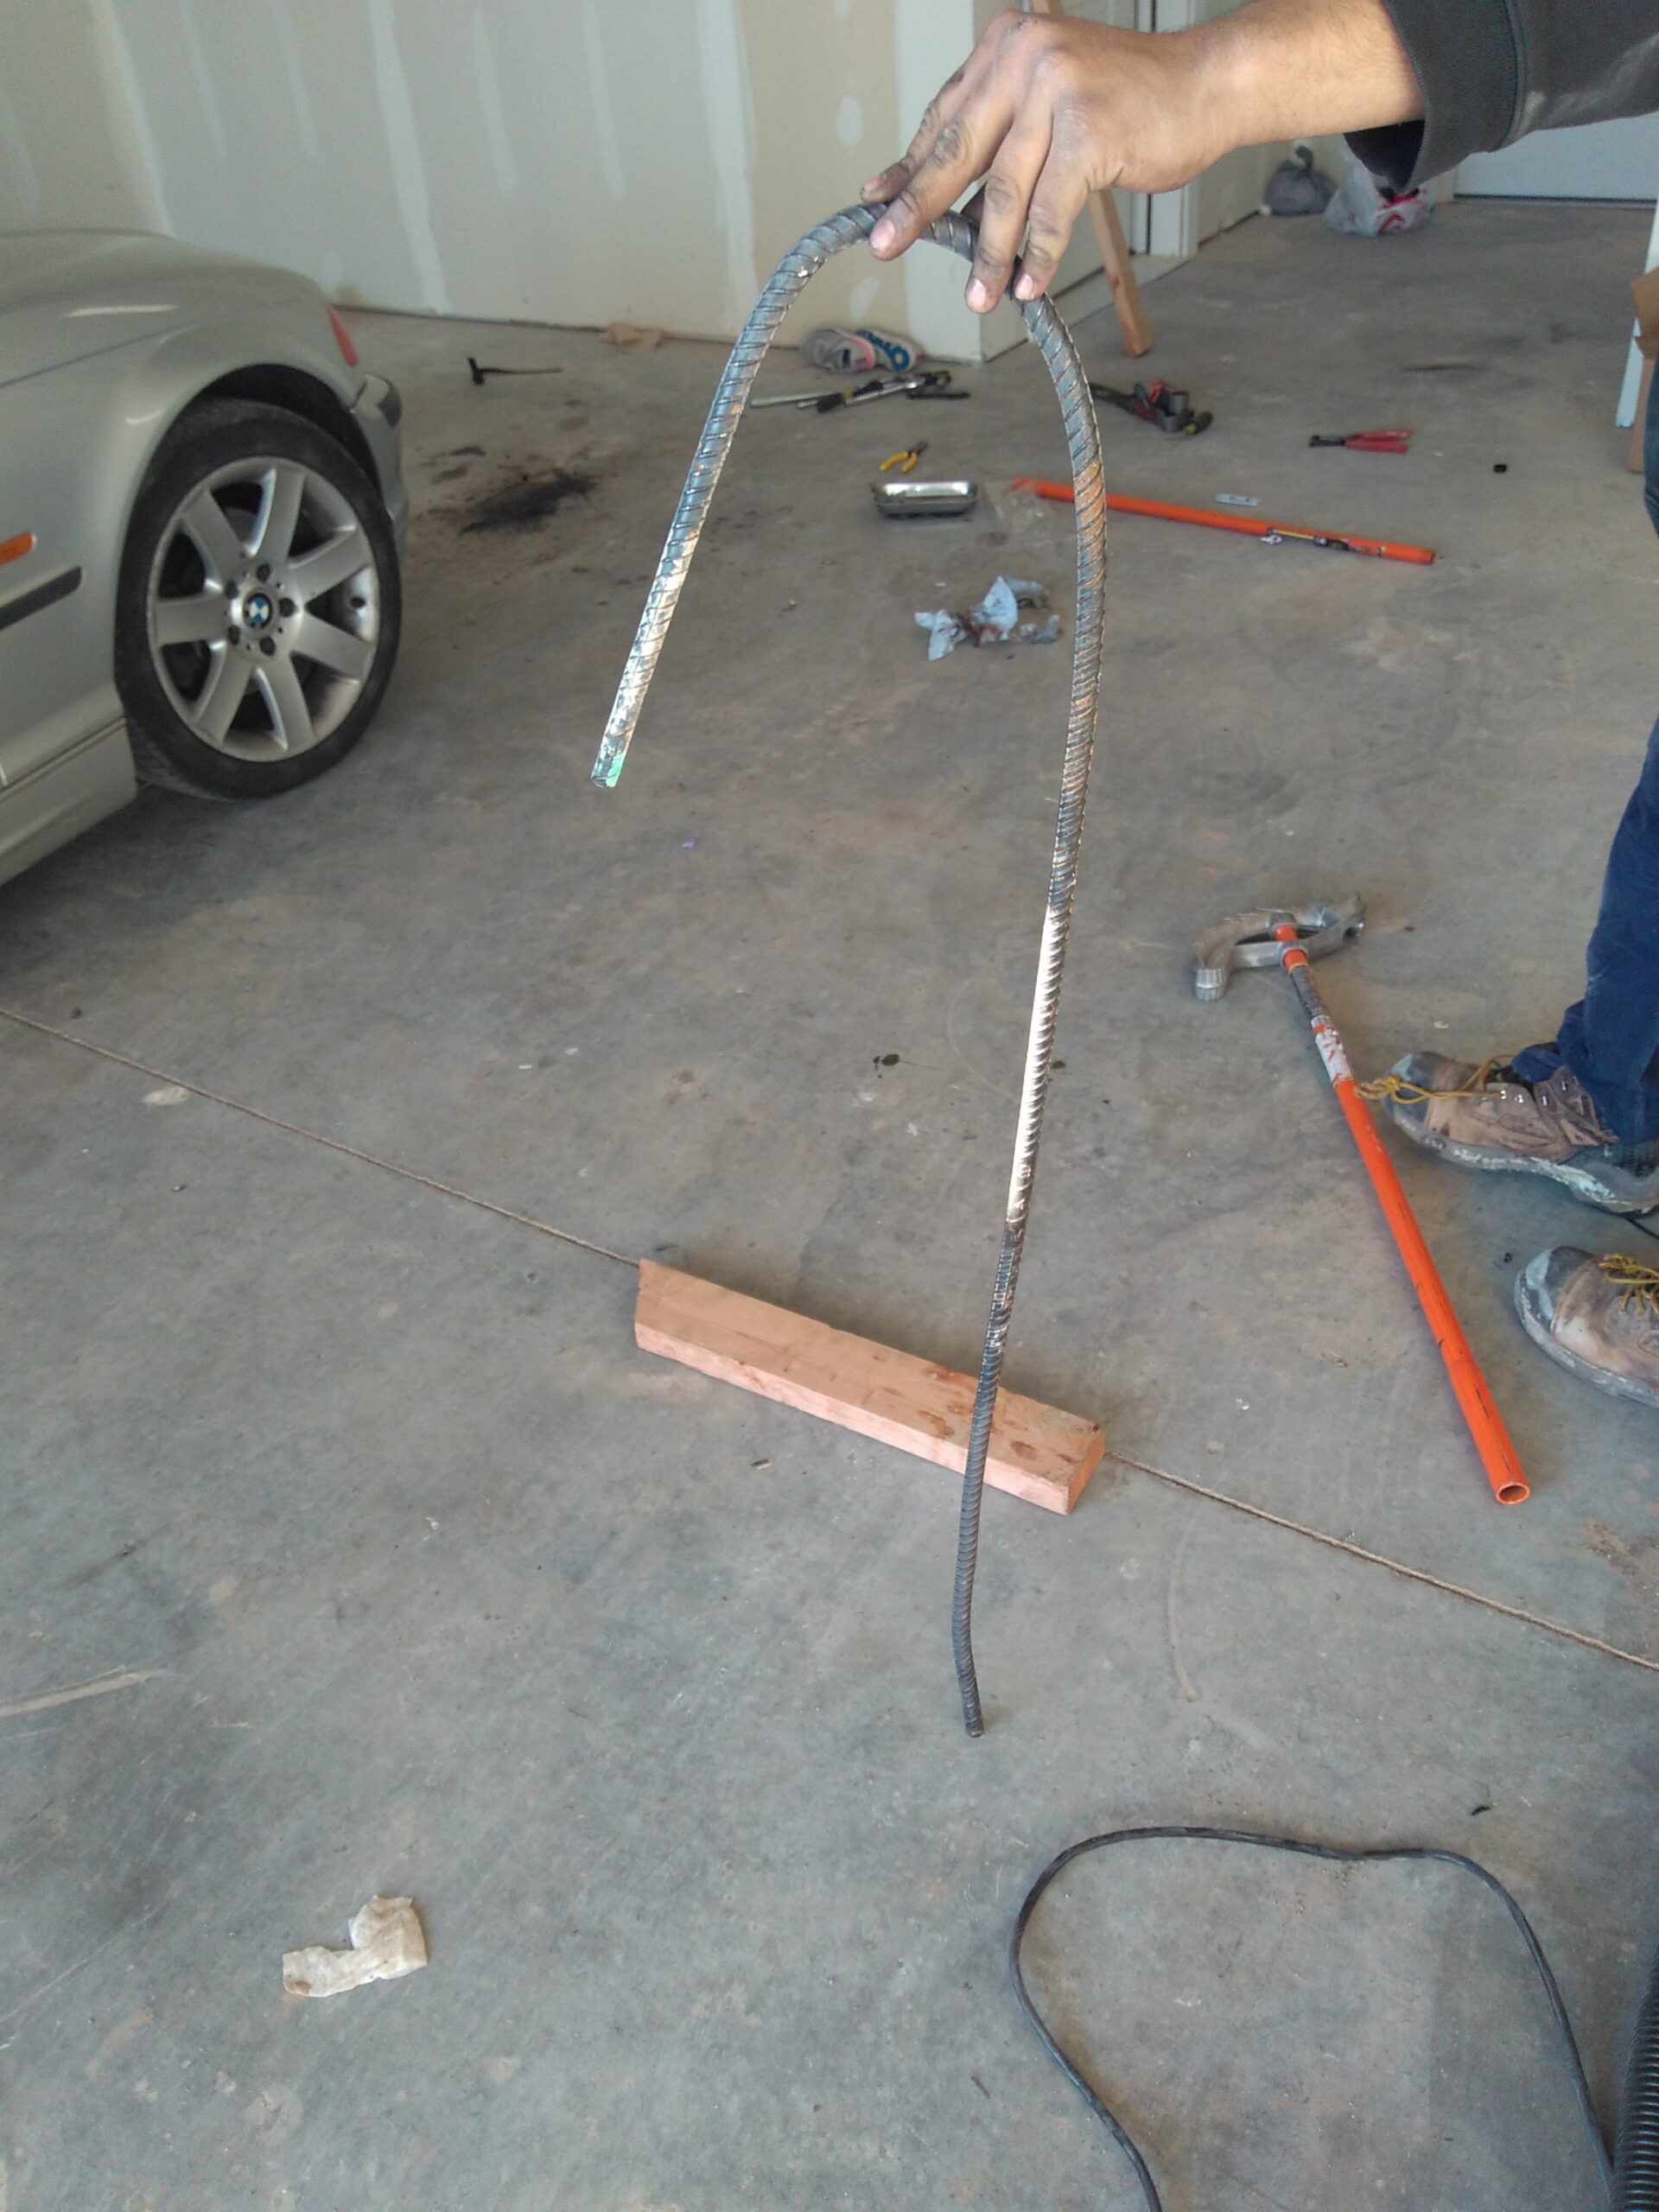
We strapped a second piece on and managed to finally get the axle nut off.

Hurray! We’re on our way.
Nope.
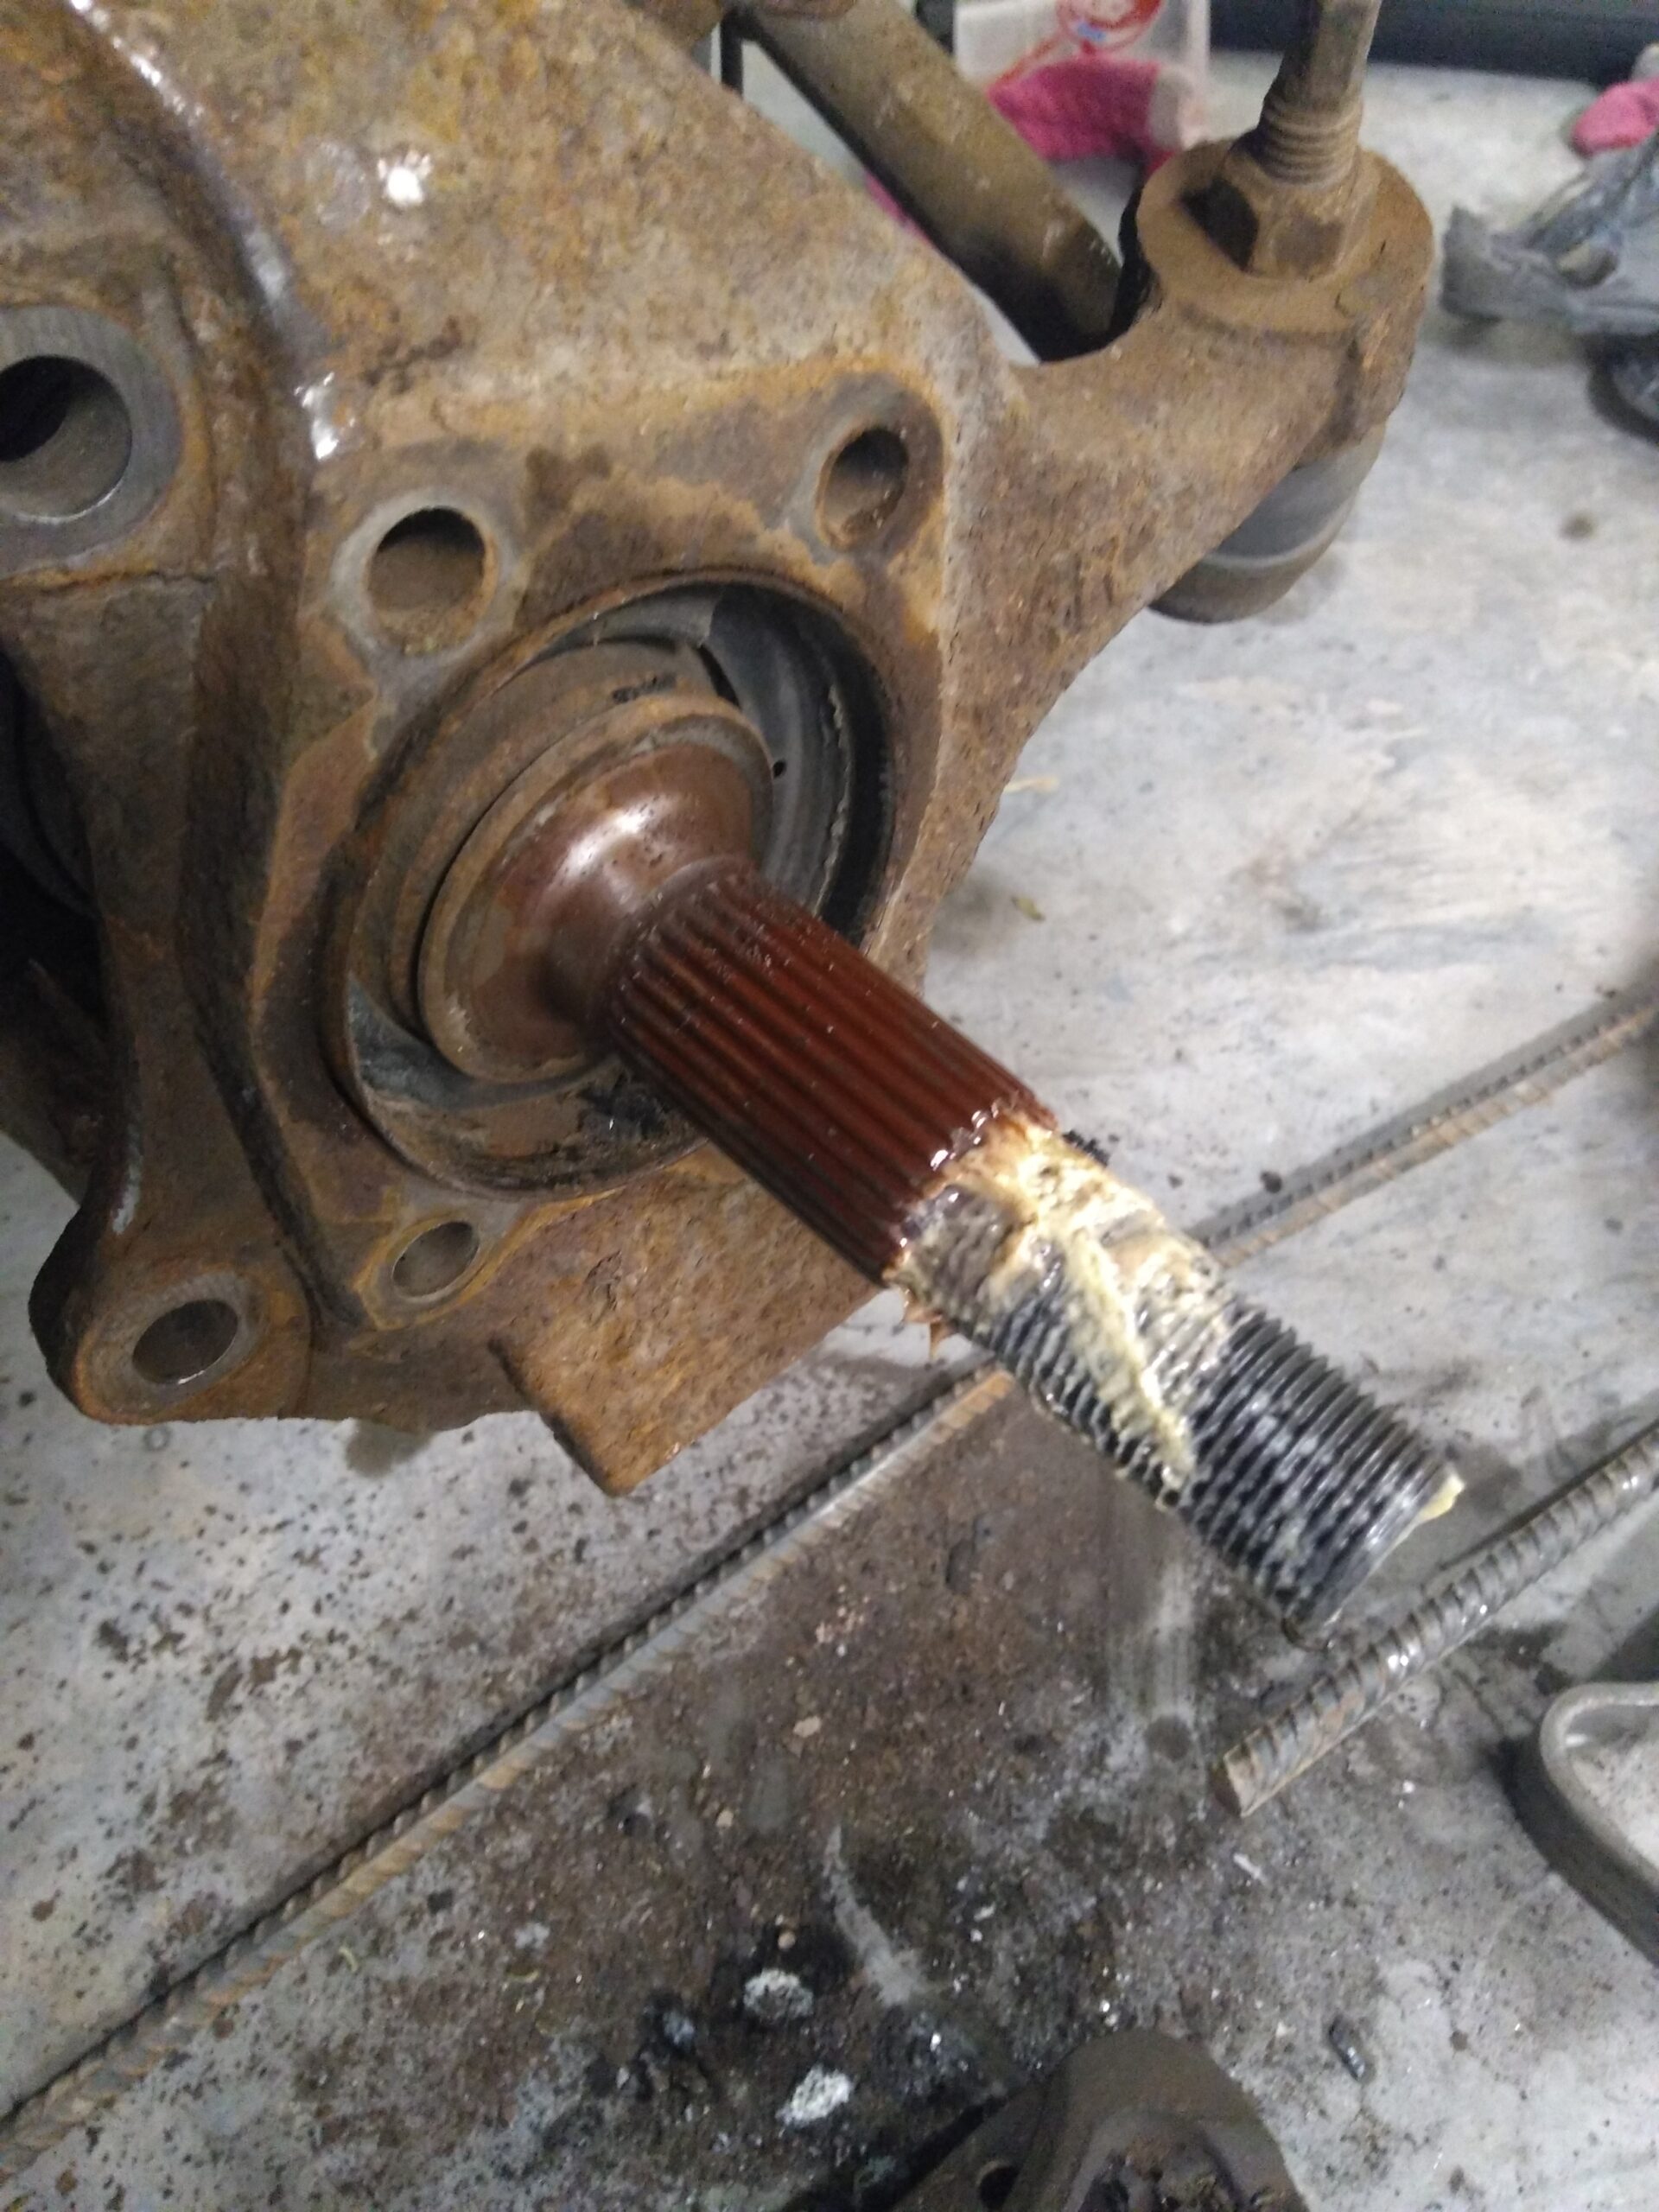
The axle nut technically holds the hub to the axle, but after 26 years, there’s plenty of rust holding those two parts together. The axle has a set of spines and the hub has a corresponding set that slide onto the axle. You have to “break” the bond between the two.
We tried crowbars first. Not a hint. We hit it with the big mallet I brought. Nope. We sprayed PB Blaster on it to loosen it. We sprayed A LOT of PB blaster. Nope. Finally we went to the auto parts store and rented a hub puller. It’s a device that fits over the hub. You secure it to the hub using lug nuts and then you put a screw through the middle of the puller and as you screw it in it pushes against the axle. Since the puller is secured to the hub, something has to give if you crank hard enough.
Well, most times. We bottomed out our center screw and I don’t know what was bending, or flexing, but the hub puller wasn’t working.
By this time it was late in the evening and we had attracted a crowd. We had three men, two women and my two year old granddaughter all in the garage offering advice.
We can’t do anything else tonight. All the stores are closed. I’m coming back tomorrow. And I’m bringing the heat. It can’t be stuck if it’s liquid.
Okay, I wasn’t ACTUALLY going to melt the axle, but heat is typically the last resort for stuck bolts, or in our case a hub.
I headed home to face my unhappy lovely wife who was not getting her shower doors. On my way I stopped into Home Depot just before closing. I got a torch. I also bought some bolts for a crazy idea I’d seen on a youtube video. But, the torch was the main thing.
The next morning, after church, I loaded up my fire extinguisher, a really long breaker bar that the same son-in-law had given me, asbestos gloves, face shield. I wasn’t coming back defeated again.
Back in Payson I got all my tools ready. Before we lit up the torch I decided to try the crazy screw idea. The bracket that holds the brake pads attaches to the car on the back side of the rotor. The bolts are 21mm. And there are two holes in the frame to fit the bolts through to secure the bracket. With the bracket removed these holes were right next to the BACK of my stuck rotor/hub assembly. I put a bolt through each hole. Then, I added a couple of washers and a nut to secure it. As I cranked on the bolts, they were pressing on the back of the rotor. Theoretically if I pushed them hard enough it SHOULD push the rotor/hub off the axle.
I didn’t have high hopes. I was sure we were going to have to go to fire.
I tightened down the first one until it got really tight. Then, I inserted the second one and did the same thing. I went back to the first one. . .AND IT WAS LOOSE! That possibly means that the rotor moves a little. We went back and forth. At one point we spun the rotor around 180 degrees to get even pressure.
Tighten one until it won’t go anymore. Switch to the other. Switch back. I lost track of how many times I did that.
And then the whole thing came loose.
DID YOU SEE THAT!?!
YEAH, YOU SAW IT TOO!
It was off.
After six hours. And we didn’t have to go to the torch. At that point it was all down hill. As in easy, not bad. We replaced the rotor. We reassembled the hub on the axle. We put our rebar back on. We put the axle nut on and torqued it to. . .as much as we could, my torque wrench only went to 150 ft/lbs. We then realized we missed the axle washer, so we took the nut off again, added the washer and replaced the nut.
Finally we were to the point that we could actually do the brakes. Replace hardware. Put on grease. Fit the brake bracket over the rotor. Depress the caliper piston. When you use your brakes a piston inside the caliper presses the shoes against the rotor. You have to manually push that piston back into the caliper. That is what the “C” clamp was for.
Replace the caliper. And then put the wheel back on.
Eight hours later. . .we were half done. We had only done one side.
We switched sides and pulled the second wheel off. And the rotor looked nice. No scoring. No lip. We didn’t need to pull the hub and replace the rotor. . .even though we now knew how and had all the tools.
This is what doing the brakes is normally like!
Twenty minutes later I had the removed the caliper, removed the old brake pads. Greased and installed the new ones. Depressed the piston. And put it all back together.
Ah, Rodney, what’s that leaking out of my truck? Is that water?
Nope. That’s oil.
Is it serious?
Check your brake fluid reservoir.
It’s full to the top and overflowing.
That’s the problem. When I depressed that piston it pushed fluid back into the reservoir. Throw some kitty litter on the spill and in a week you won’t notice a thing.
We replaced the wheel and while I cleaned up my tools he drove it around the parking lot.
Feels great!
Sometimes a job takes 20 minutes. . .sometimes it takes eight hours and twenty minutes
Stay safe
Rodney M Bliss is an author, columnist and IT Consultant. His blog updates every weekday. He lives in Pleasant Grove, UT with his lovely wife, thirteen children and grandchildren. Order Miscellany III A Collection of Holiday Short Stories, an anthology including his latest short story, “You Can Call Me Dan” here
Follow him on
Twitter (@rodneymbliss)
Facebook (www.facebook.com/rbliss)
LinkedIn (www.LinkedIn.com/in/rbliss)
or email him at rbliss at msn dot com(c) 2022 Rodney M Bliss, all rights reserved
