STAW: Chronological Chaos OP – An Unbeatable Build?
This post assumes an understanding of Star Trek Attack Wing (STAW). Read a brief introduction to it here.
Last month I attended the Chronological Chaos OP at our Friendly Local Game Store (FLGS.) The FLGS I play at plays Faction Pure. We were also playing “old rules.” So, no subfactions. Two of my sons also attended. I played the Independent Faction. My older son played Romulan. But, it was the Federation Fleet that my younger son ran that was the unbeatable build.
It’s obviously pretty bold to call a build unbeatable, especially when you are limiting the build to a single faction. I’ll go over the build and then walk through the first Activation (movement) Phase. I think it would be difficult to prevent that first move and it would be nearly impossible to catch him after the first turn.
Chronological Chaos OP
In this scenario, your fleet arrives in an unexplored sector of space to investigate a series of subspace anomalies causing large scale time fluctuations across the quadrant. As you arrive, your sensors detect an enemy fleet coming out of warp nearby. You have direct orders to investigate the anomalies to figure out their source, but you cannot simply ignore your most hated enemies while doing so. As you engage in combat and start investigating these anomalies, you realize that they are tears in space and time which bridge multiple universes!
Essentially, you have to fly to each of four spots in the playing area as quickly as possible, without having your fleet destroyed. Chronological Chaos has multiple victory conditions.
- Any ship has four mission tokens at the end of the round. (Meaning it has visited each of the four objectives)
- One player is eliminated.
- The time limit is reached.
That means that the game is over if someone gets to all four spots, or if one fleet destroys their opponent’s fleet, or if the players take an hour and neither player has eliminated the other or made it to all four spots We built the Federation Fleet specifically to accomplish goal #1. We were not interested in fighting. In fact, because only ships who have gone through the same number of checkpoints can attack each other, the goal was to prevent the opponents from even being able to interact with “the Rabbit,” our fastest ship.
The Rabbit Build
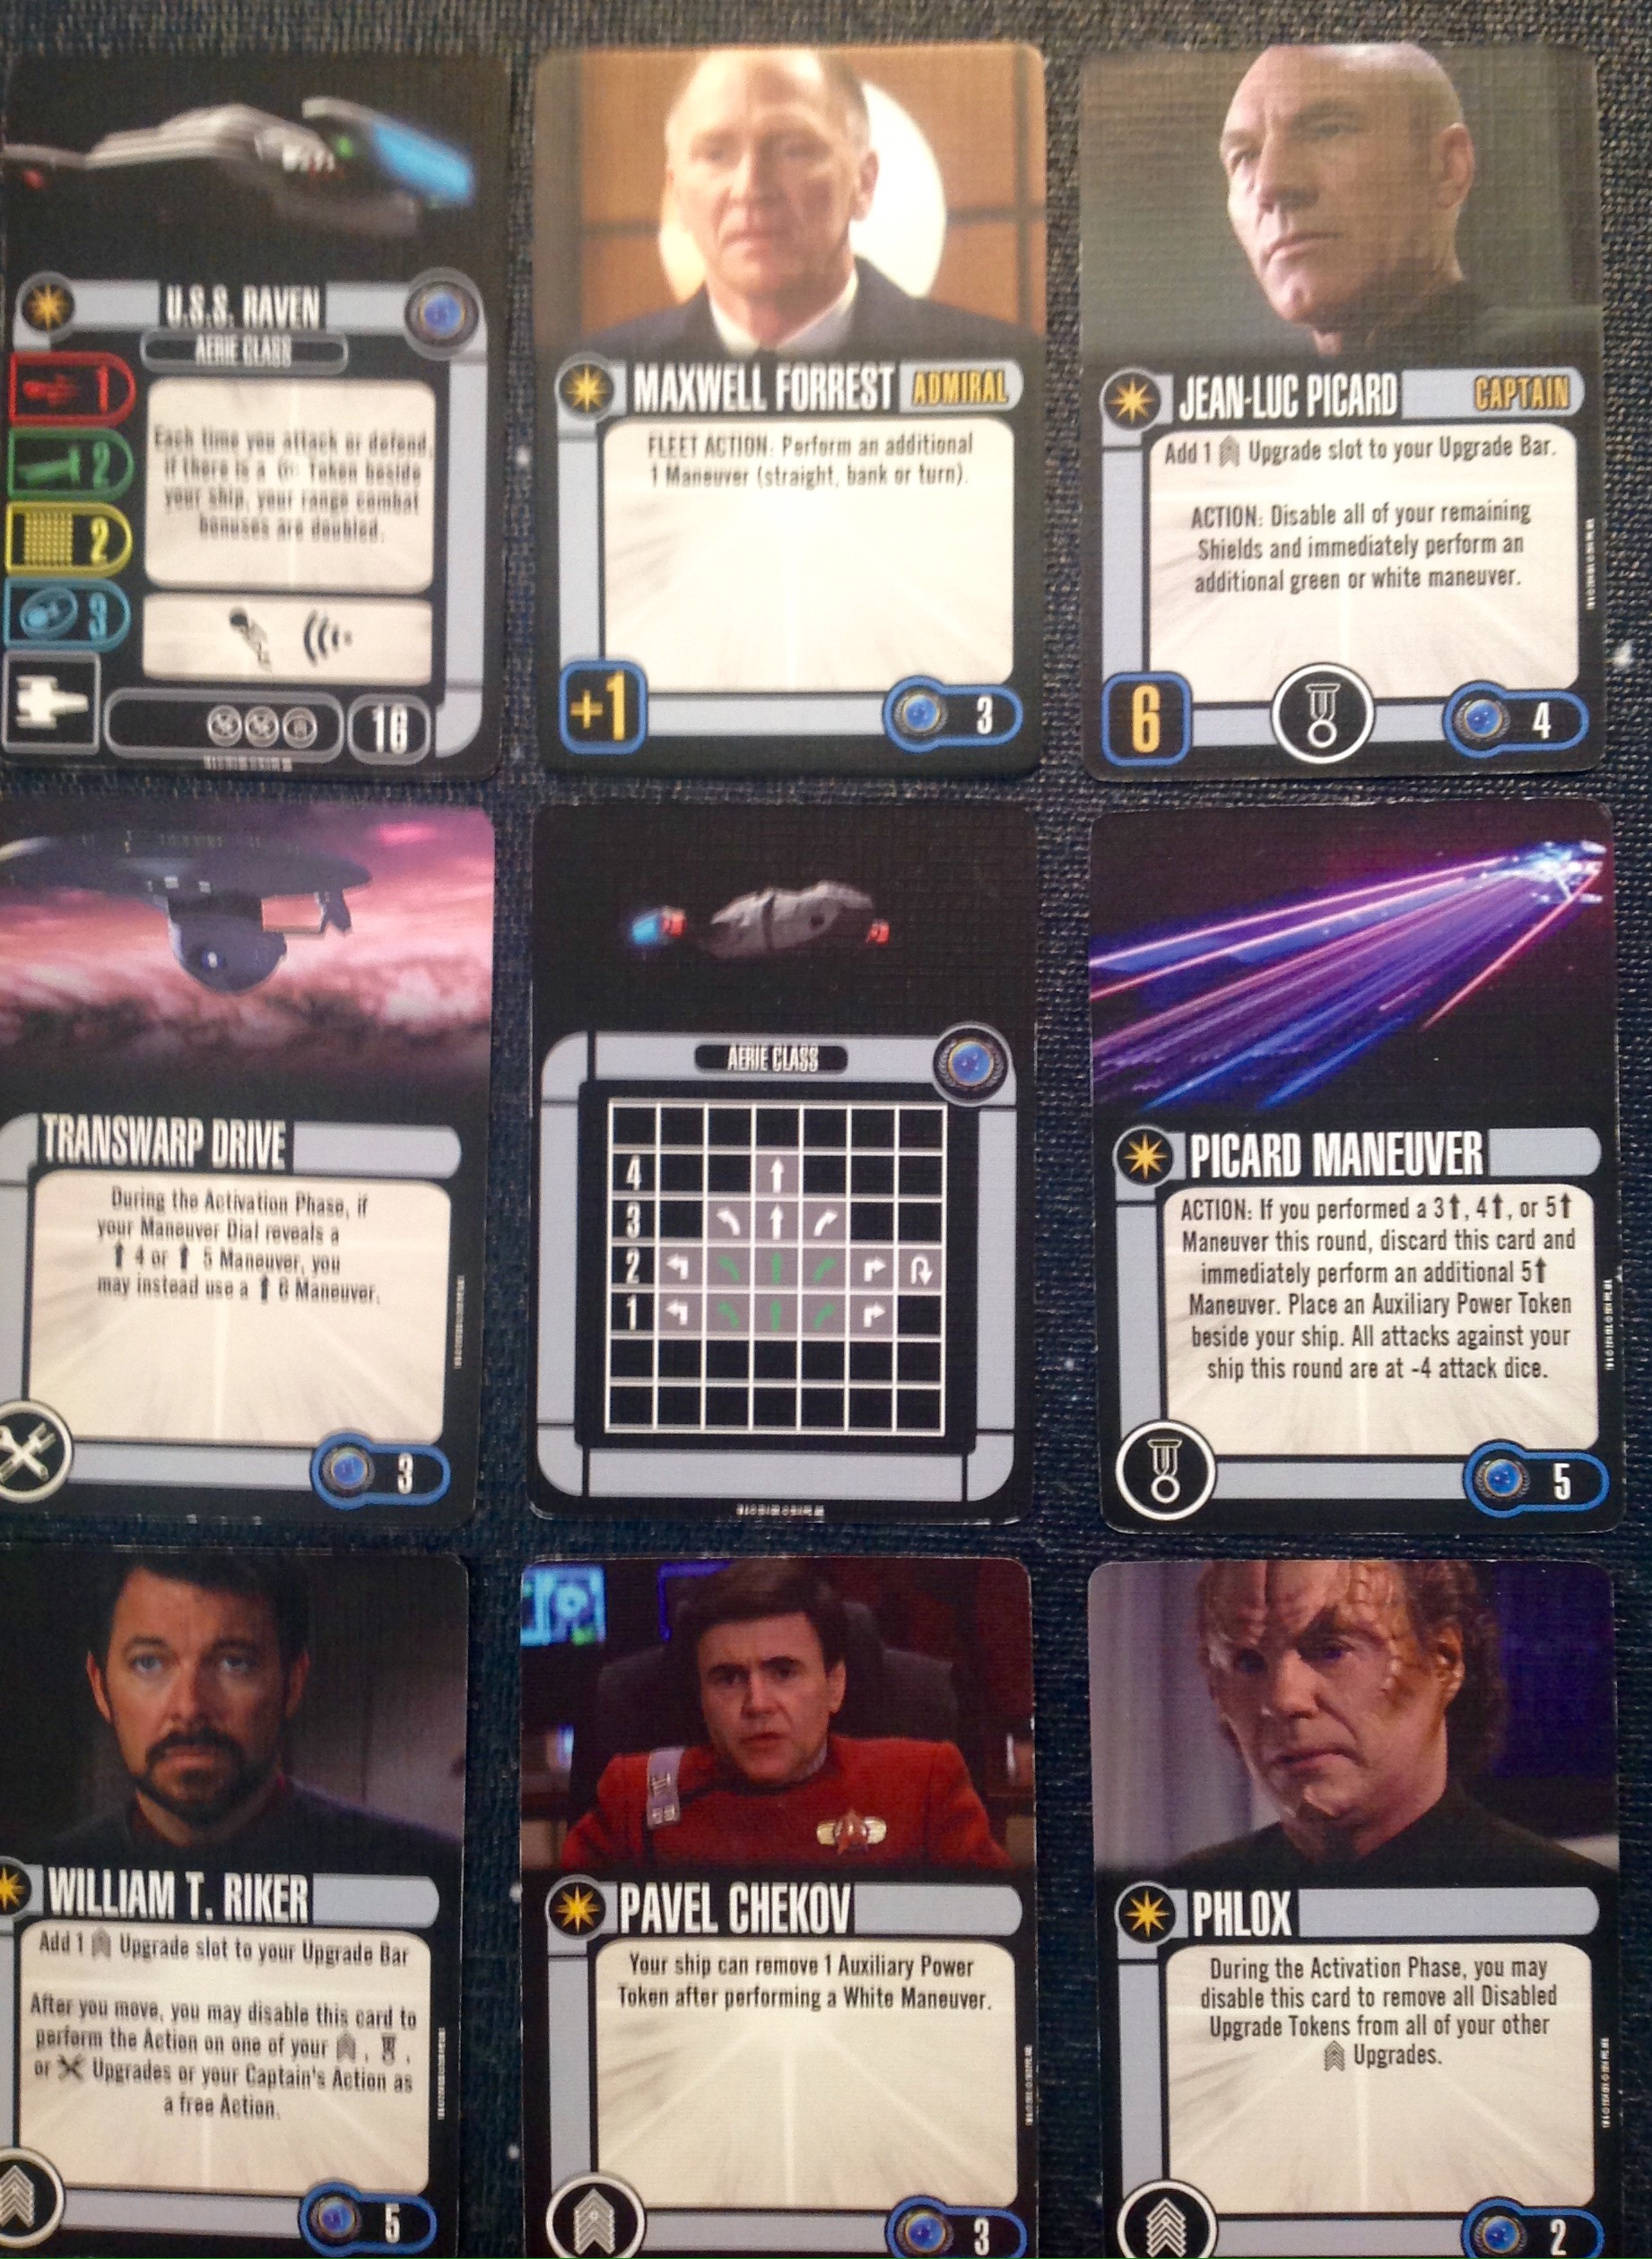
U.S.S. Raven [U.S.S. Raven] (16) <– The Rabbit
Jean-Luc Picard [U.S.S. Stargazer] (4)
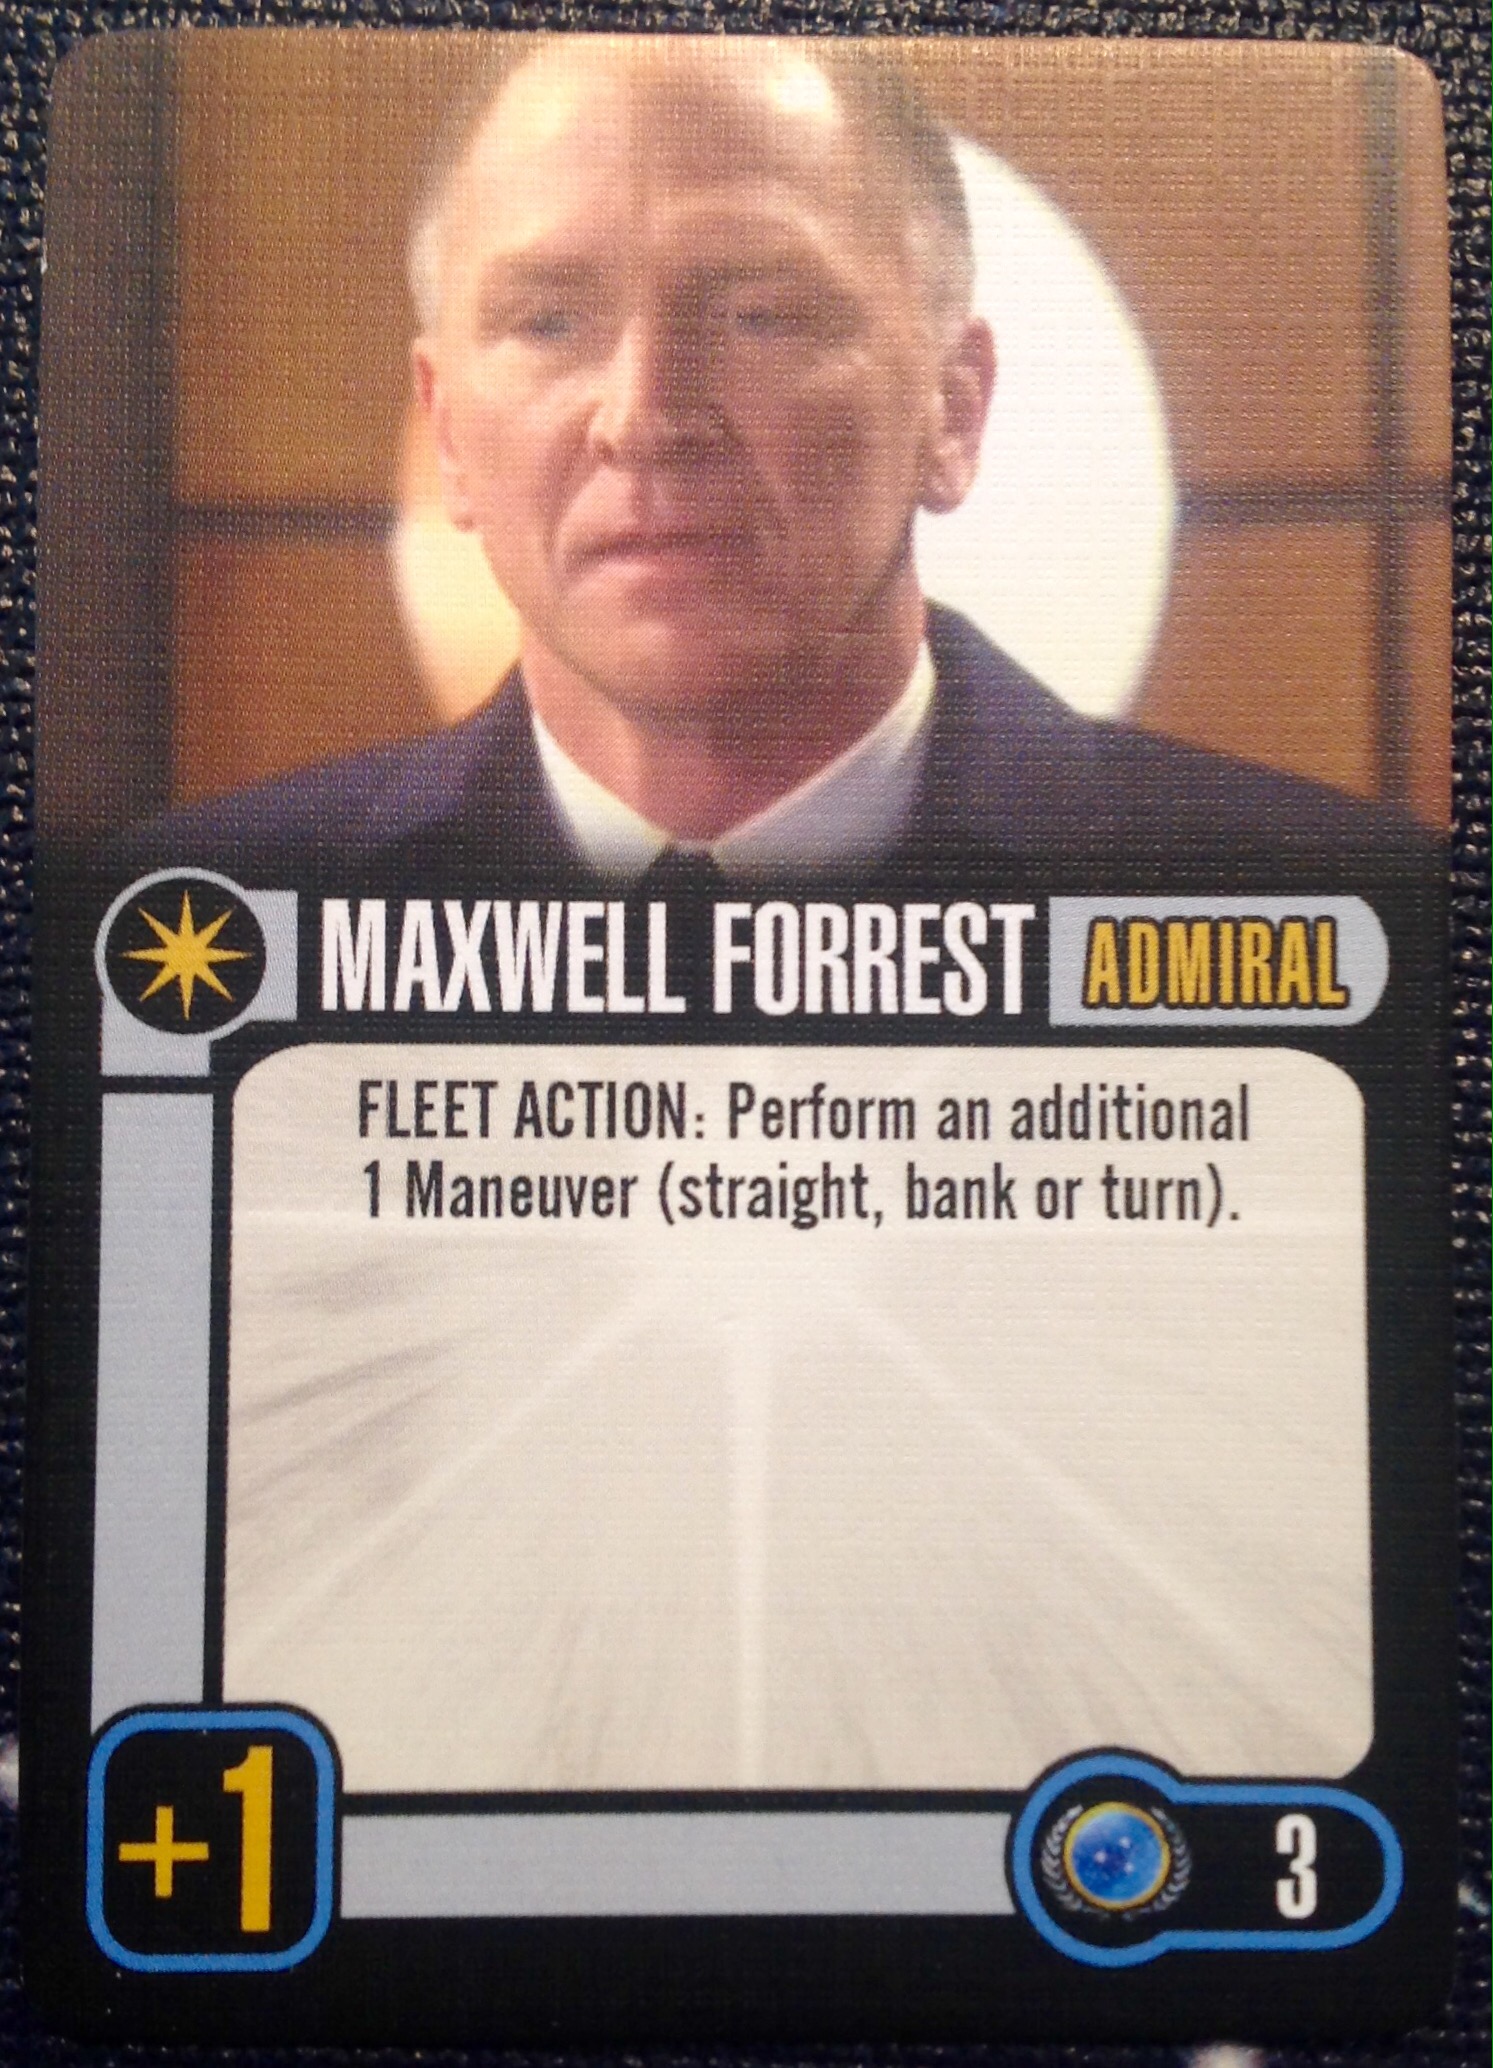
Adm Maxwell Forrest [Enterprise NX-01] (3)
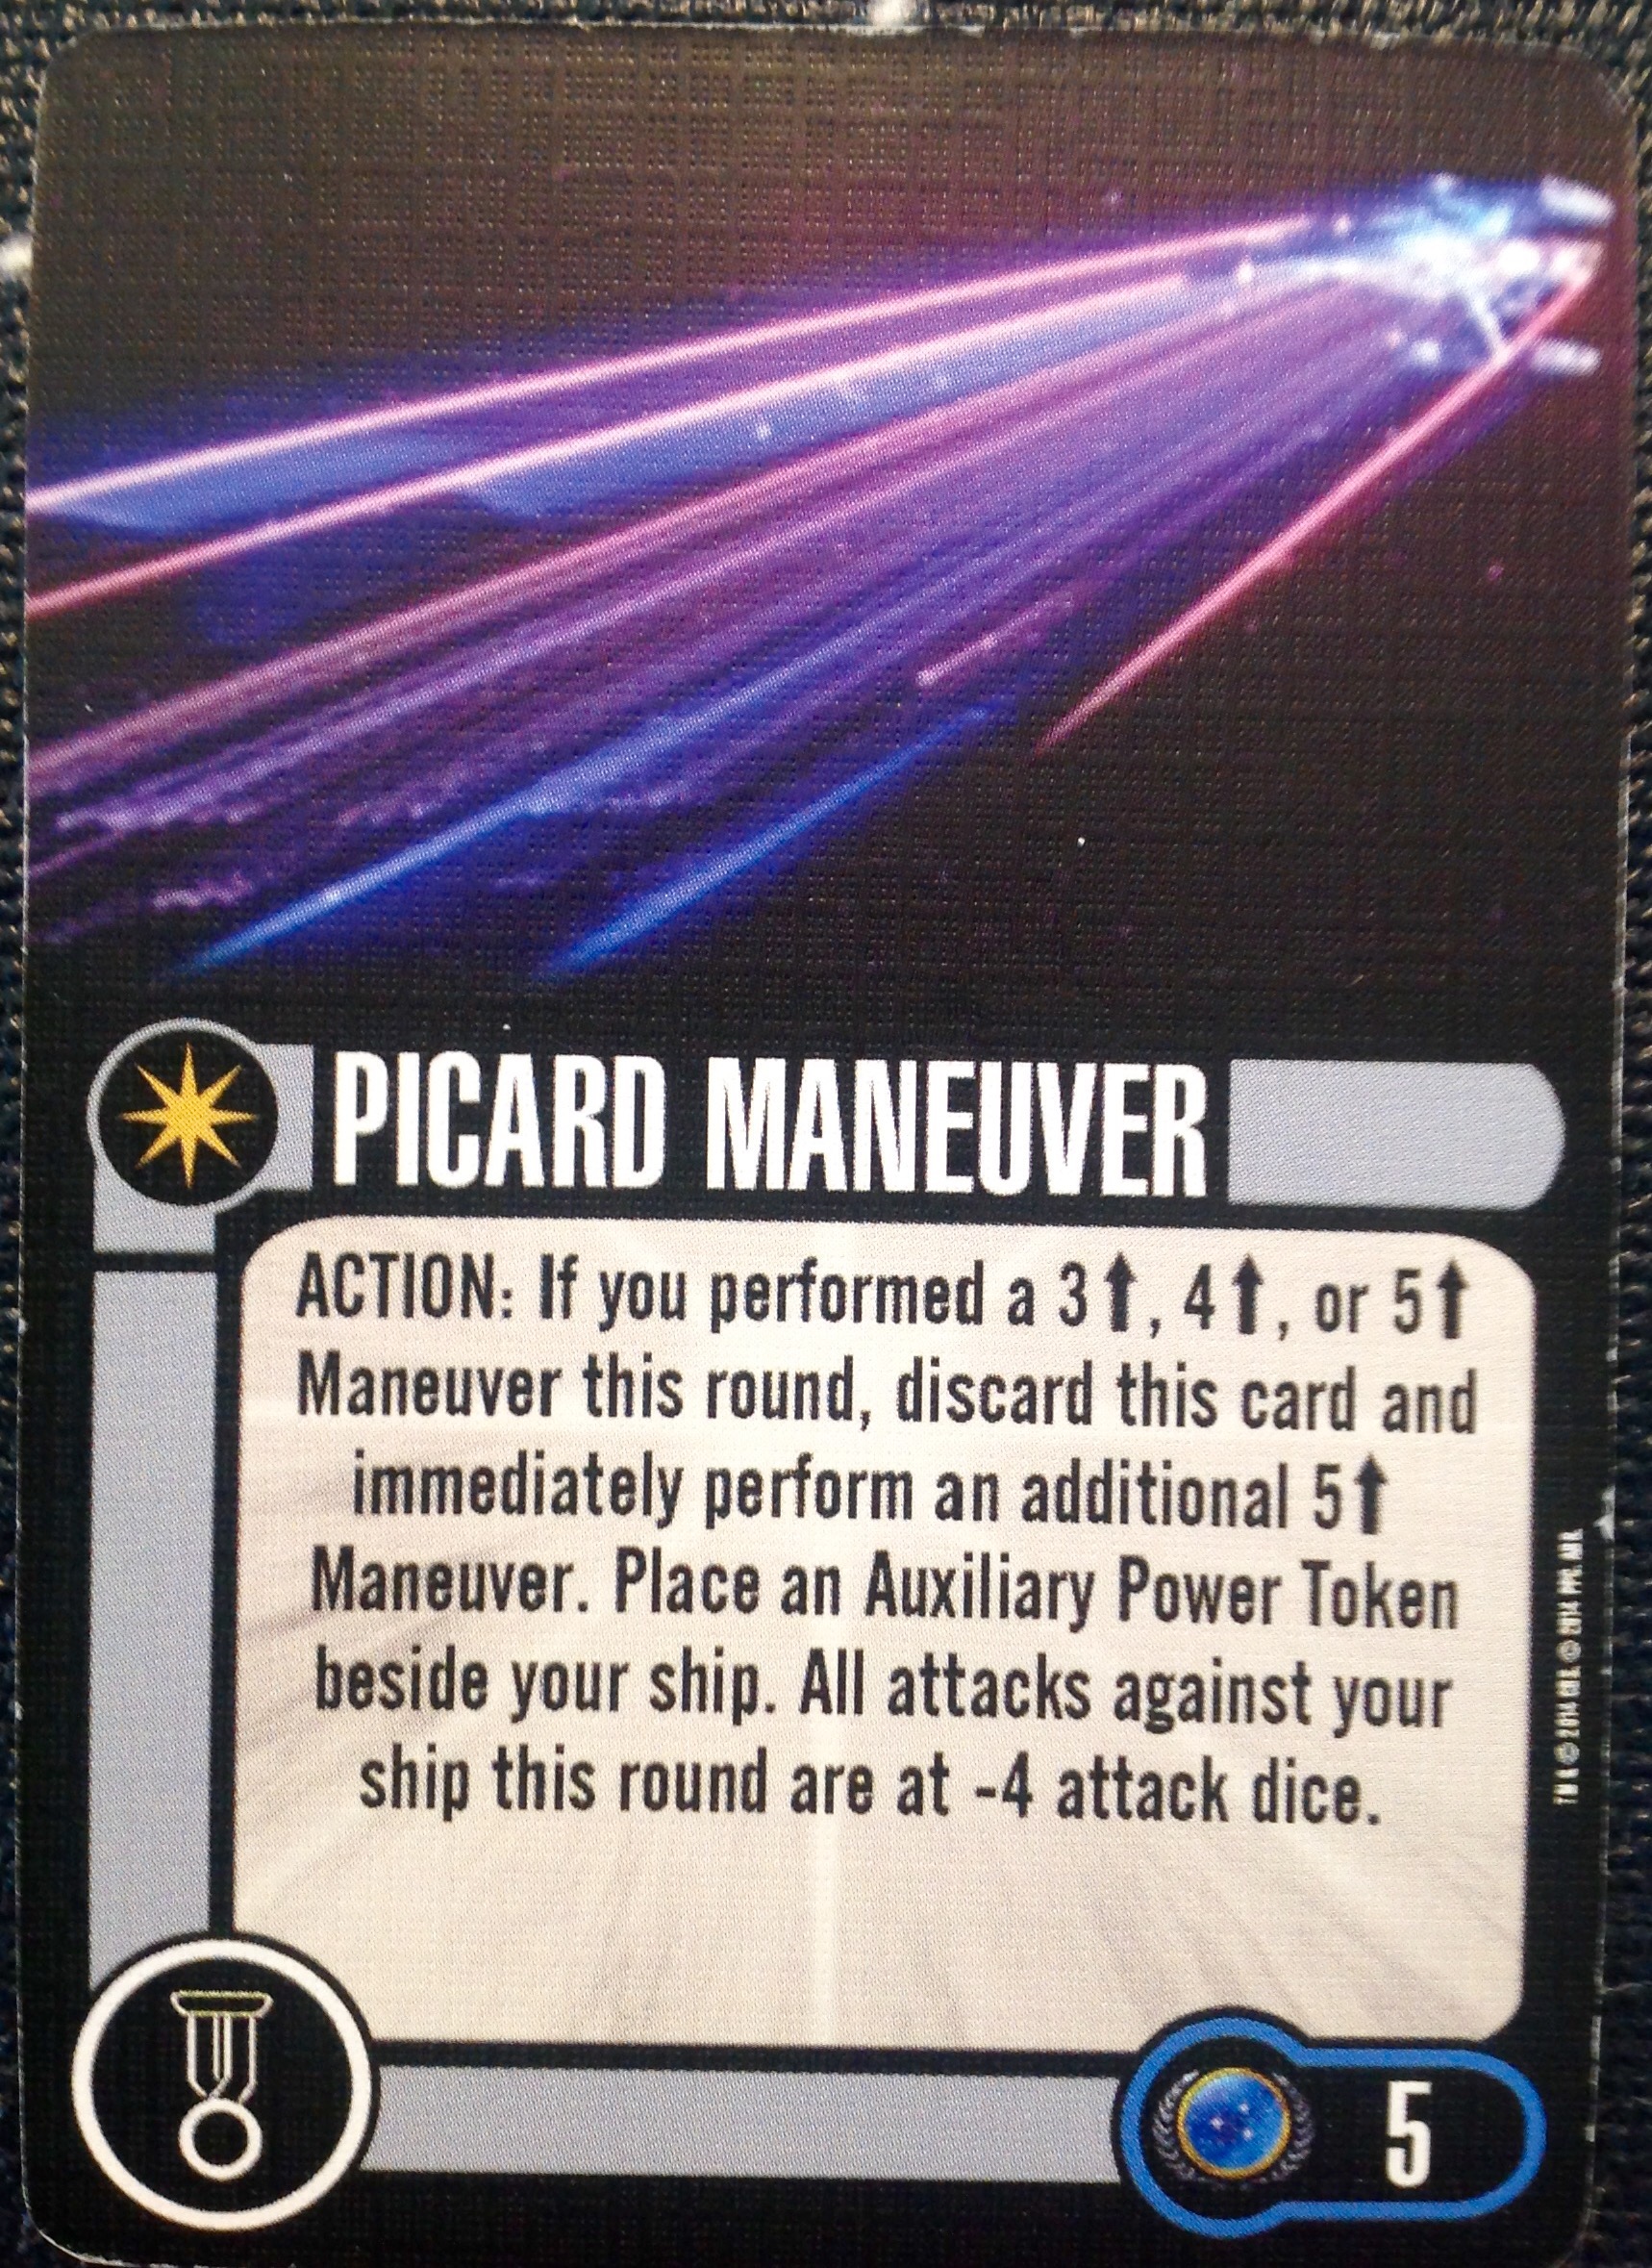
Picard Maneuver [U.S.S. Stargazer] (5)
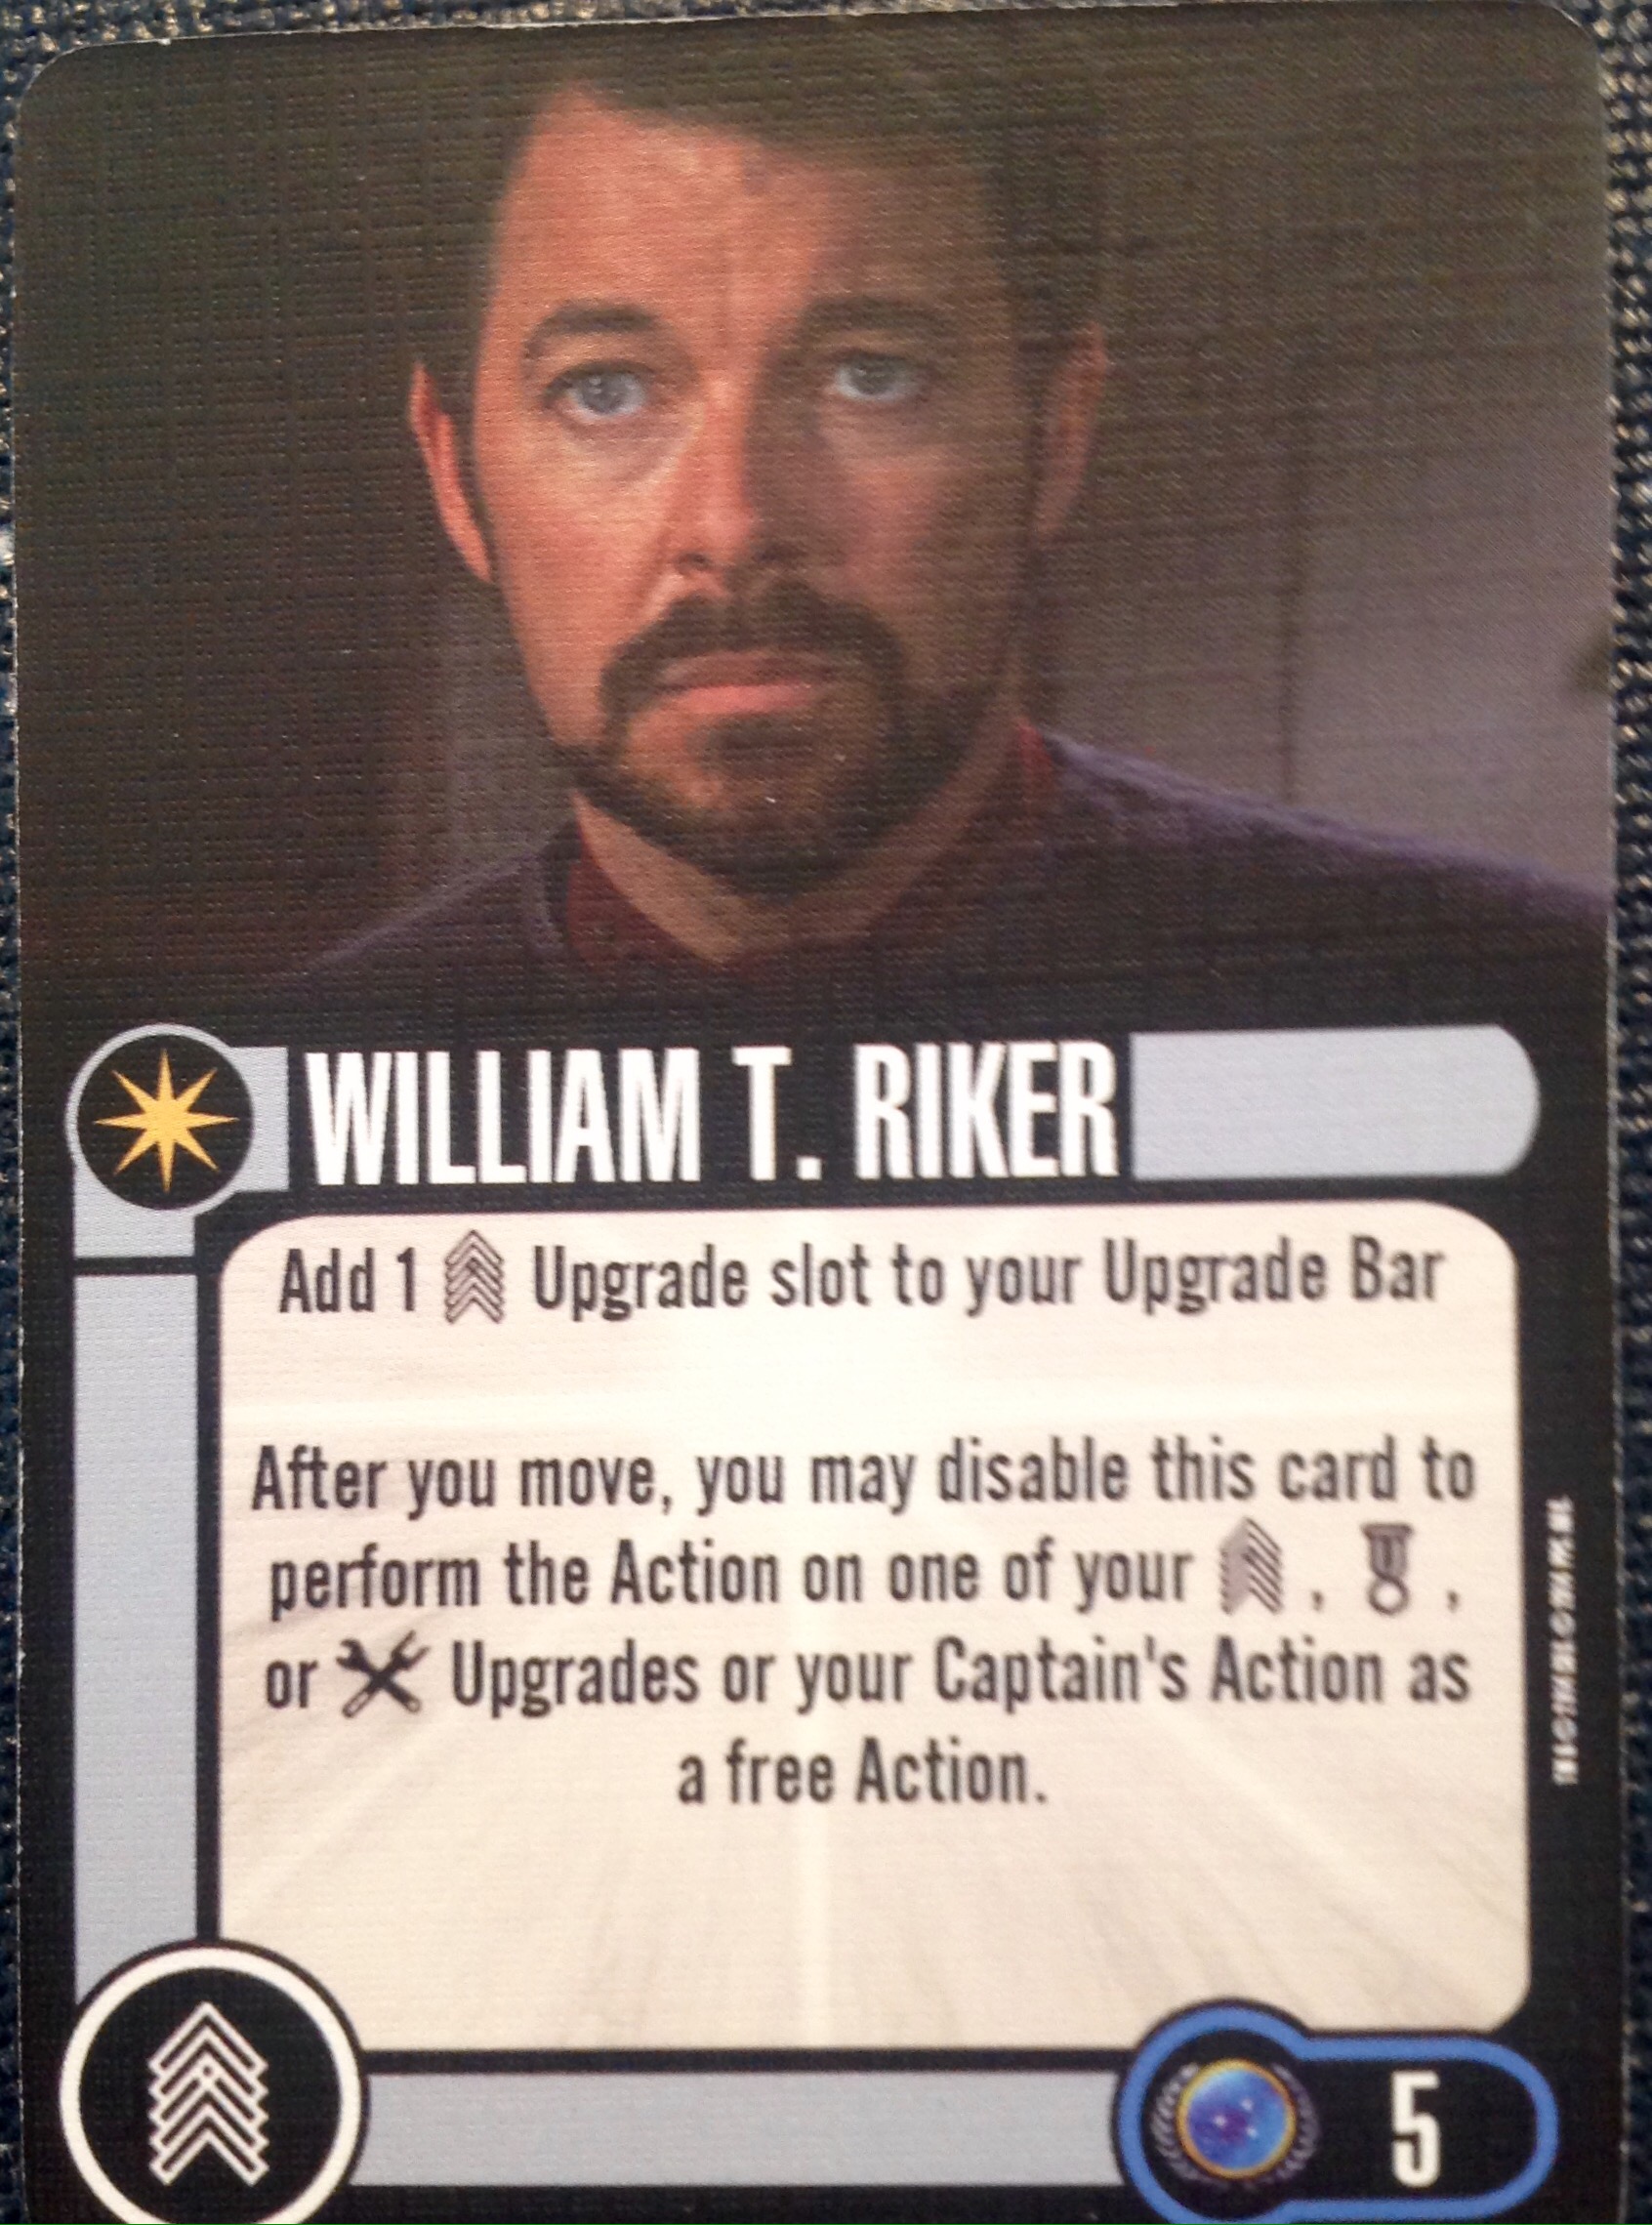
William T. Riker [U.S.S. Enterprise-E] (5)
Phlox [Enterprise NX-01] (2)
Pavel Chekov [U.S.S. Reliant] (3)
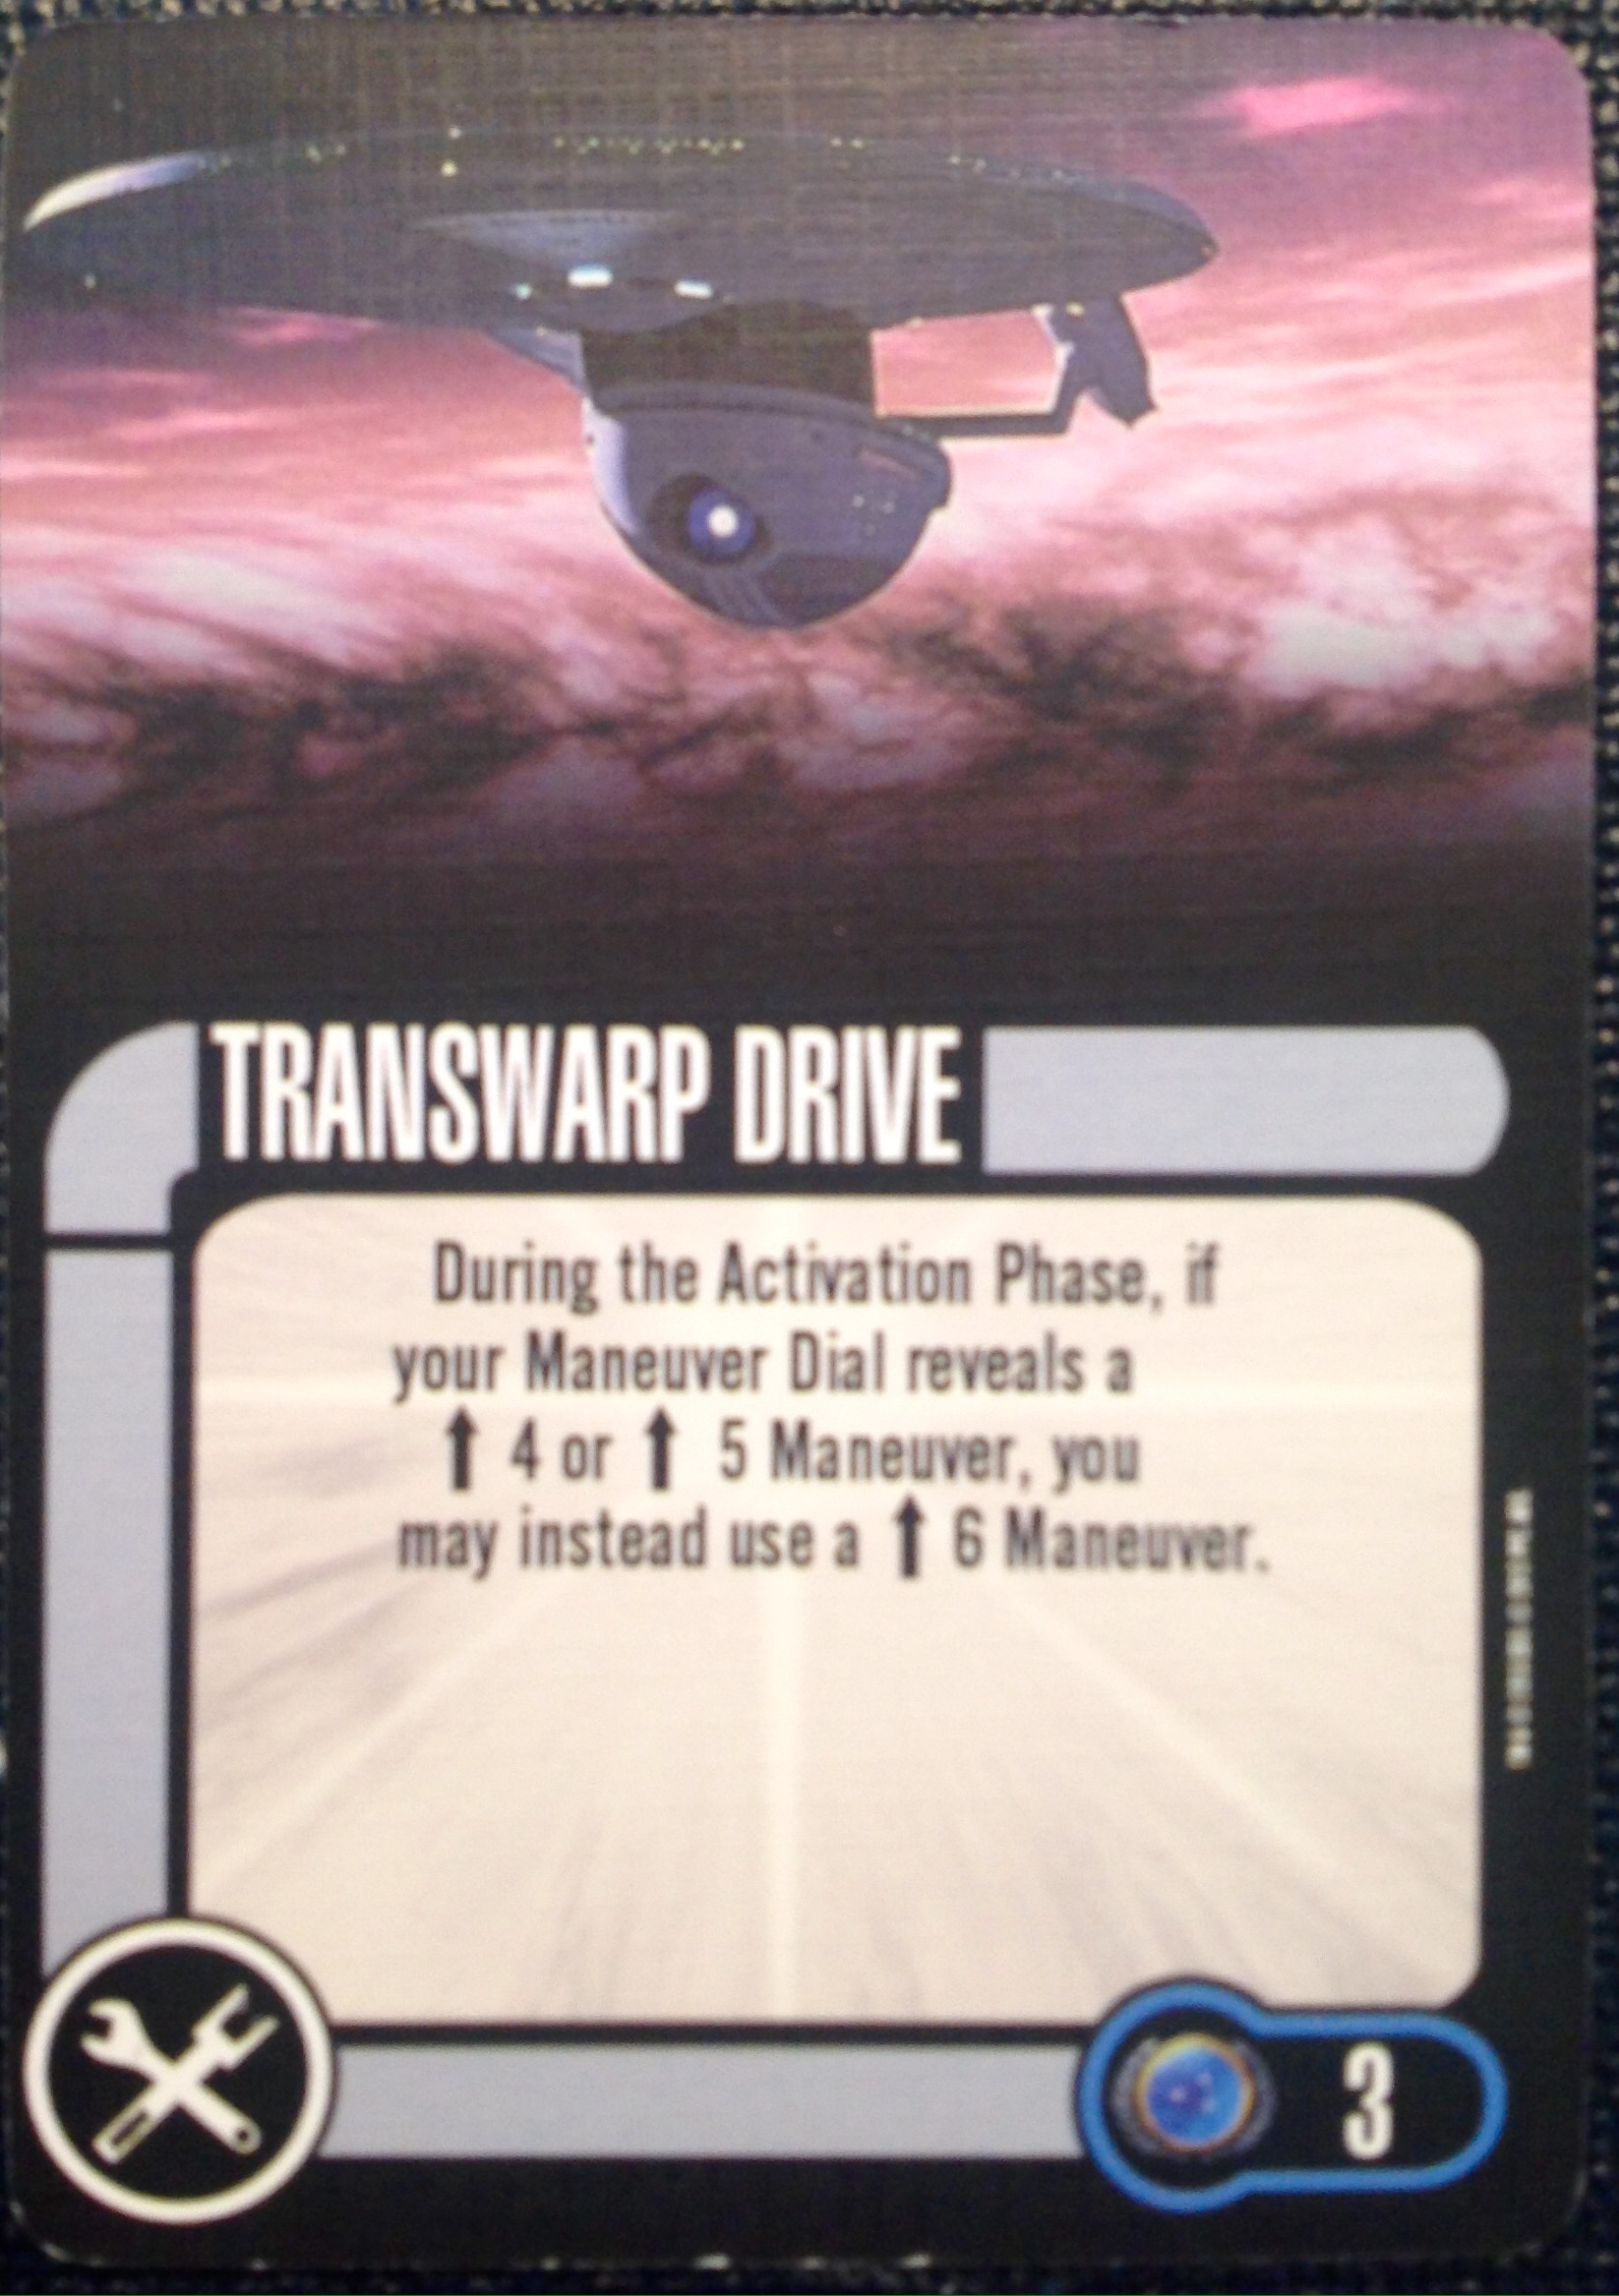
Transwarp Drive [U.S.S. Excelsior] (3)
Total (41)
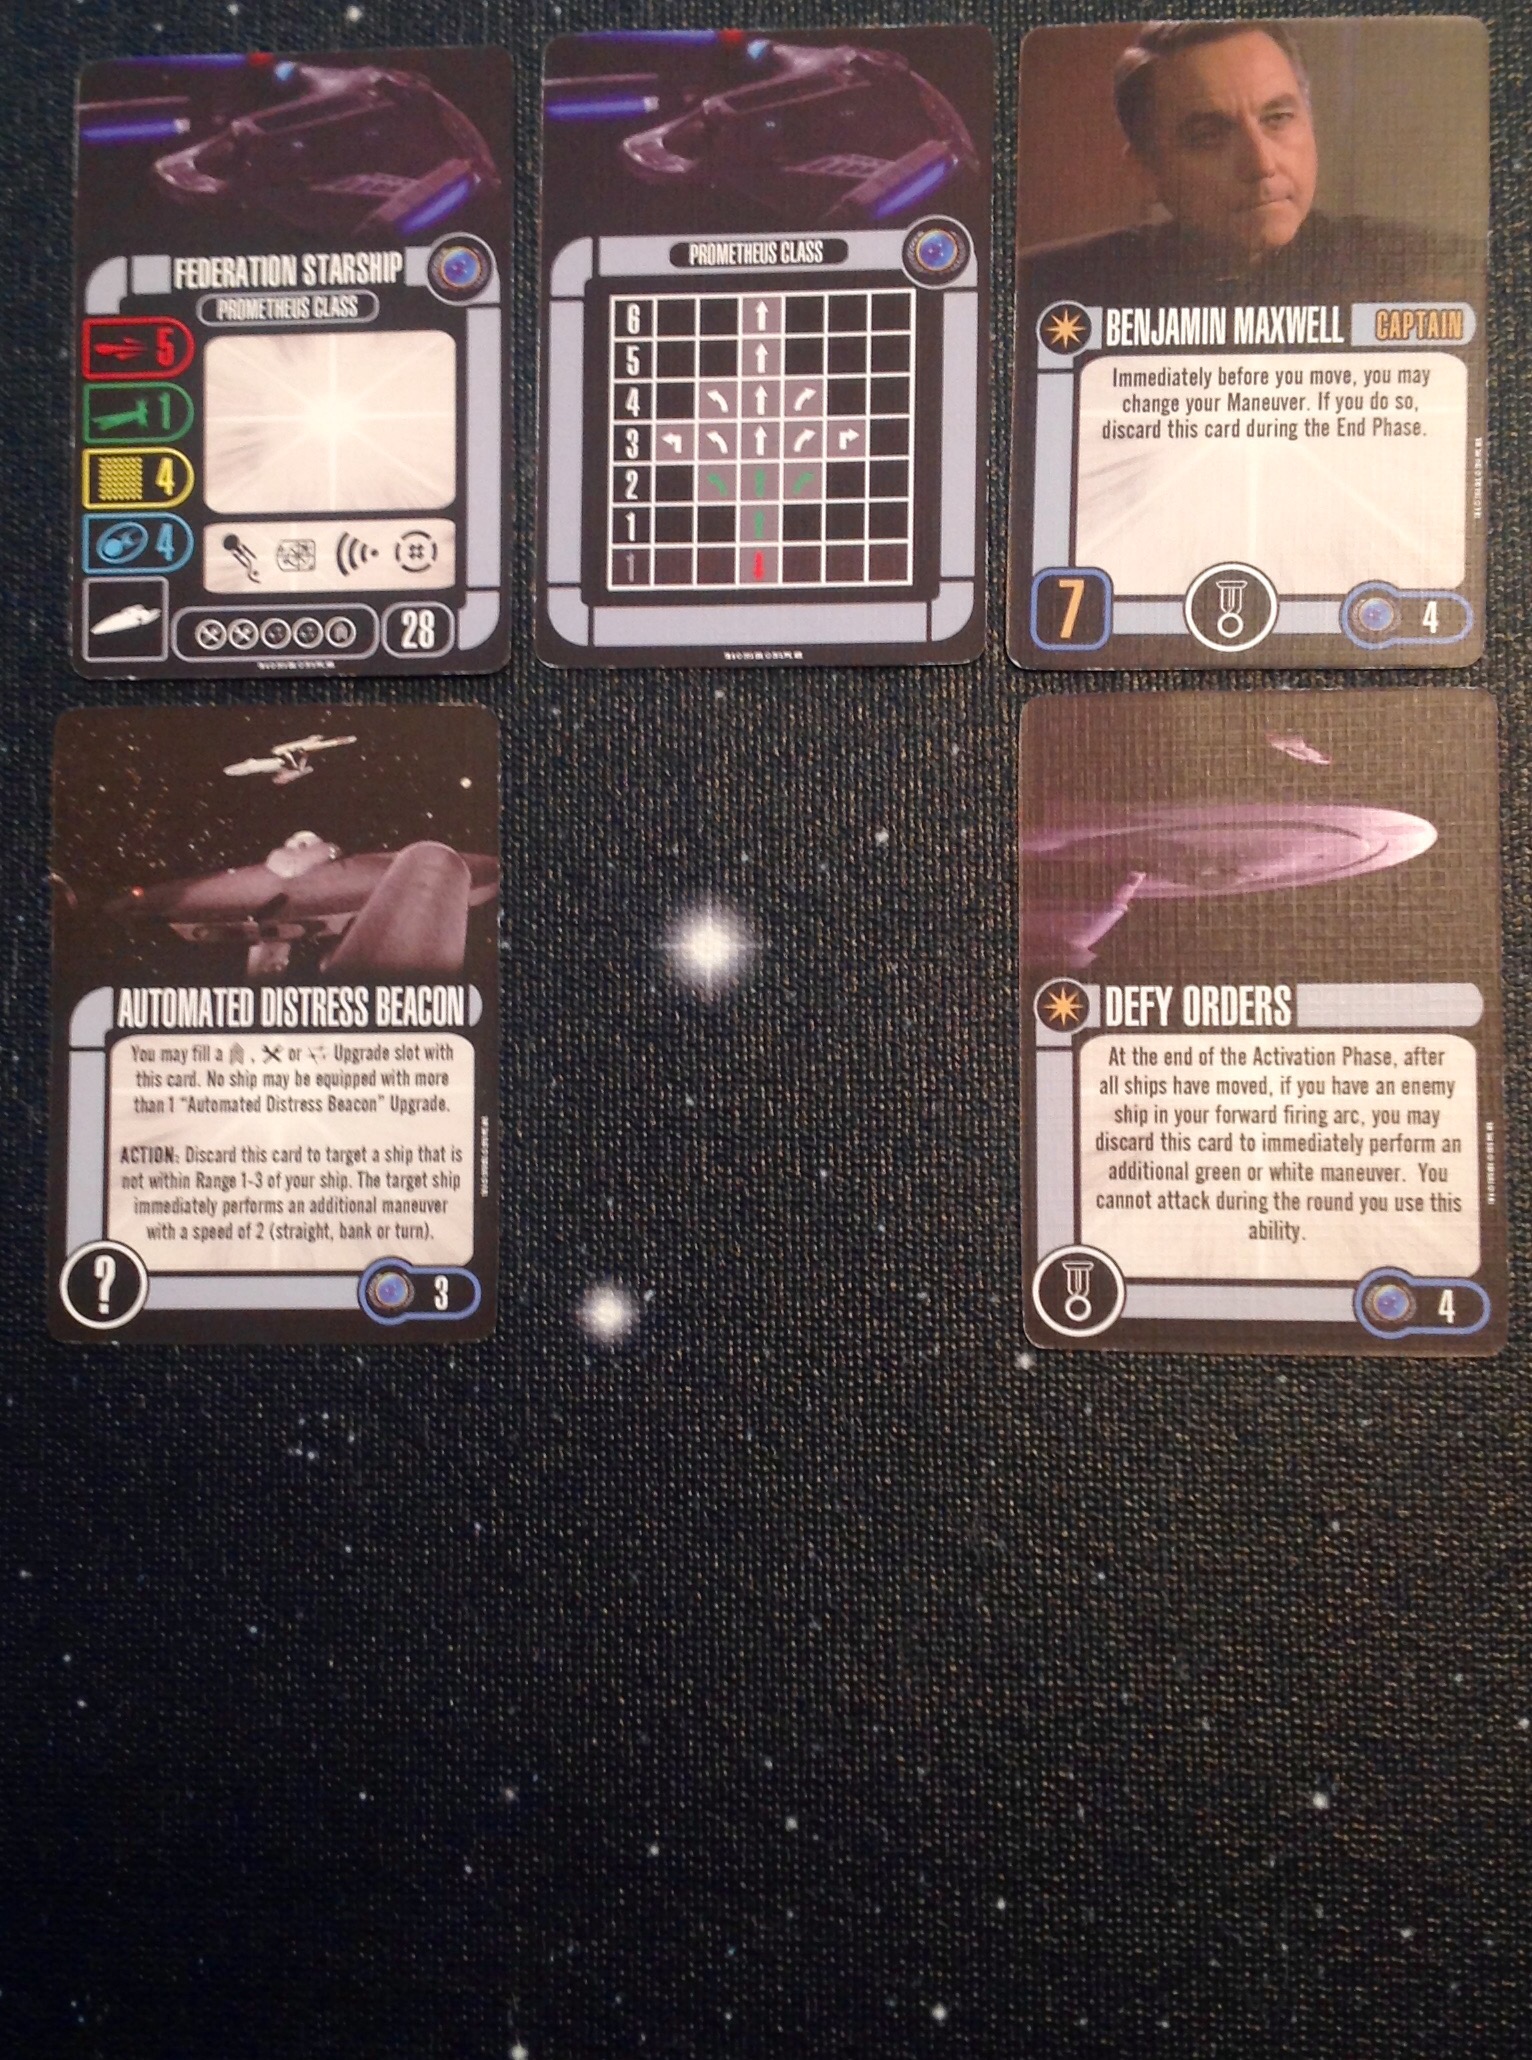
Prometheus Class [U.S.S. Prometheus] (28)
Benjamin Maxwell [U.S.S. Yeager] (4)
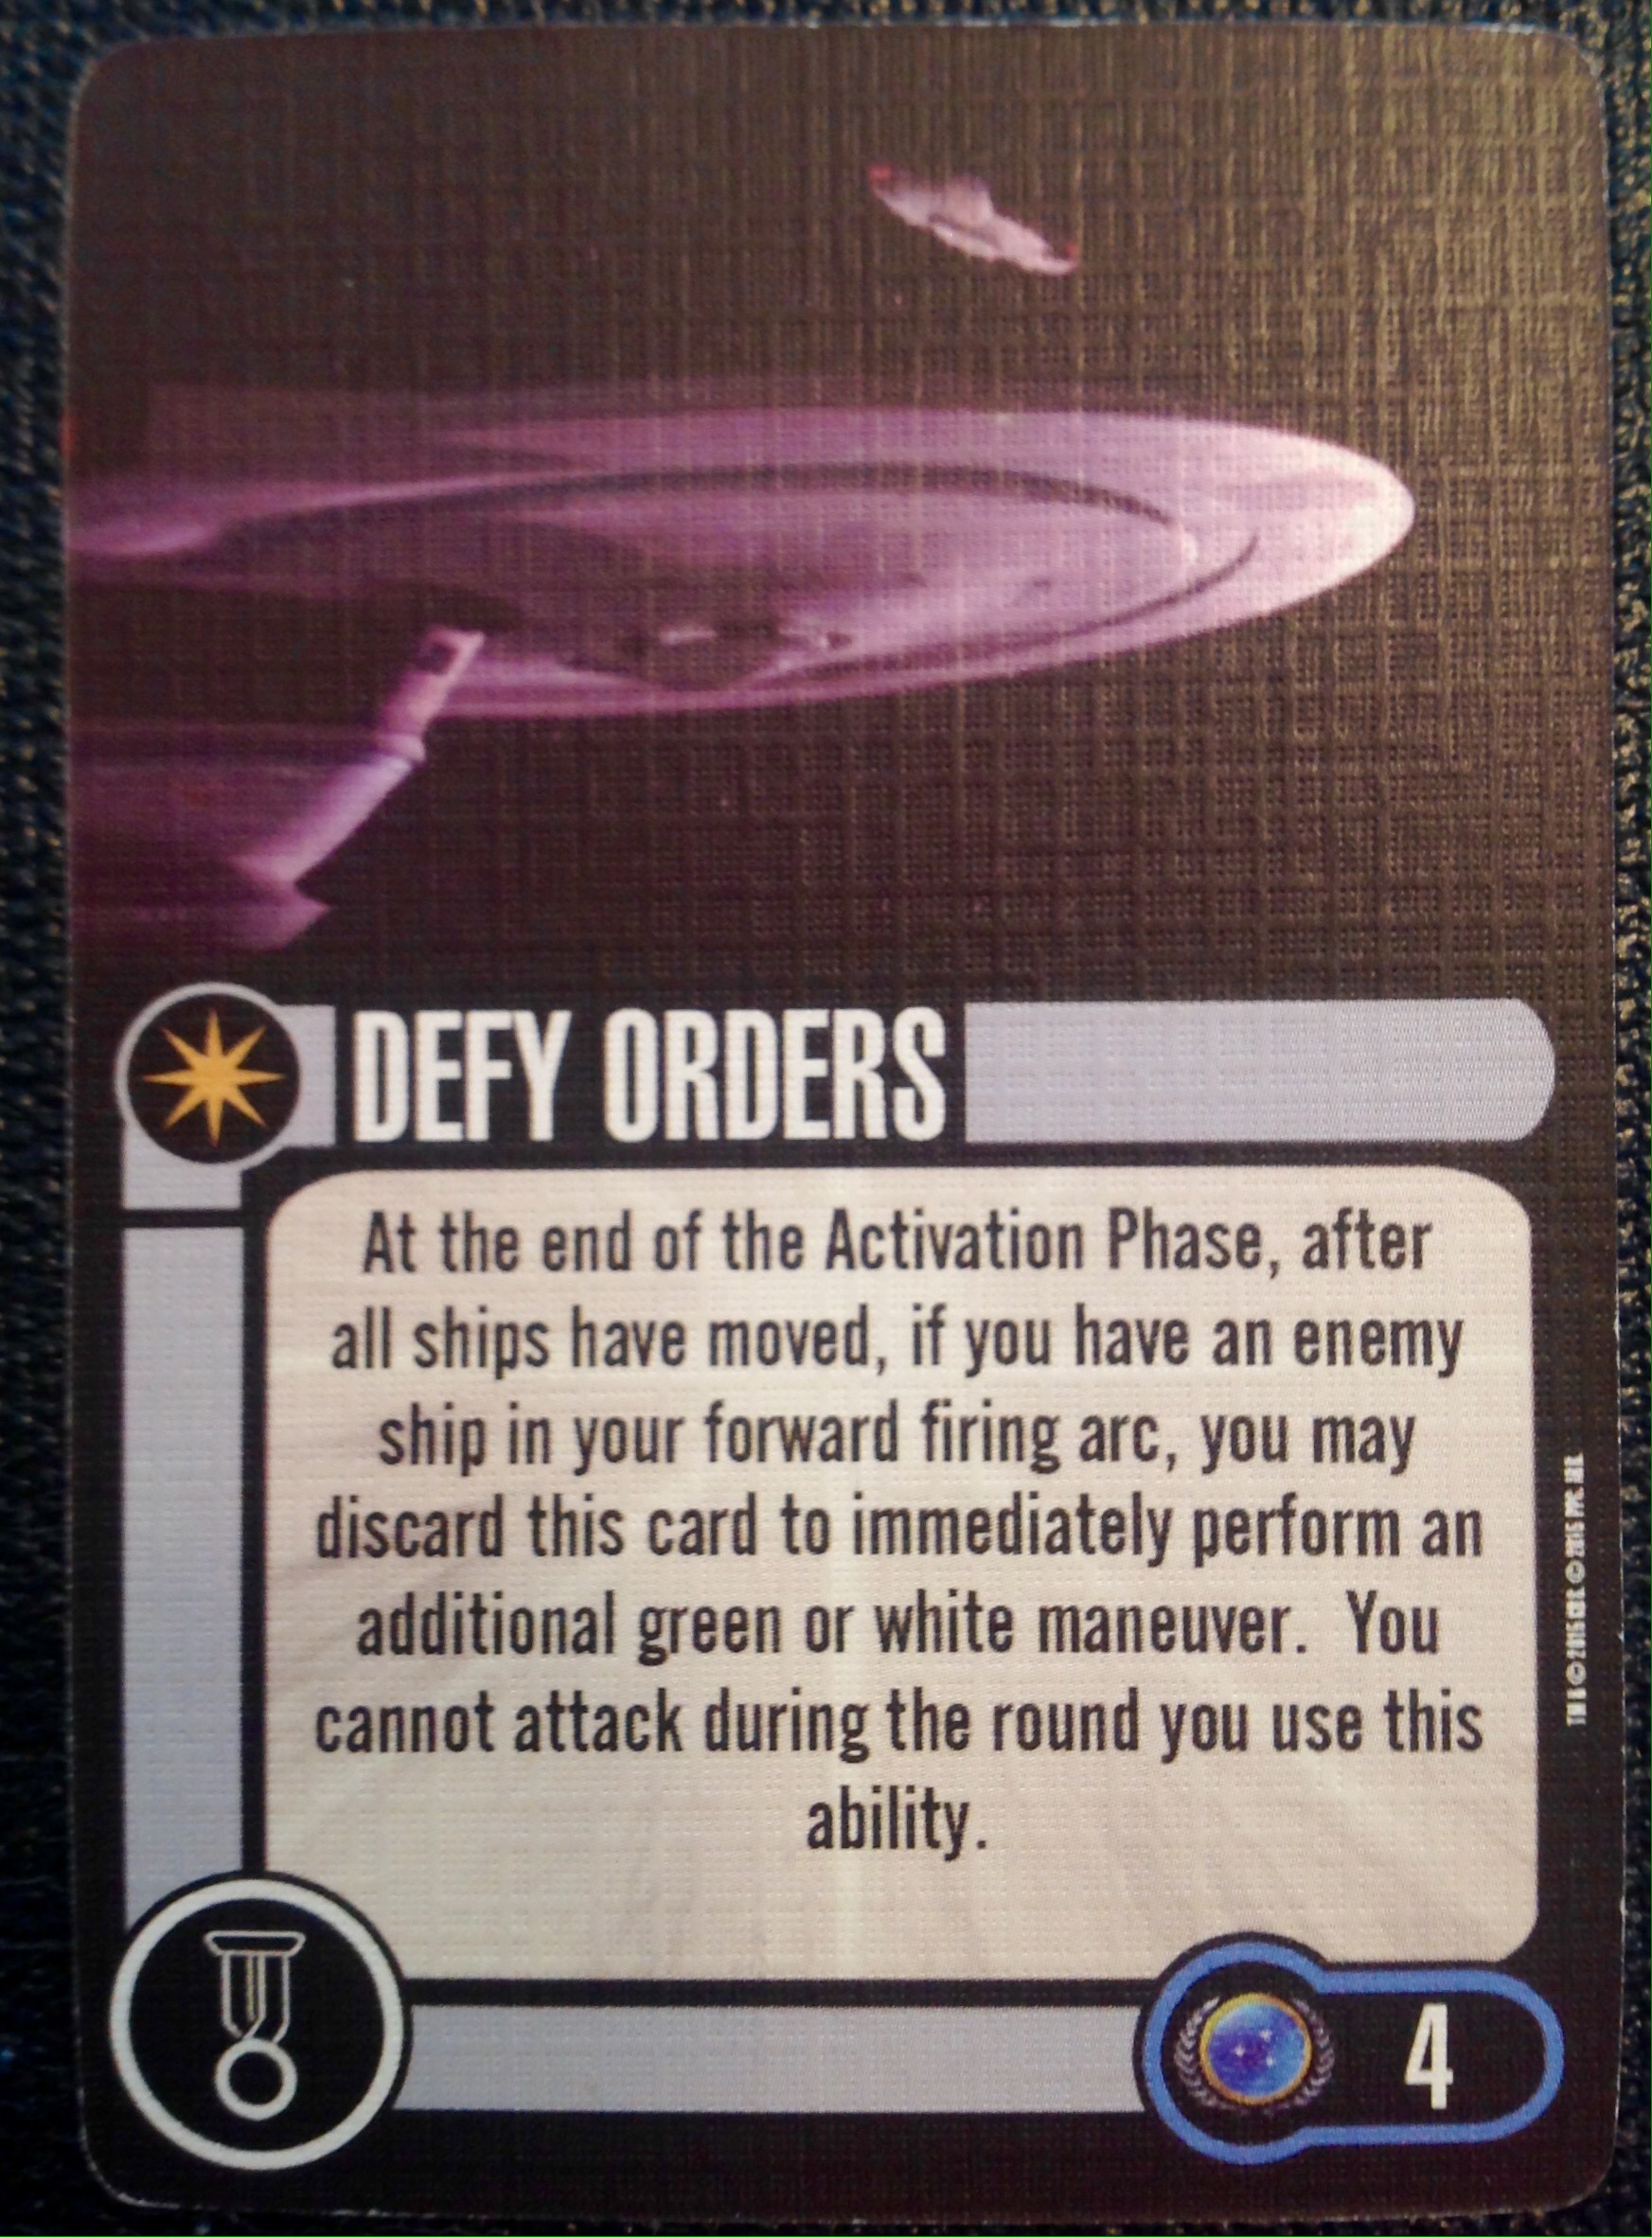
Defy Orders [U.S.S. Lakota] (4)
Automated Distress Beacon [U.S.S. Constellation] (3)
Total (39)
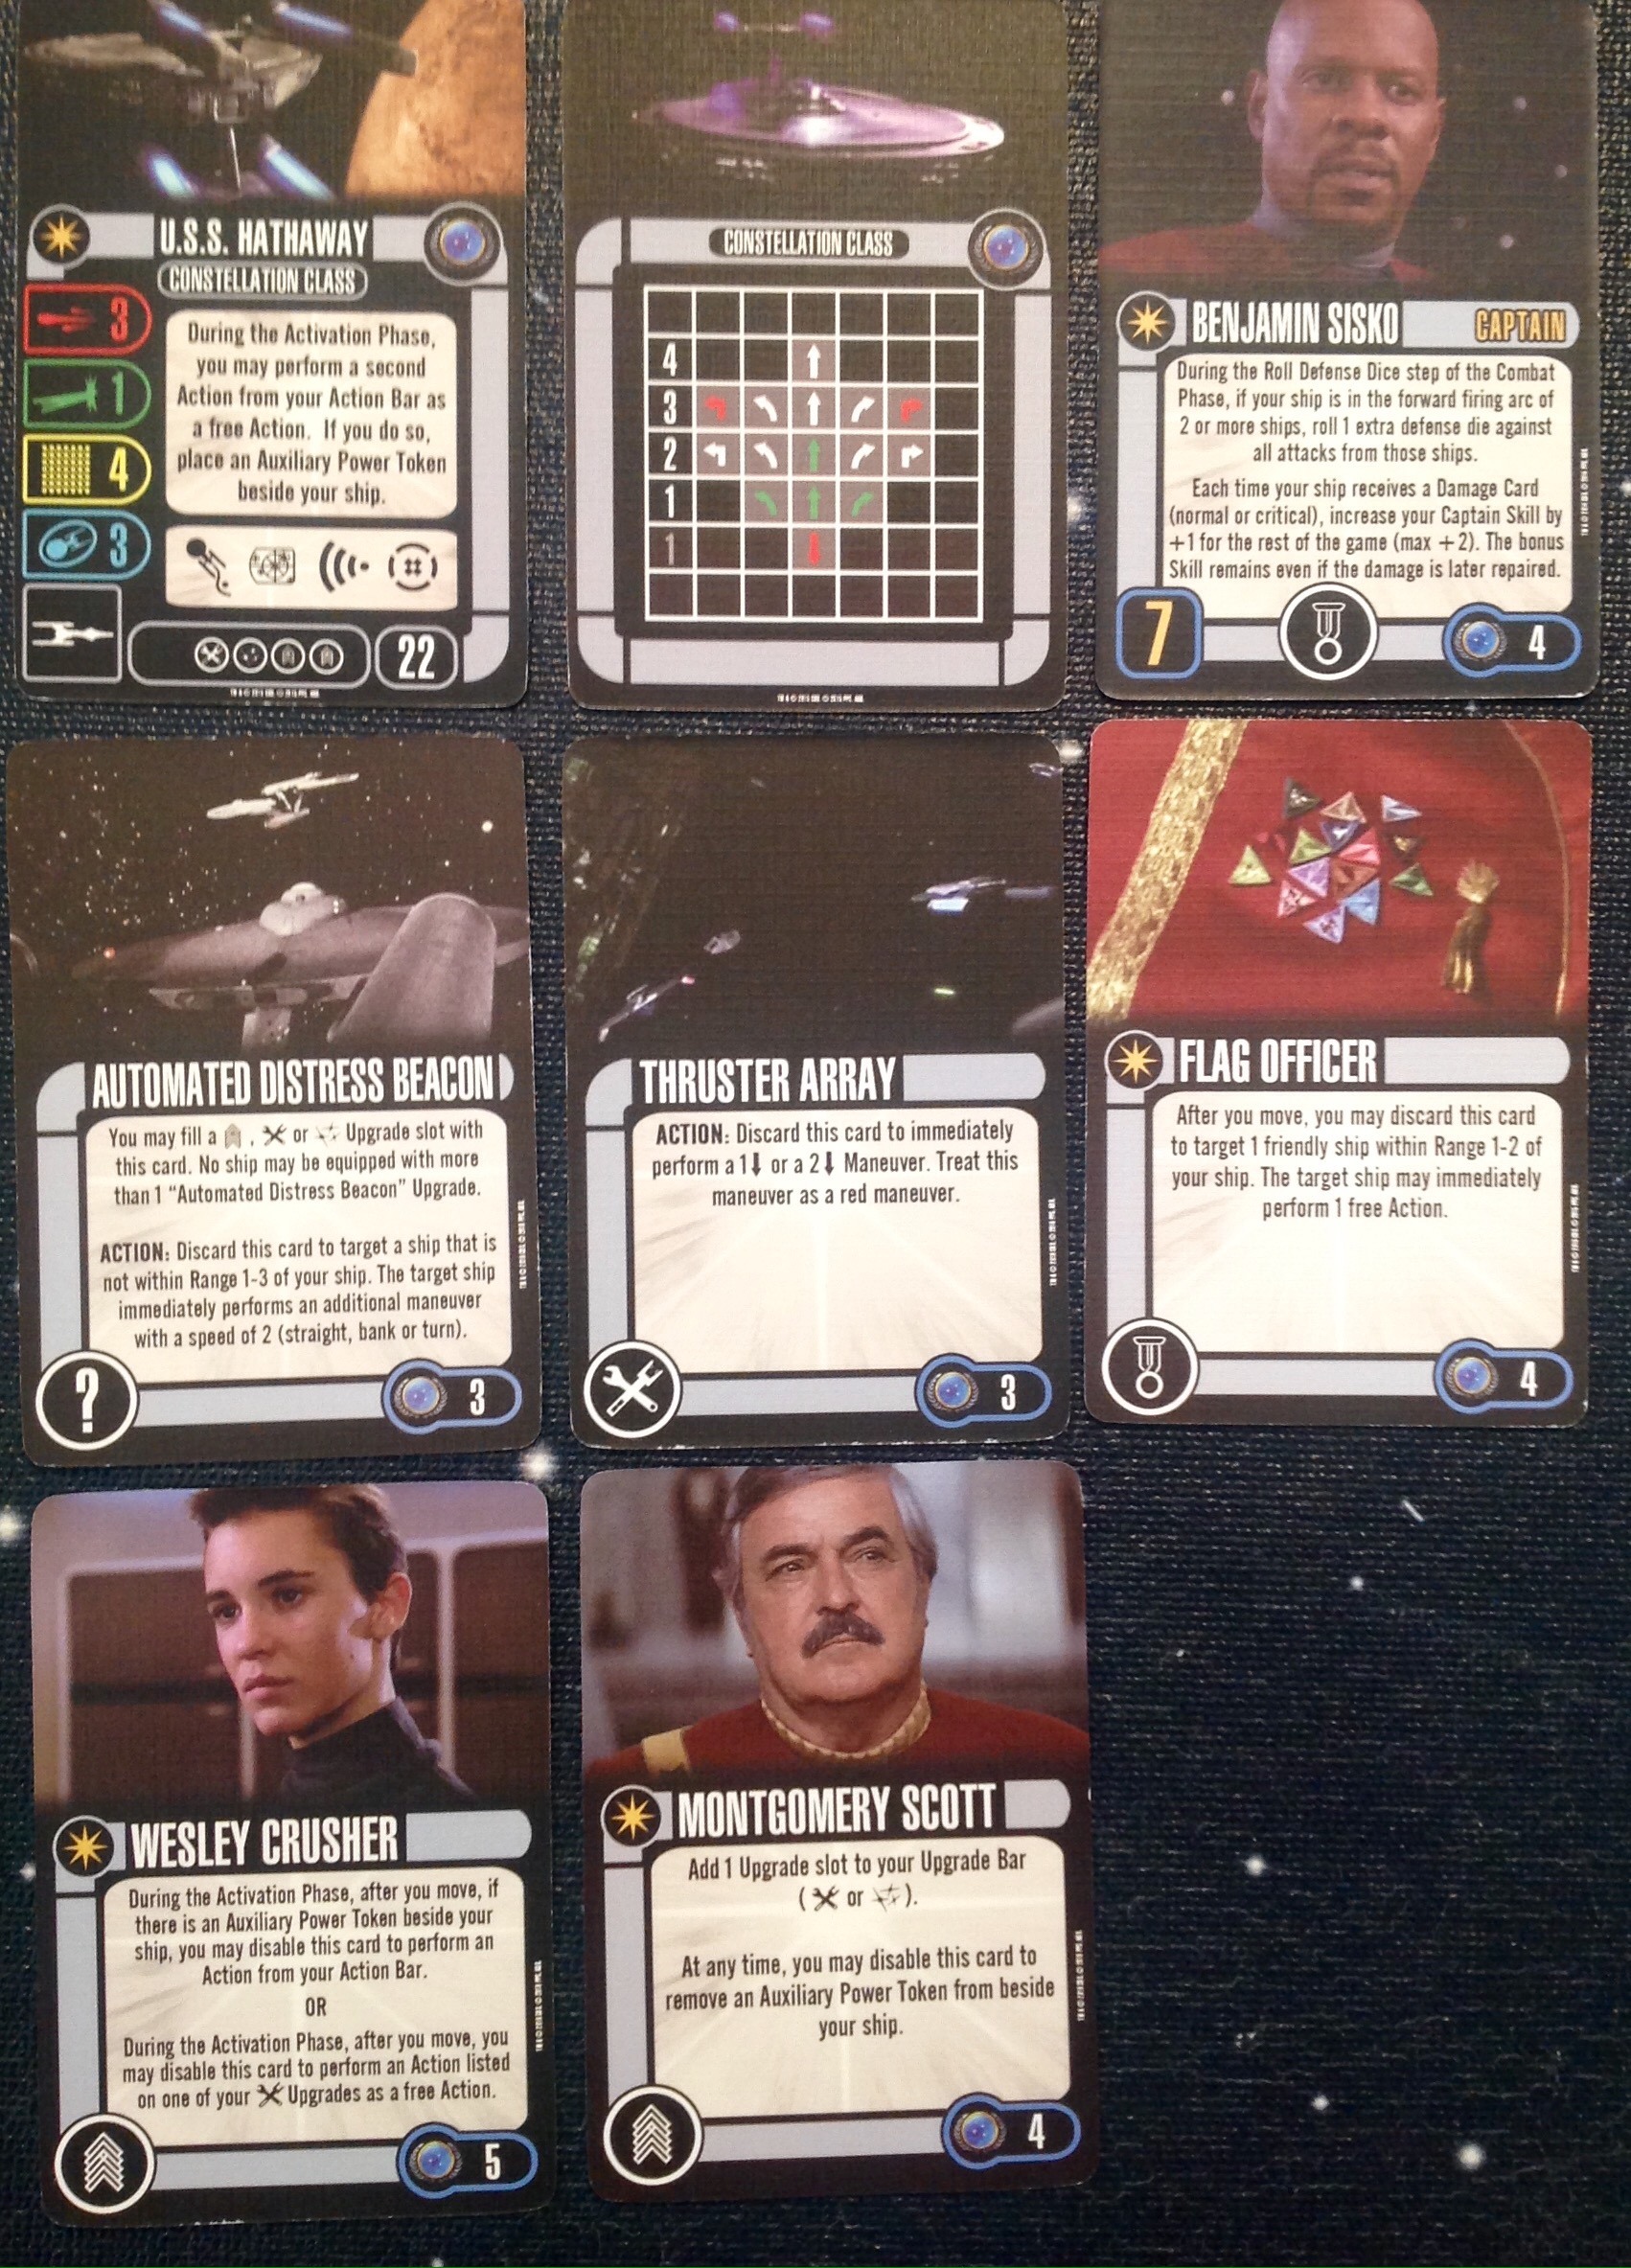
U.S.S. Hathaway [U.S.S. Hathaway] (22)
Benjamin Sisko [Deep Space 9] (4)
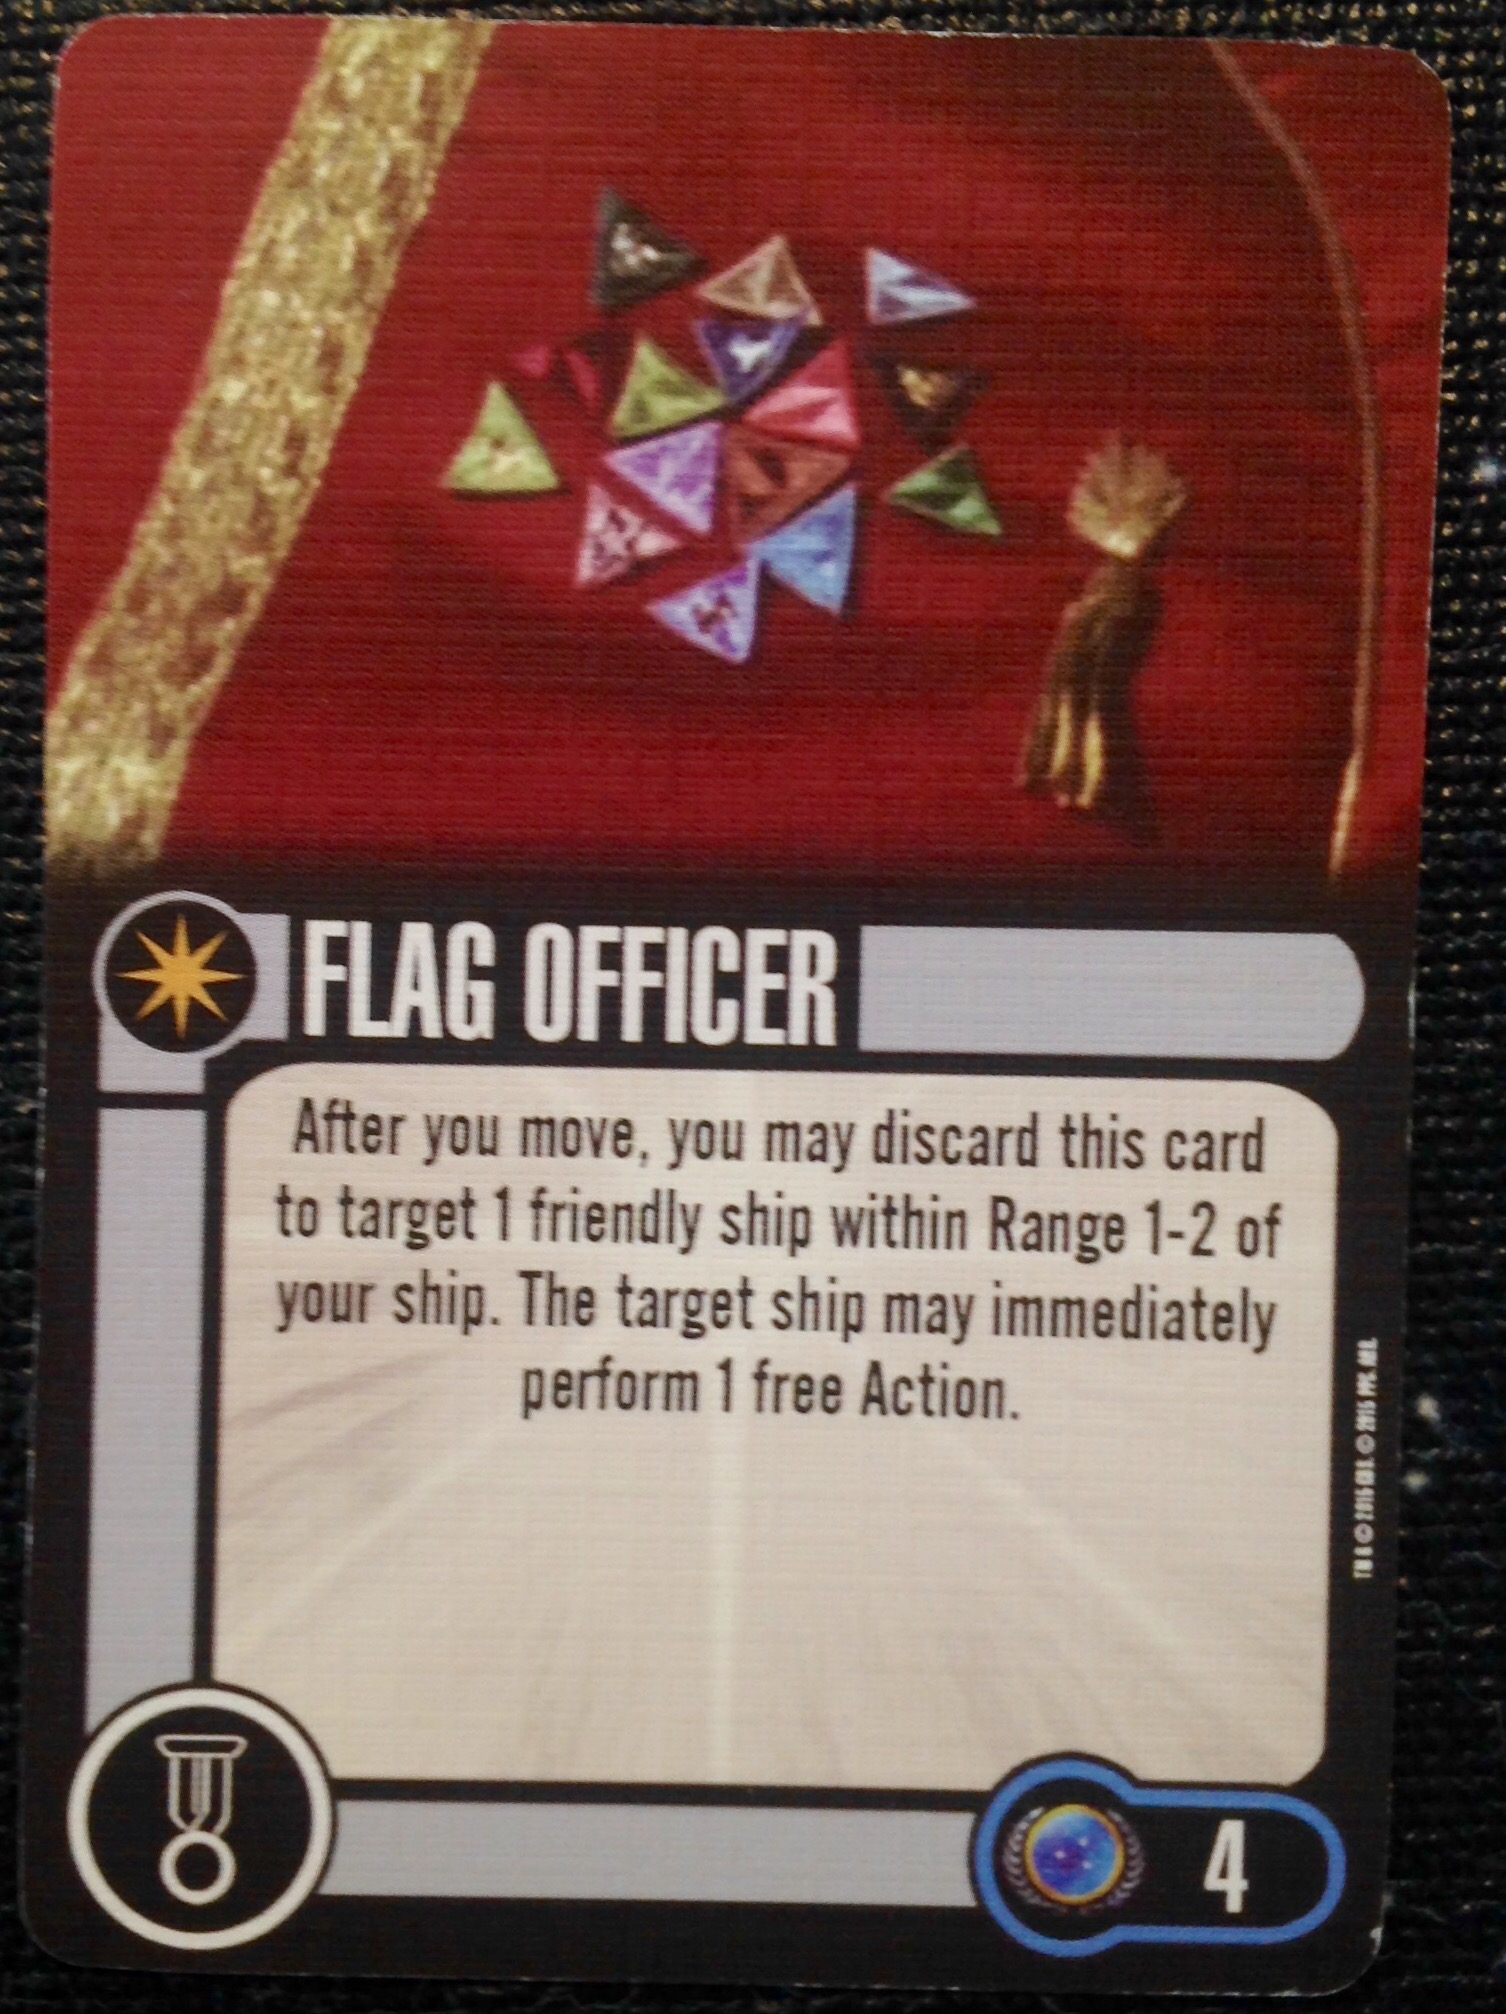
Flag Officer [U.S.S. Intrepid] (4)
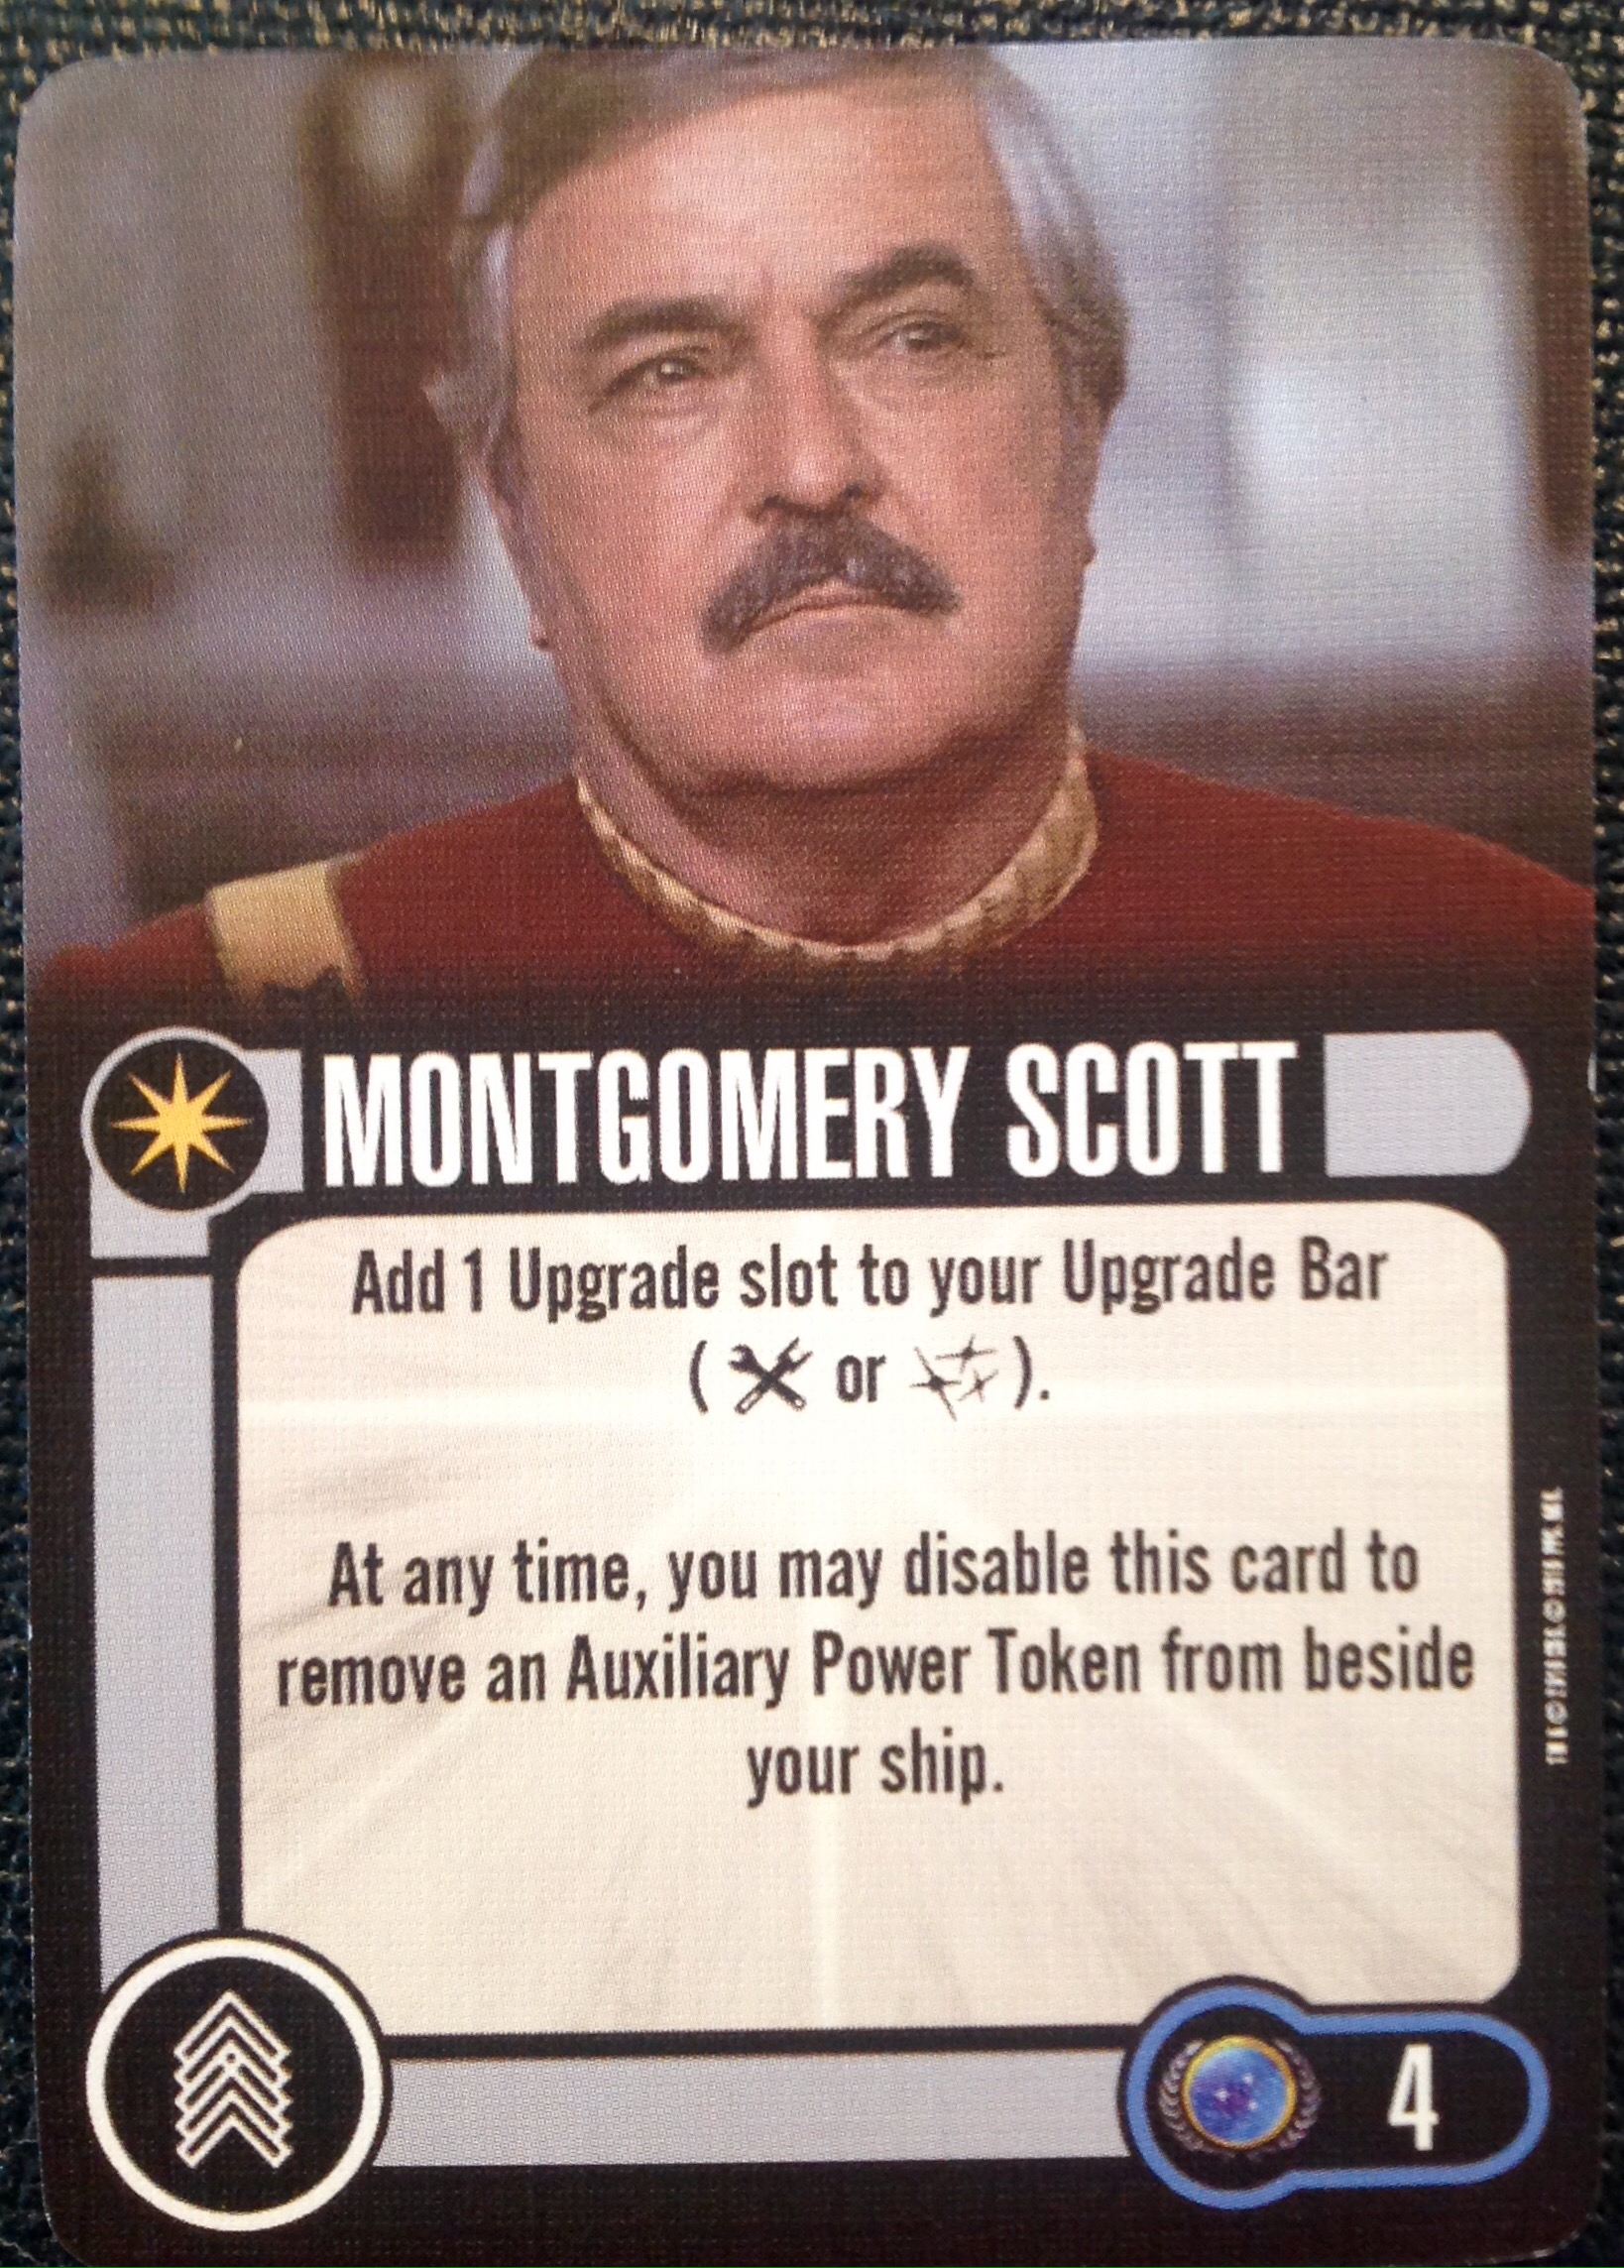
Montgomery Scott [H.M.S. Bounty] (4)
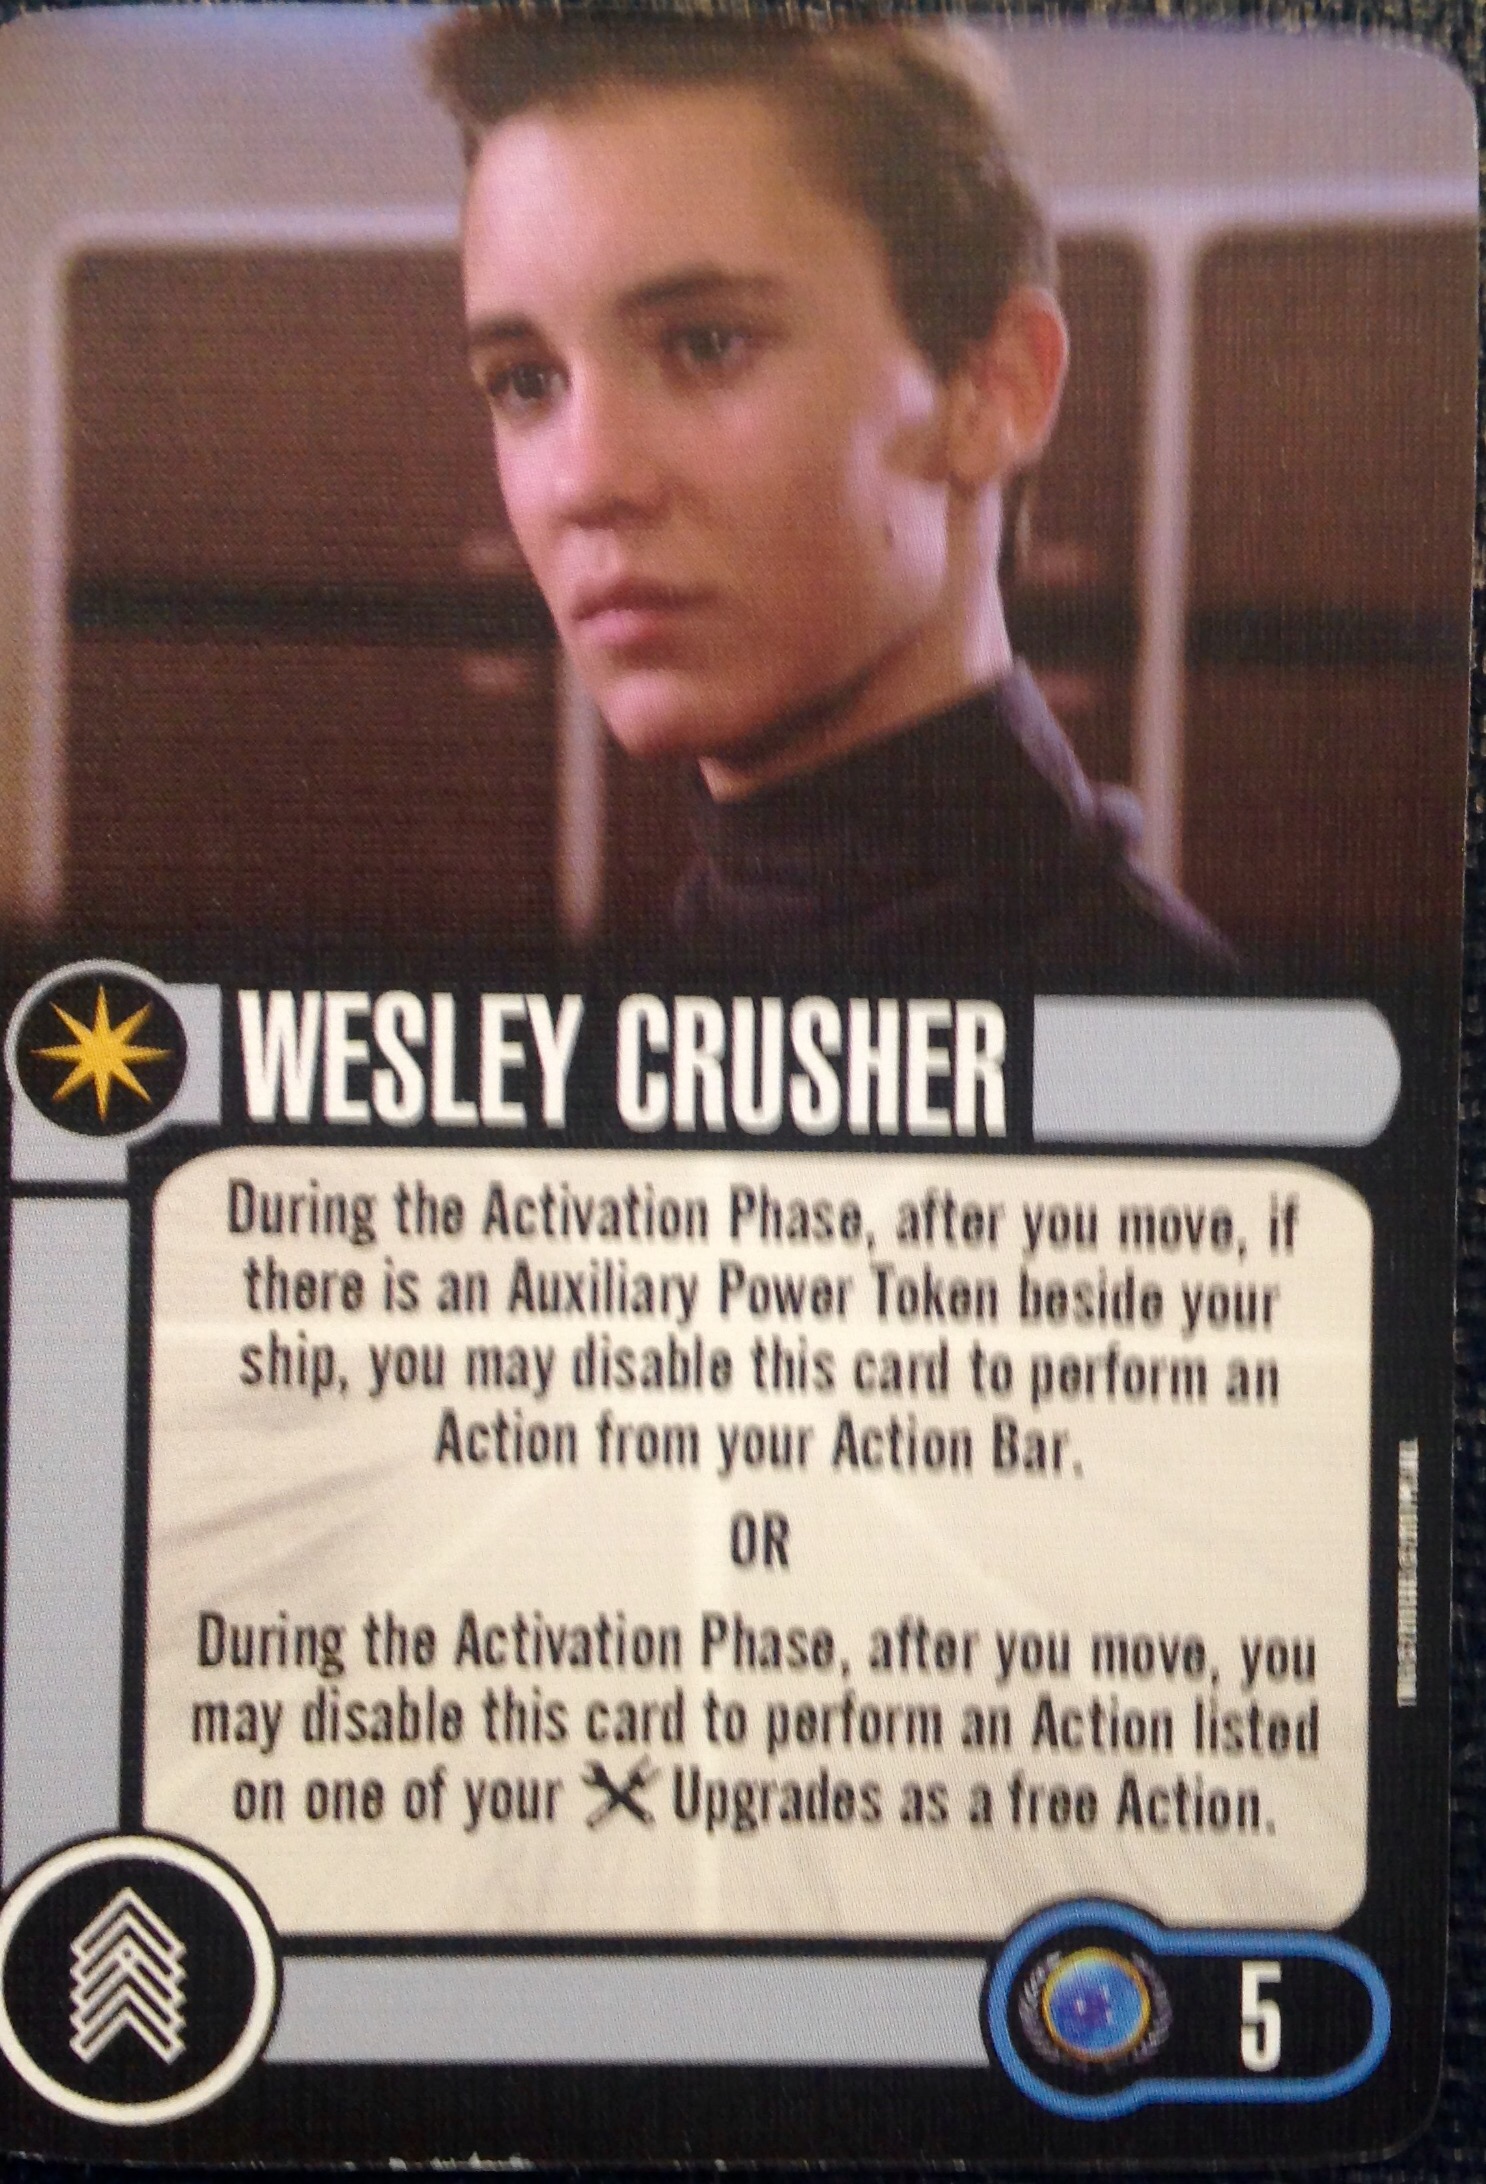
Wesley Crusher [U.S.S. Montgolfier] (5)
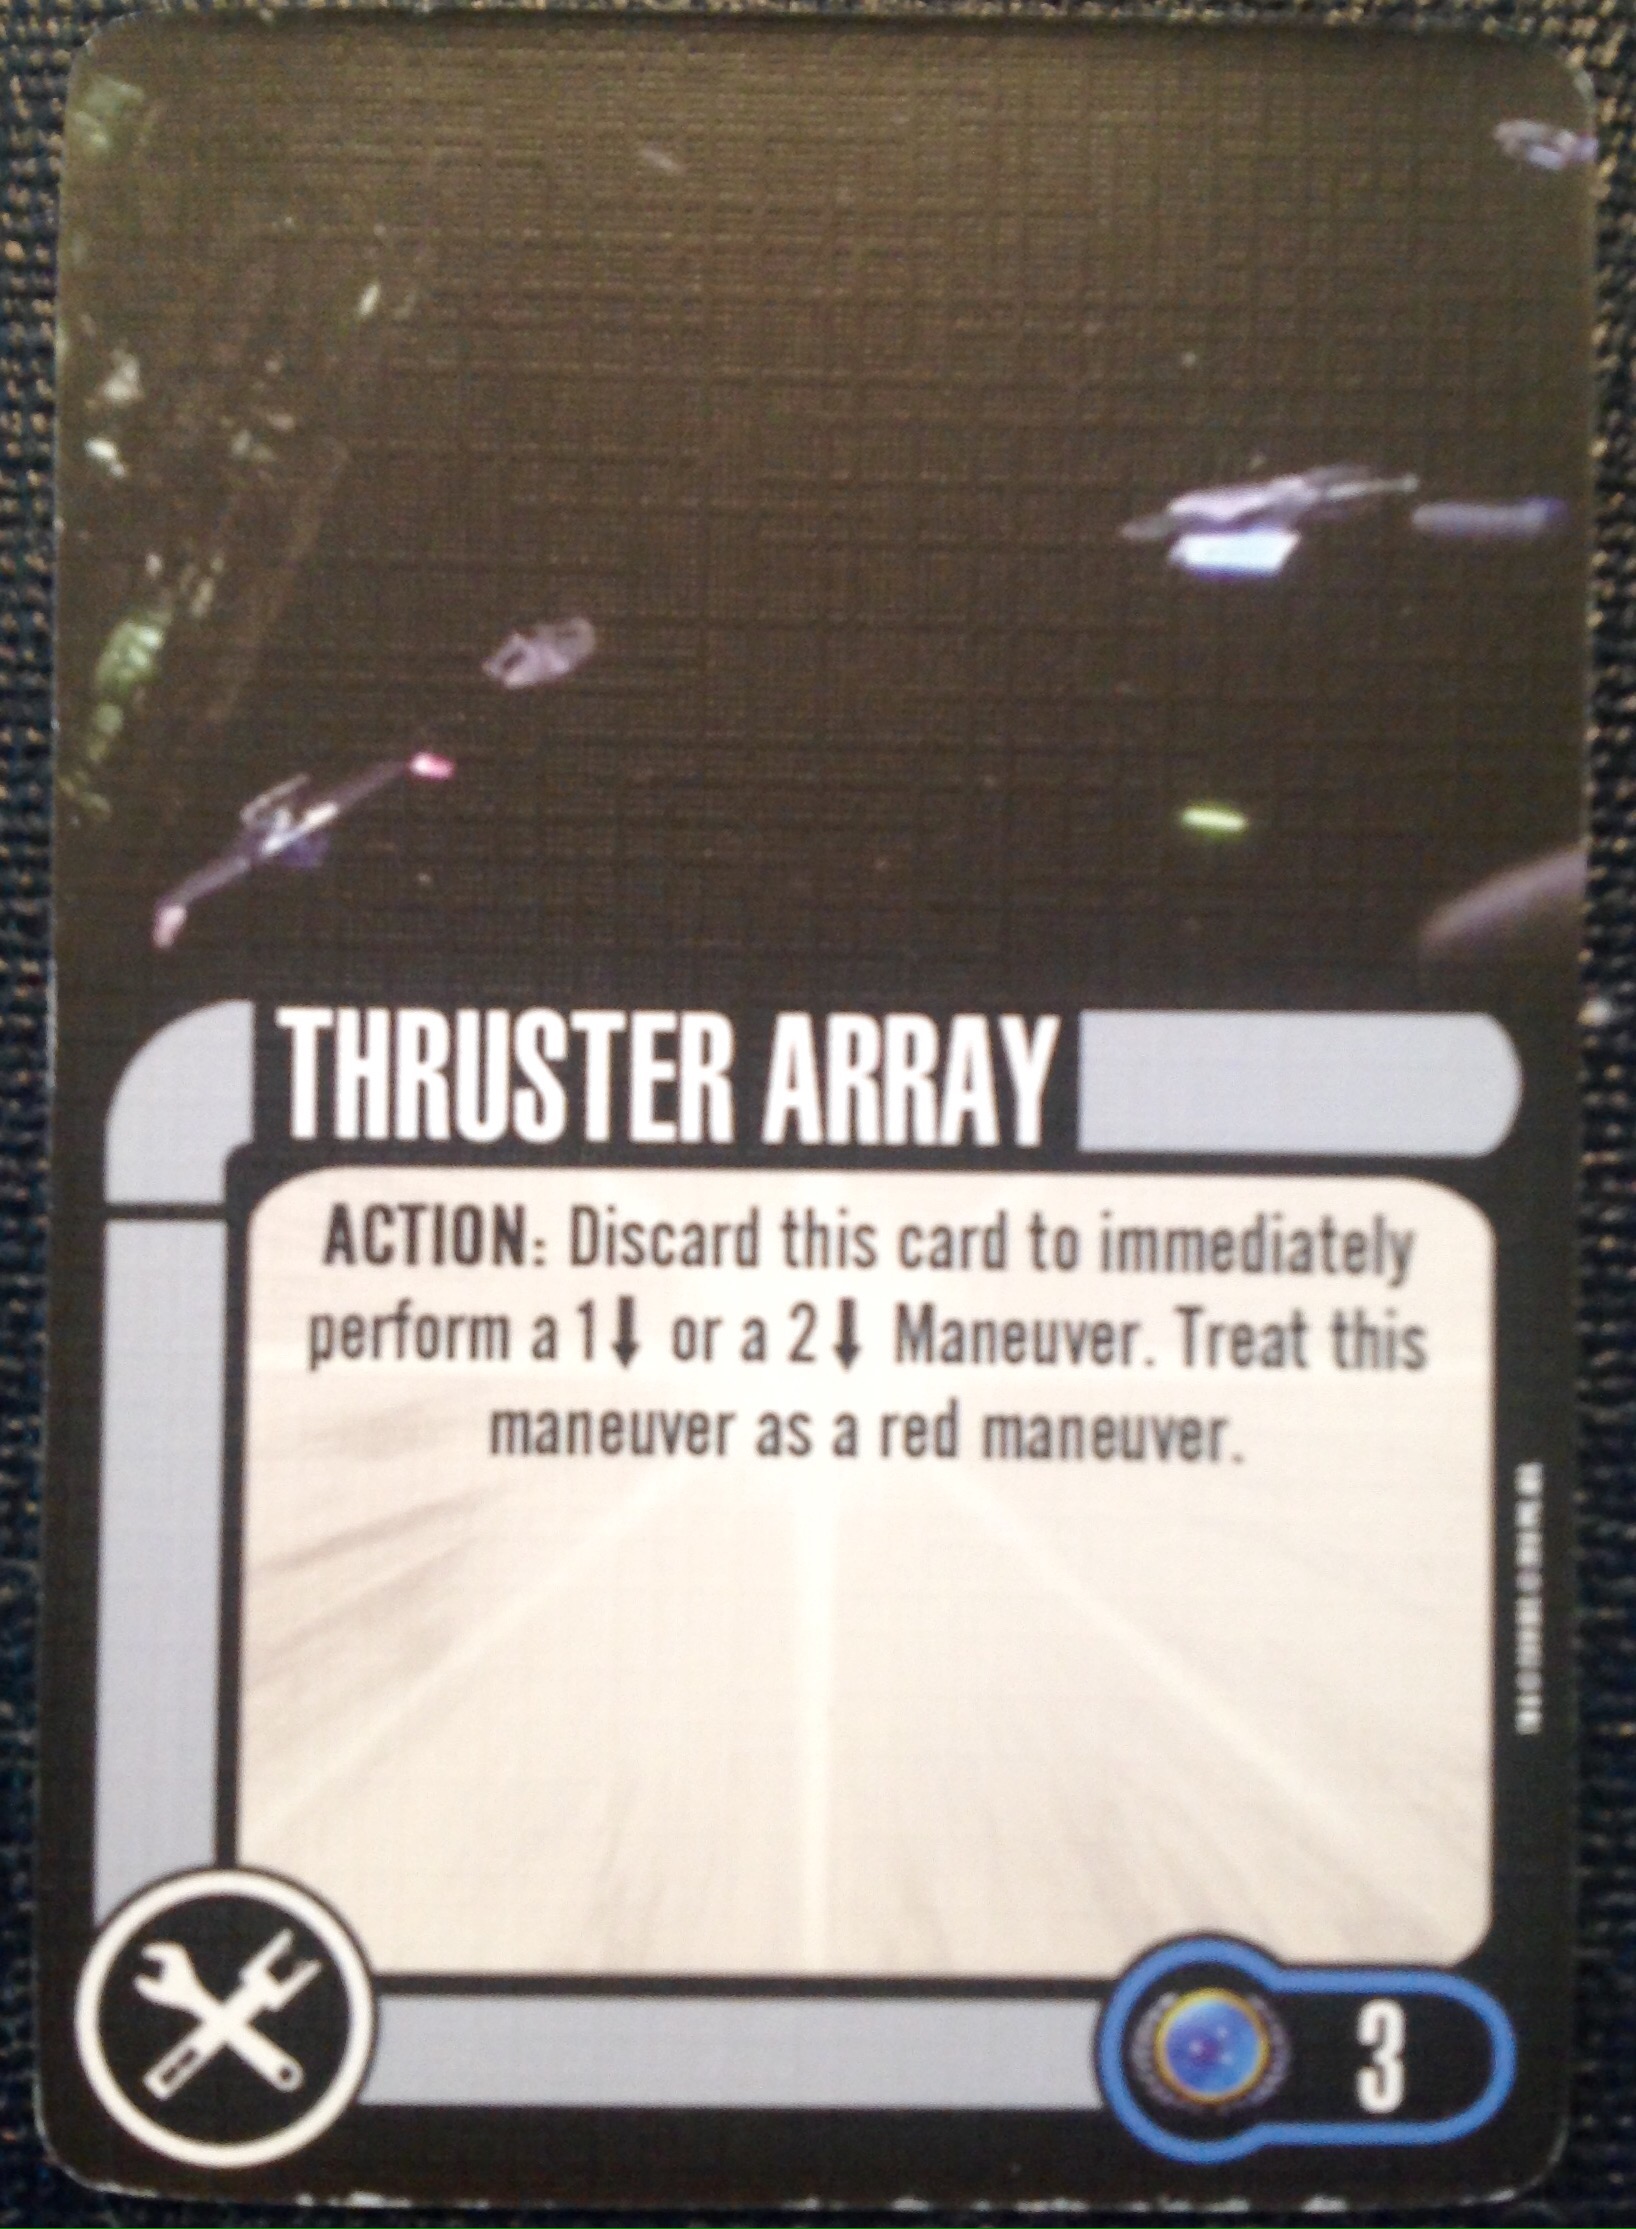
Thruster Array [U.S.S. Montgolfier] (3)
Automated Distress Beacon [U.S.S. Constellation] (3)
Total (45)
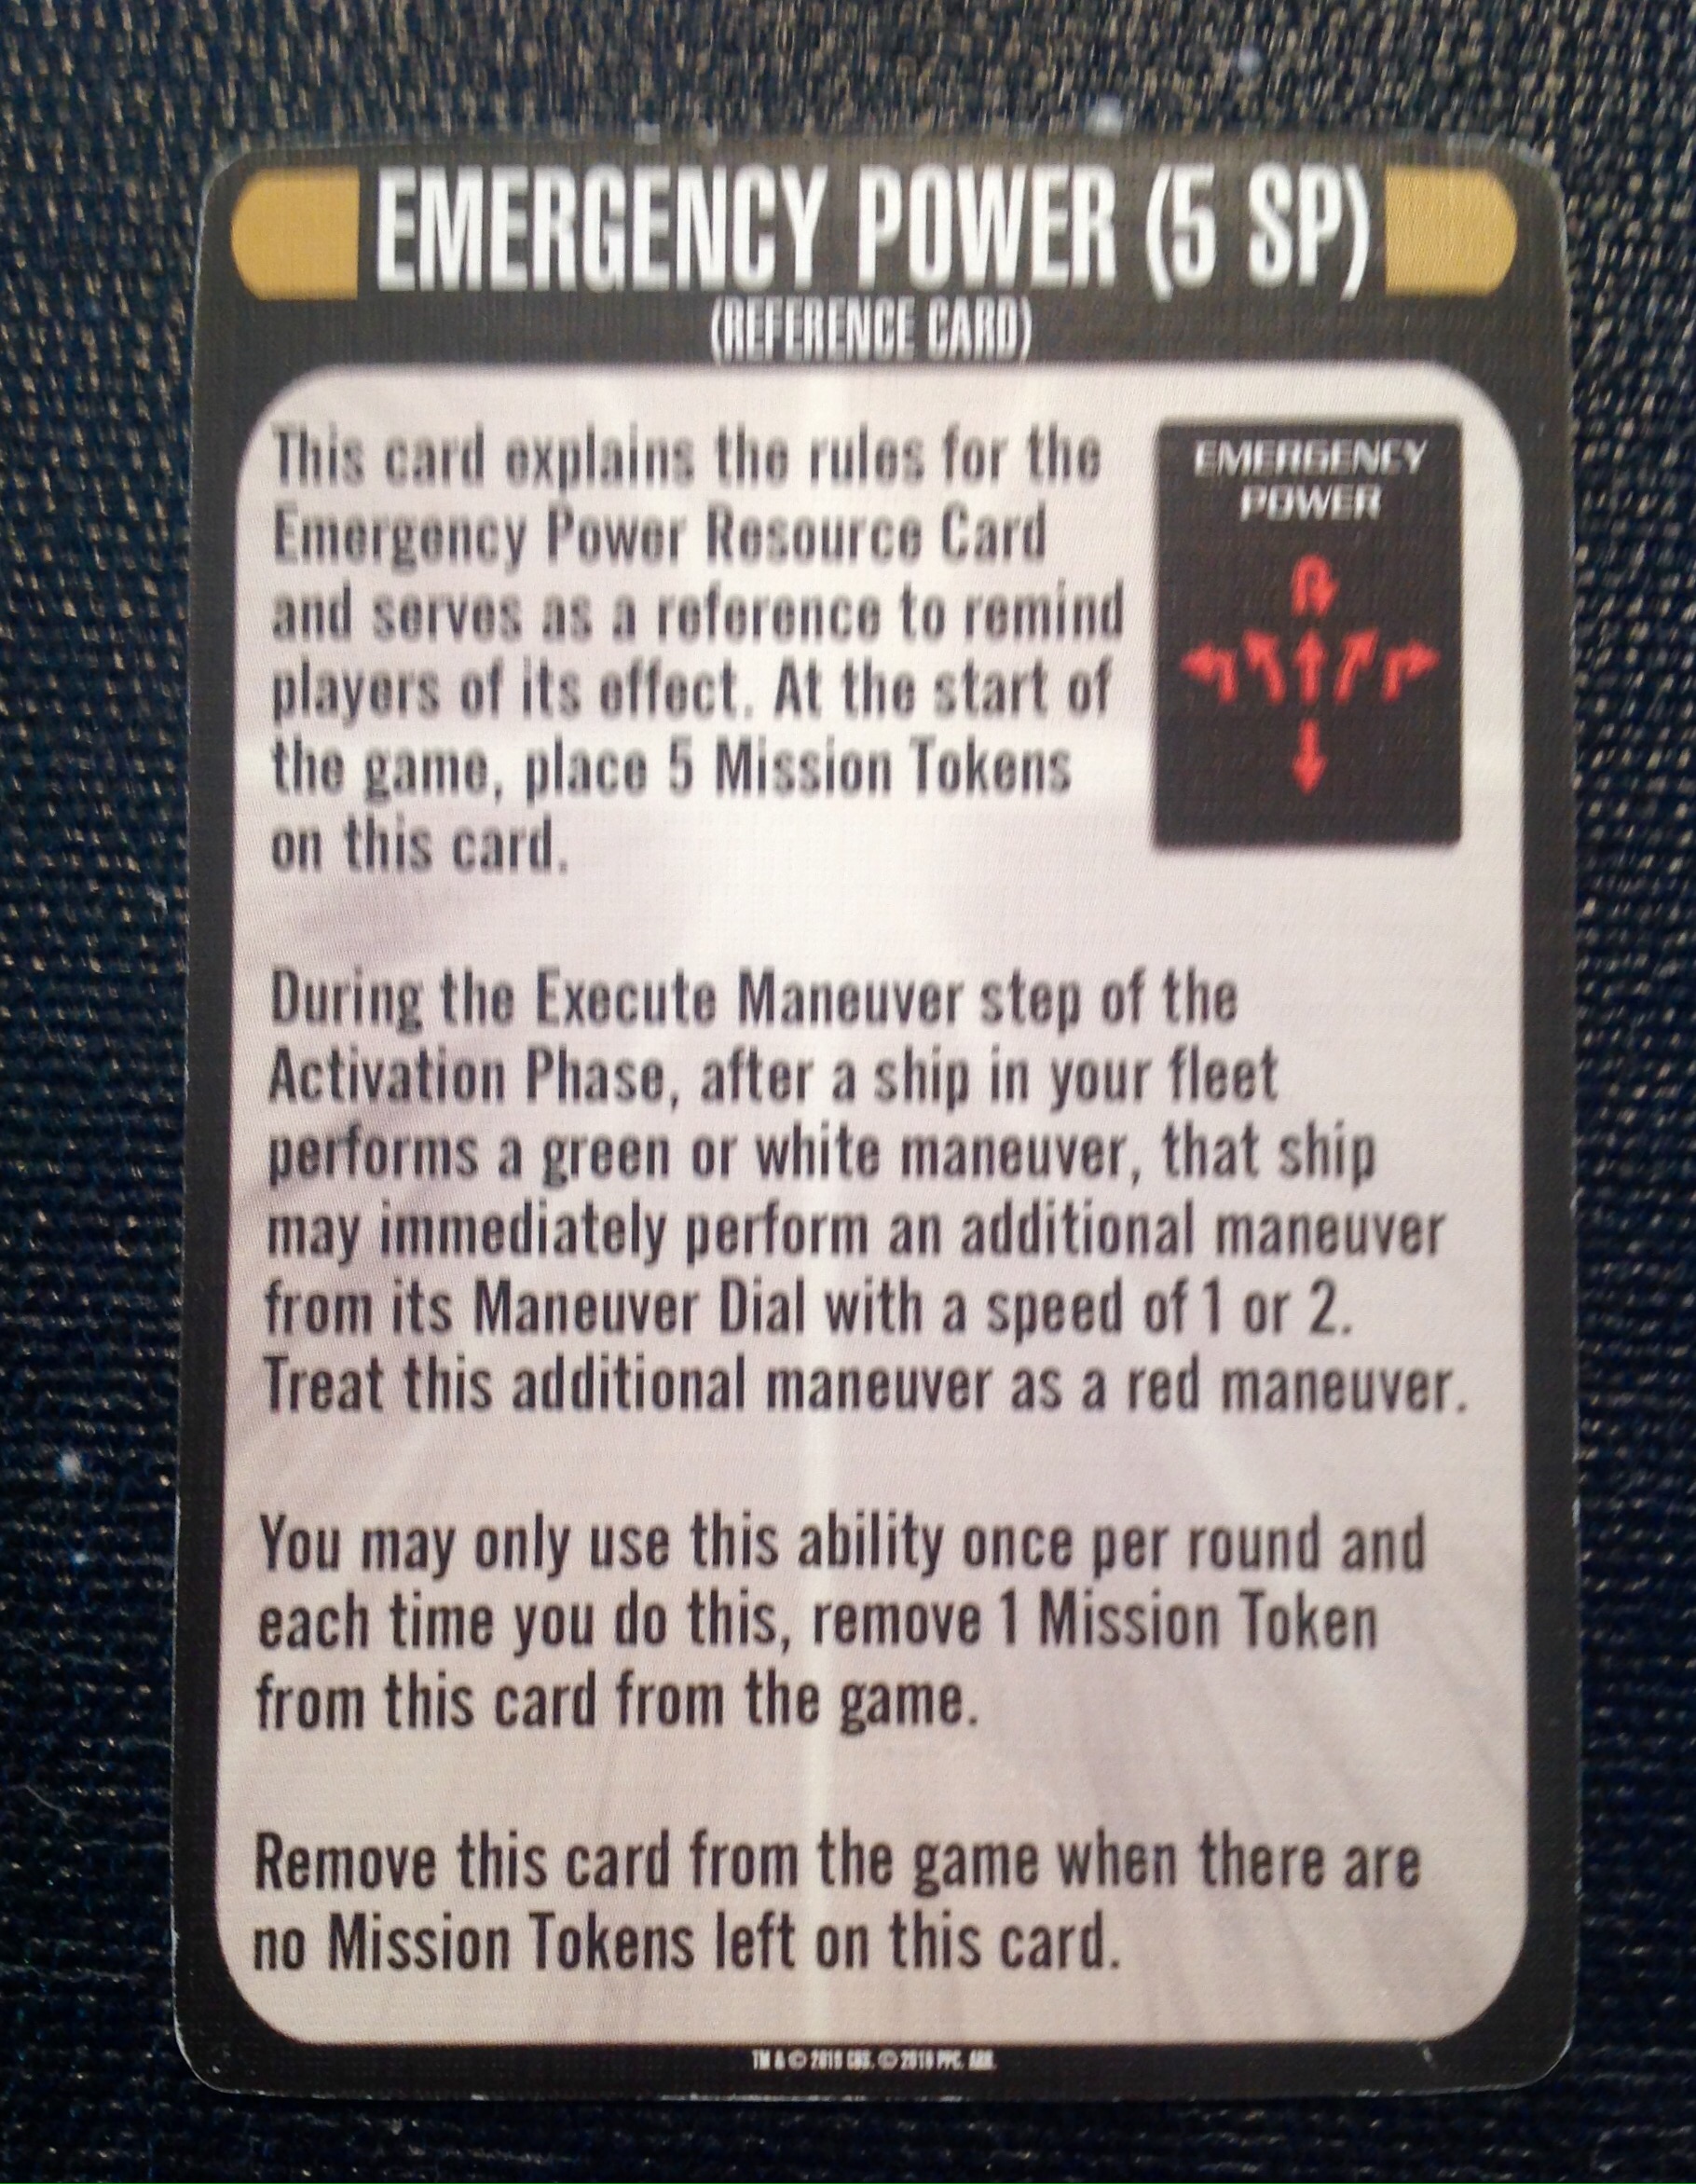
Emergency Power (5)
Fleet total: 130
Generated by Space Dock for iOS
http://spacedockapp.org
Flying The Rabbit Build
Yes, it’s the USS Raven, but we named it the Rabbit. The goal was to get the Rabbit as far ahead as possible, as quickly as possible. The Prometheus-class (let’s just call it the Prometheus, even though it’s not the named ship) is a fast ship in its own right, but mostly it’s for blocking. The Hathaway is almost a throwaway. but, it still has an important role to play. The resource, Emergency Power doesn’t figure into the opening move, but is useful in the middle or late game if needed.
First a word on the captains. Other than Picard’s ability, the other captains’ abilities are not important. The important thing is that all three captain have the same skill level. Picard’s 6 gets a boost of 1 from Admiral Forrest. It’s possible to use the other two captains to attempt to distract your opponent before you start playing.
The same thing for the Ships’ abilities. They are really immaterial. The important characteristics are the upgrade slots and most importantly the maneuvers that each ship is capable of.
Assuming you are playing from the Southern Edge, The Rabbit sets up exactly 13″ from the Western edge and against the very Southern edge. The Prometheus sets up 11″ from the East edge and 4″ from the Southern Edge. The Hathaway sits just West of the Prometheus.

By having all captains at a Skill 7, the Federation player gets to move all his ships together and in any order. The Prometheus moves first by going STRAIGHT 6. This puts it more than Range 3 away from the Rabbit.
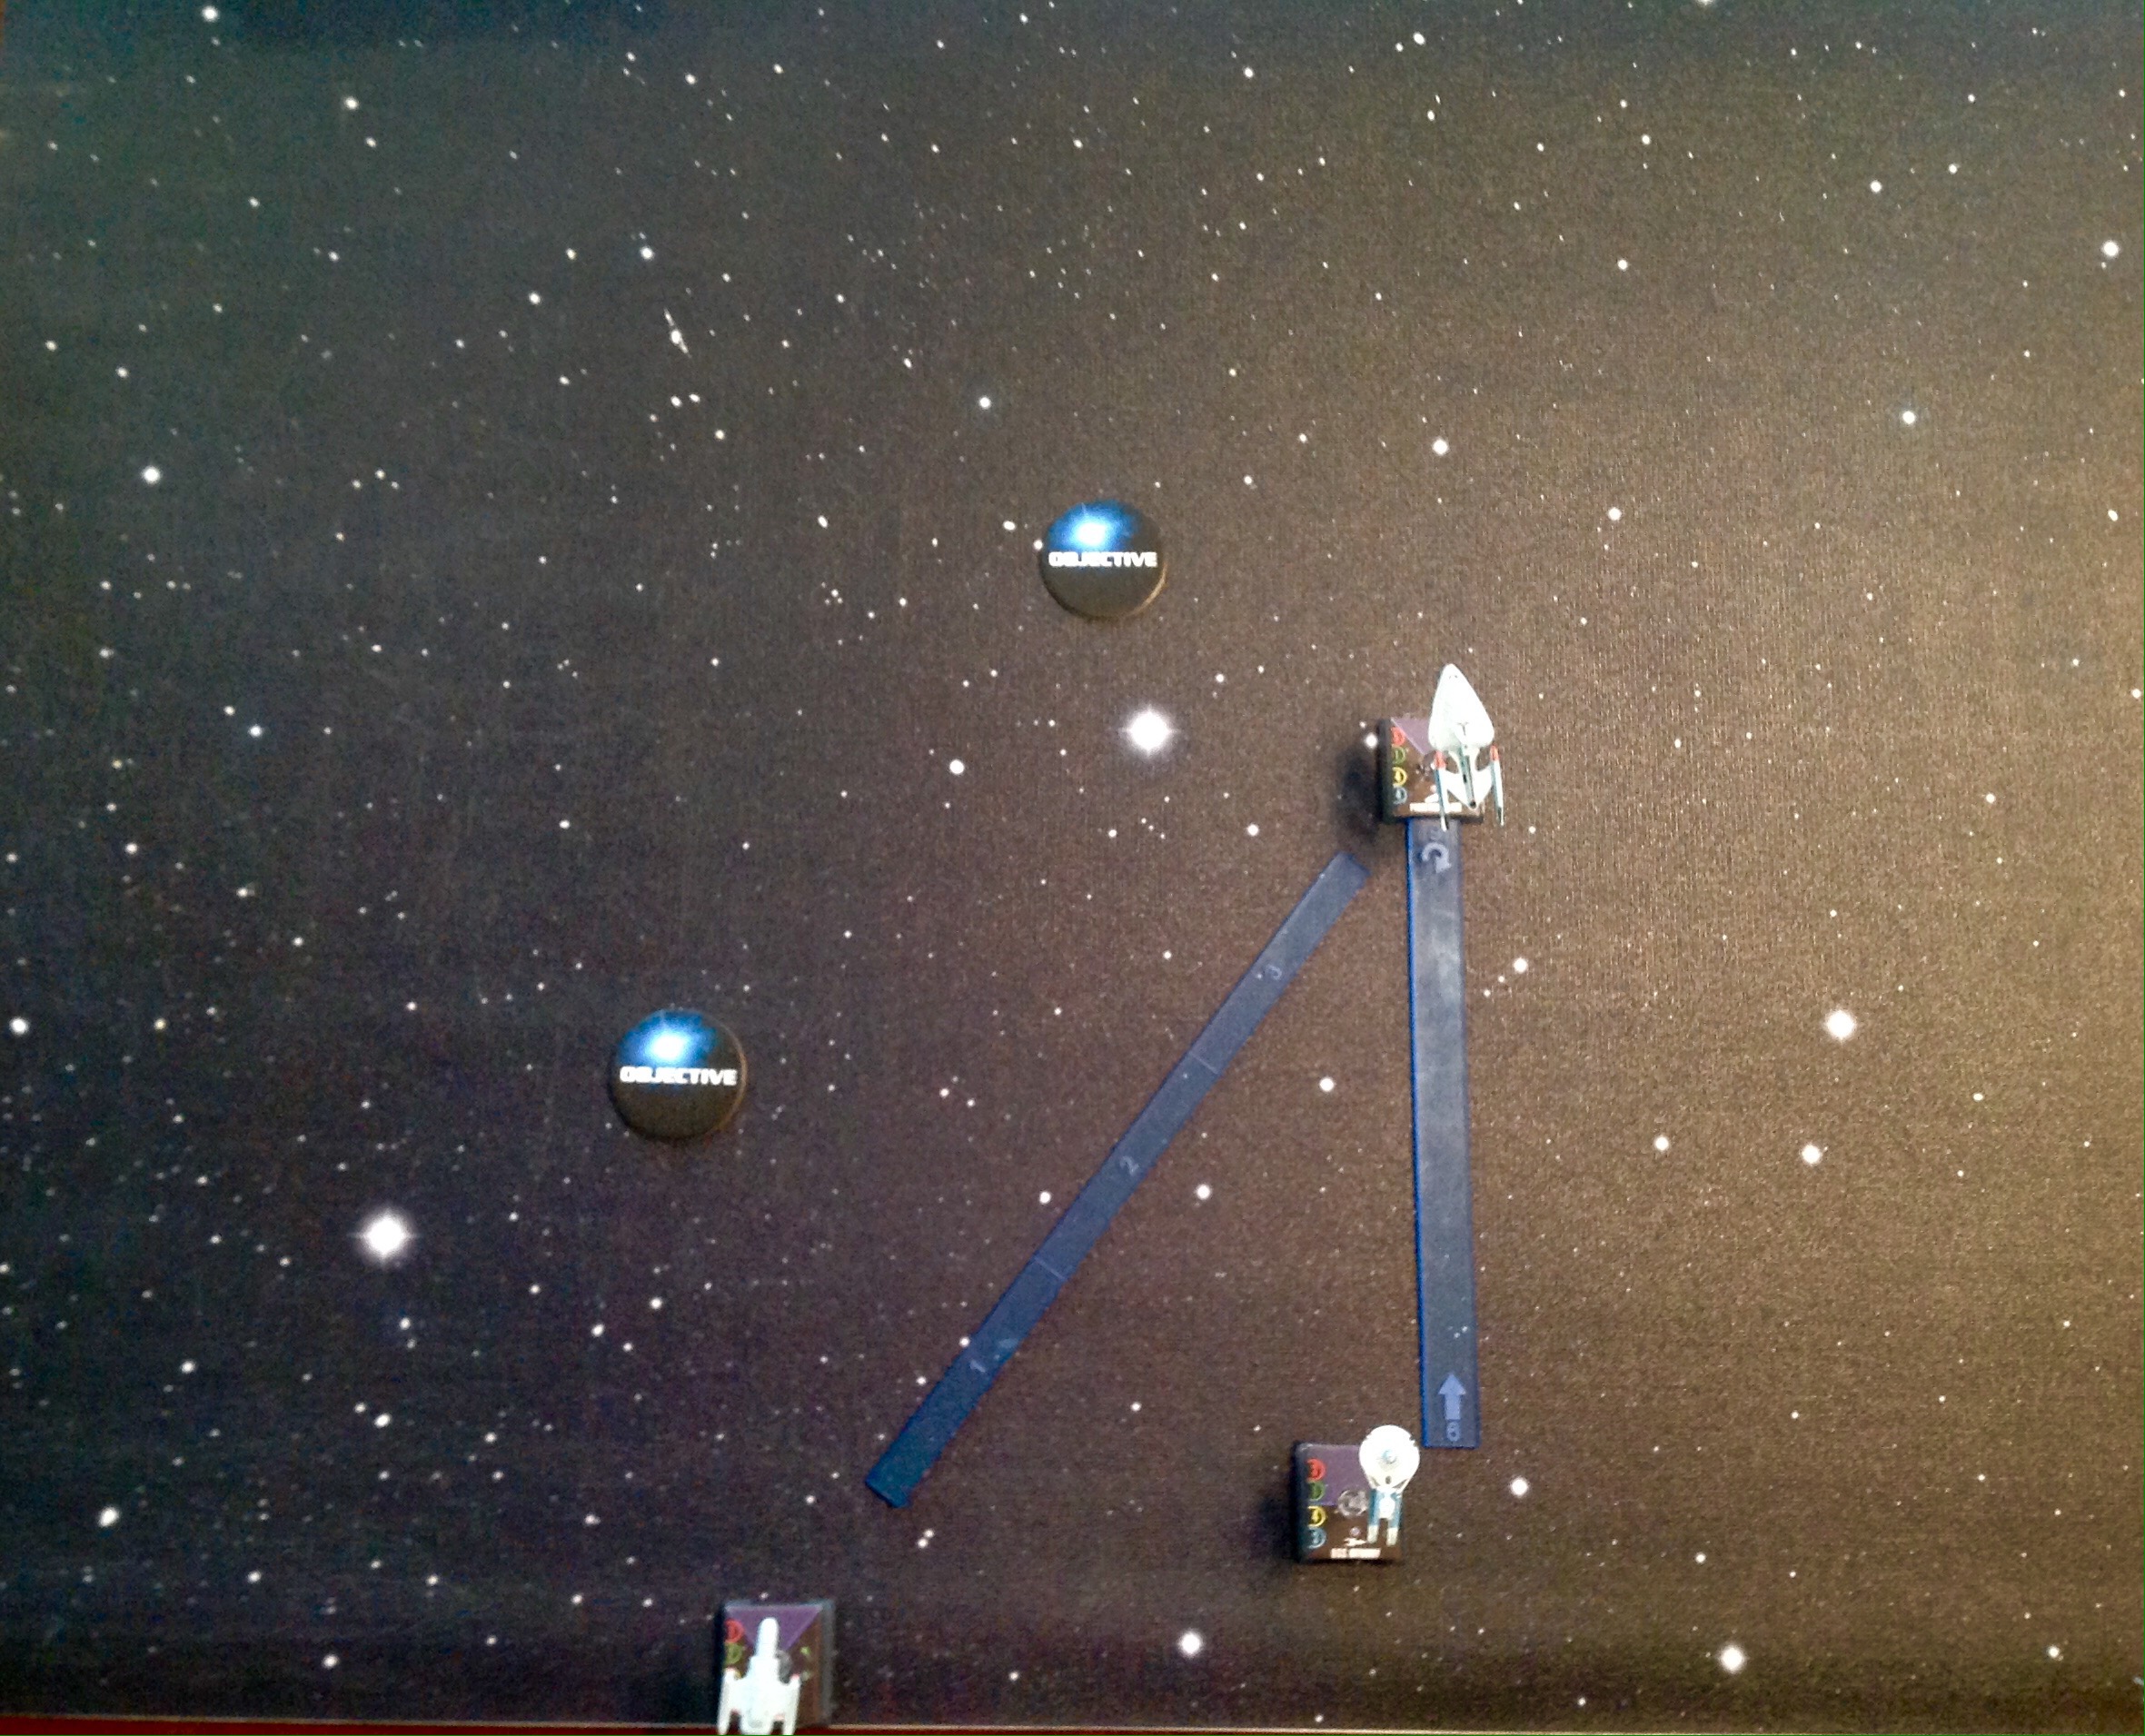
For his Action, he uses Automated Distress Beacon to move the Rabbit STRAIGHT 2.
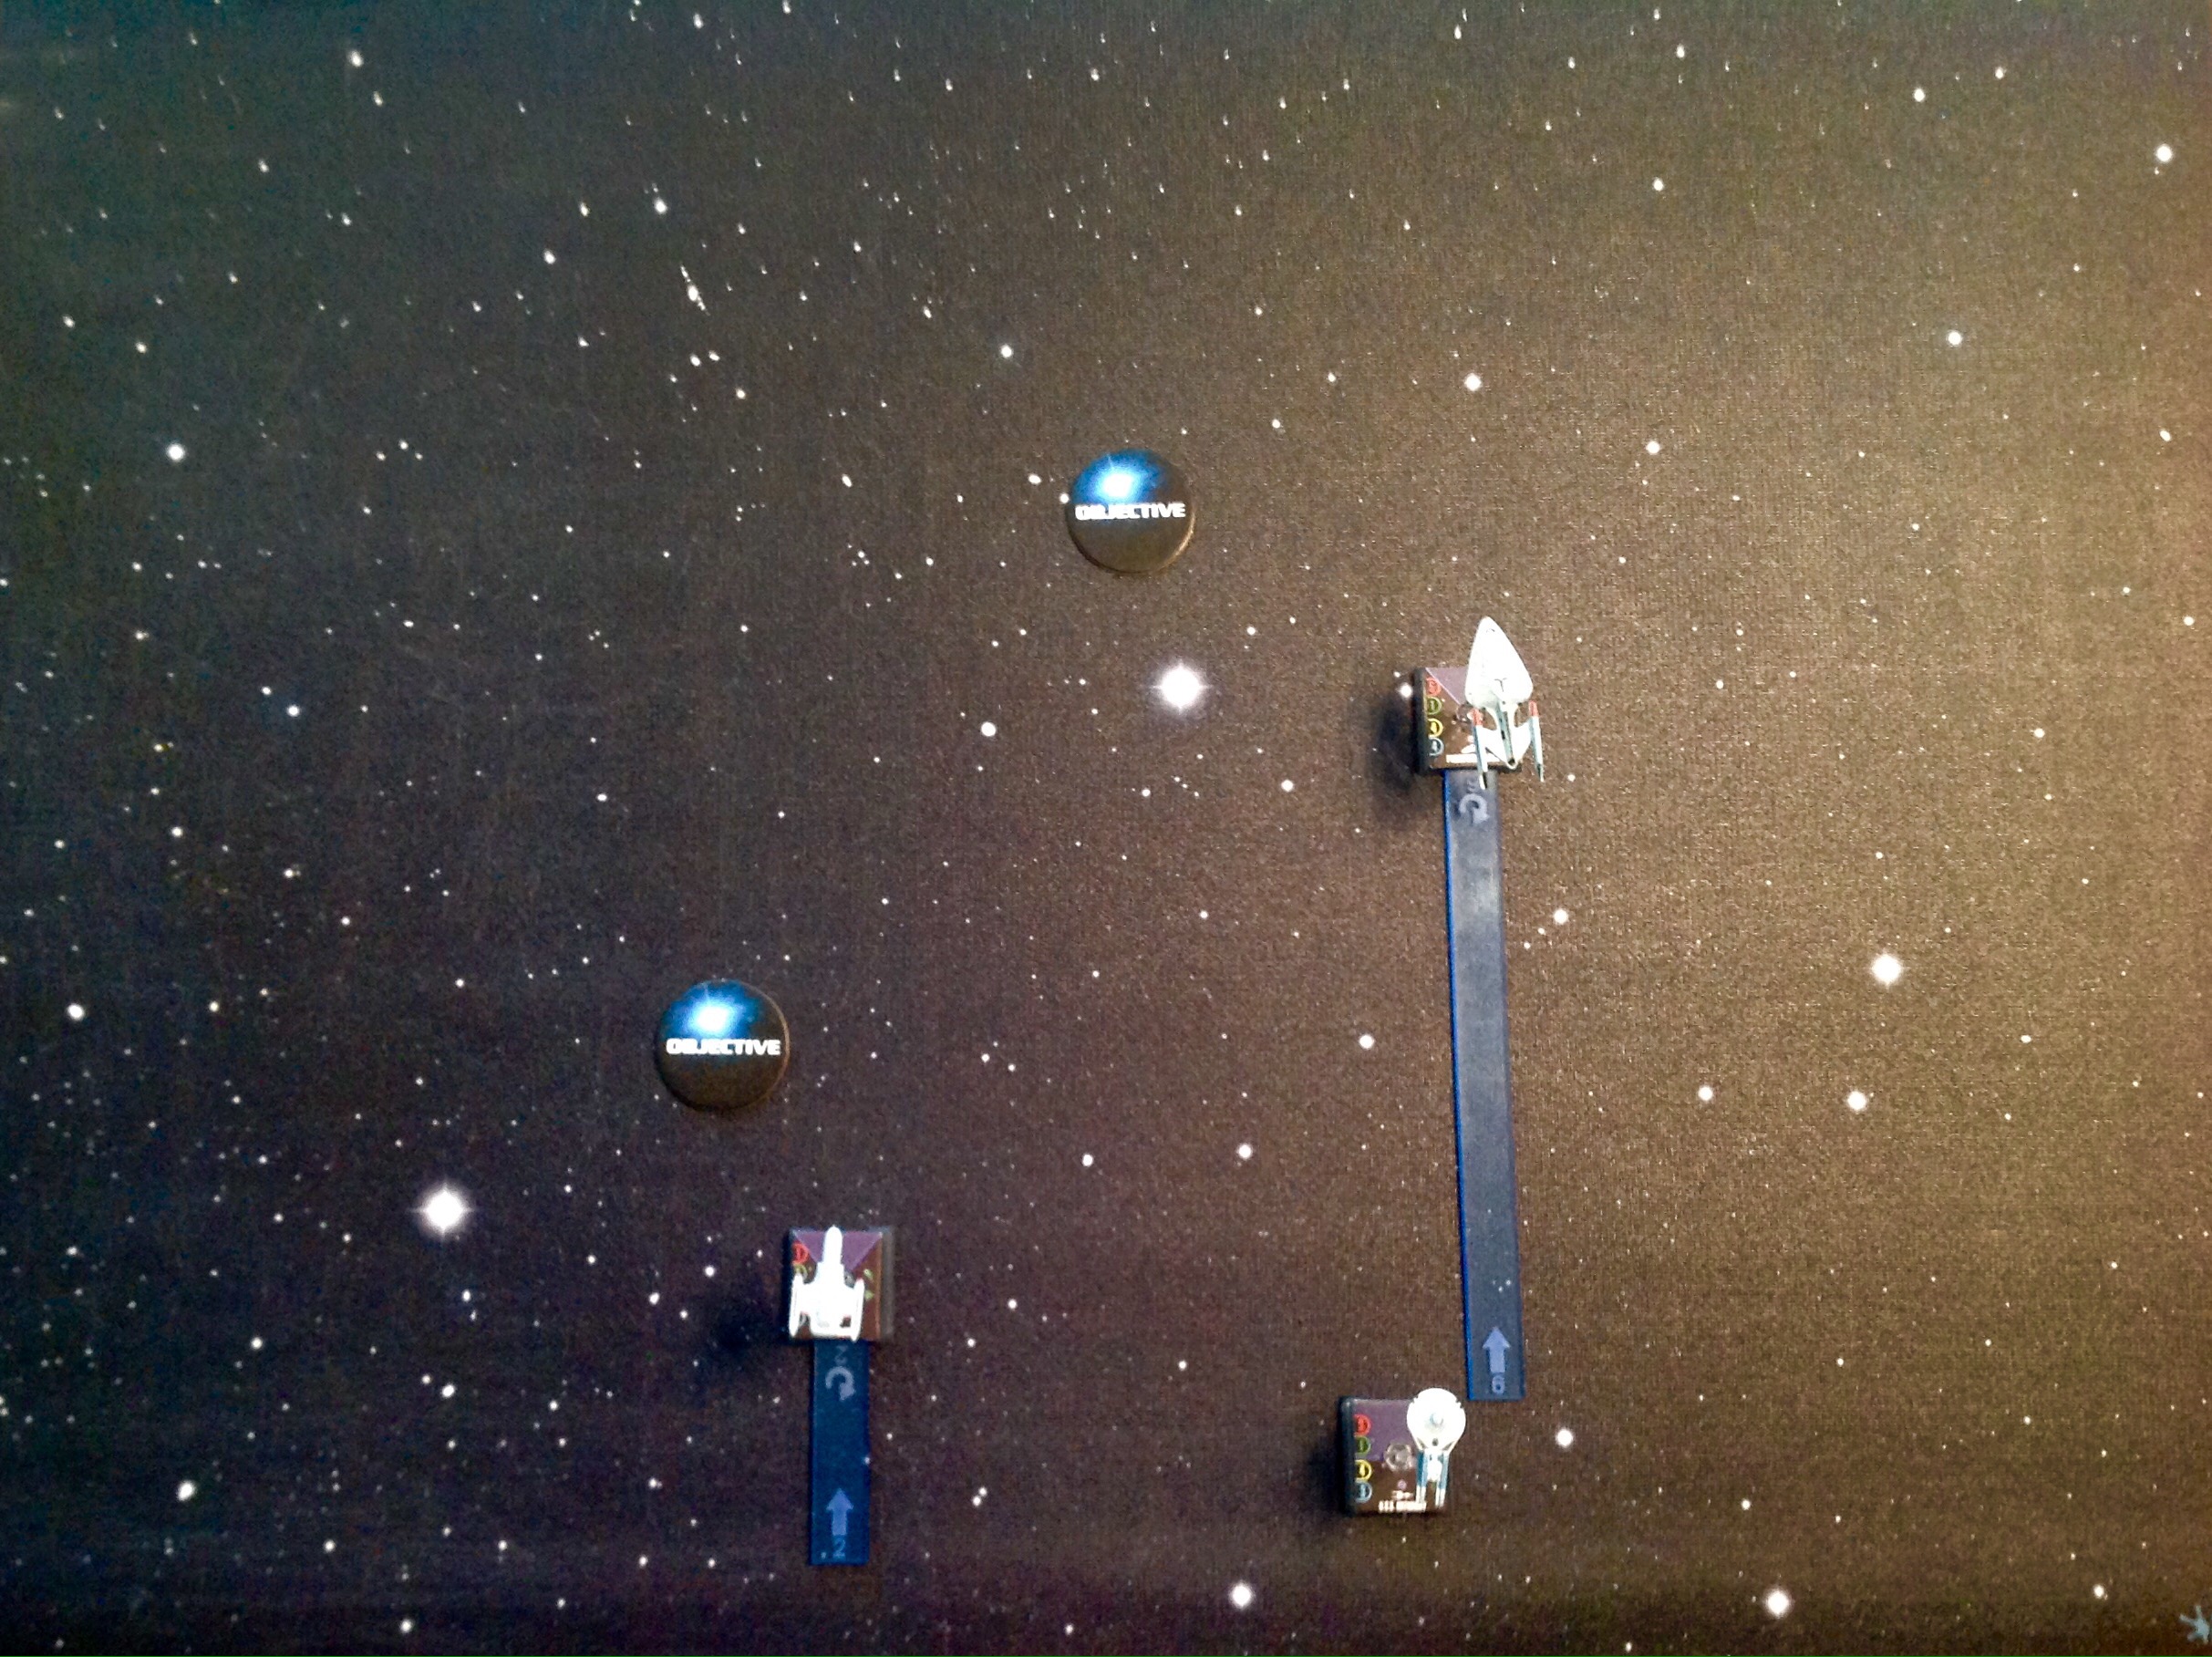
Next up is the Hathaway. The Hathaway moves STRAIGHT 1. This puts it within Range 2 of the Rabbit.
Hathaway now discards Flag Officer allowing it to use an Action on a ship within Range 2. It targets Captain Picard’s captain Action.
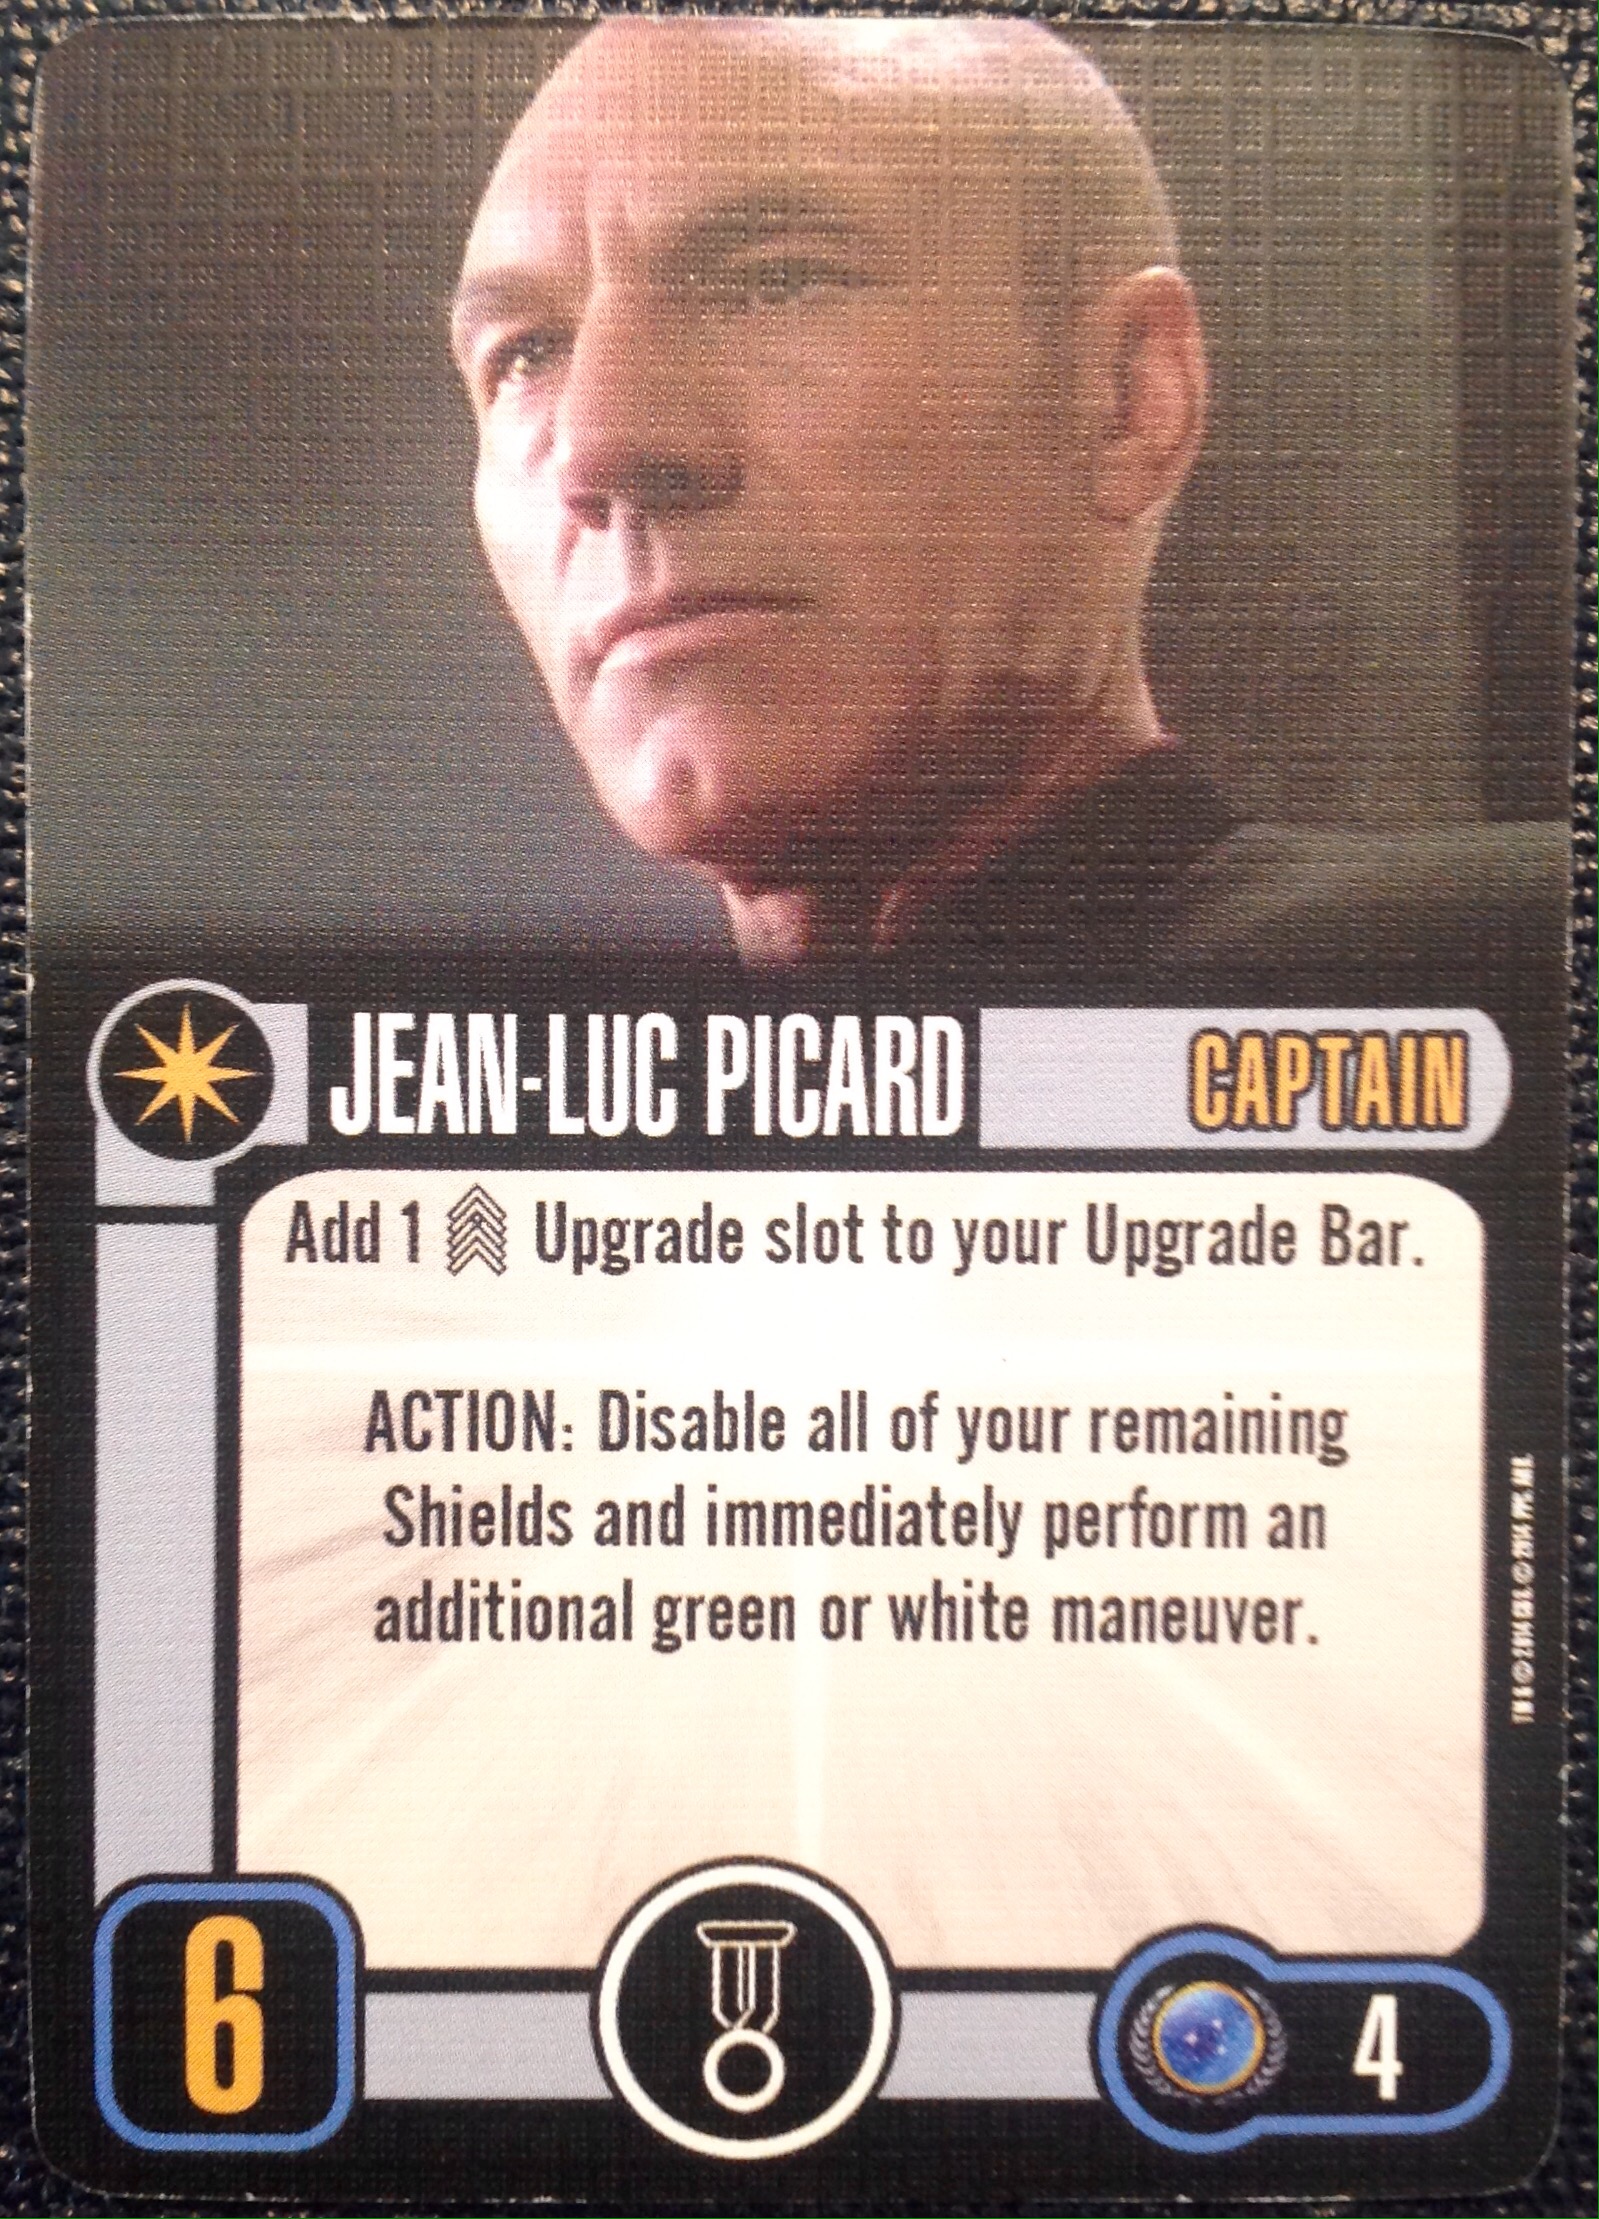
This allows the Rabbit to move STRAIGHT 4. At this point Hathaway disables Wesley Crusher to immediately use one of its Tech Upgrades. In this case it discards Thruster Array to move the Hathaway REVERSE 2 and take an Auxiliary Power Token (APT.)
This puts the Hathaway more than Range 3 away from the Rabbit.
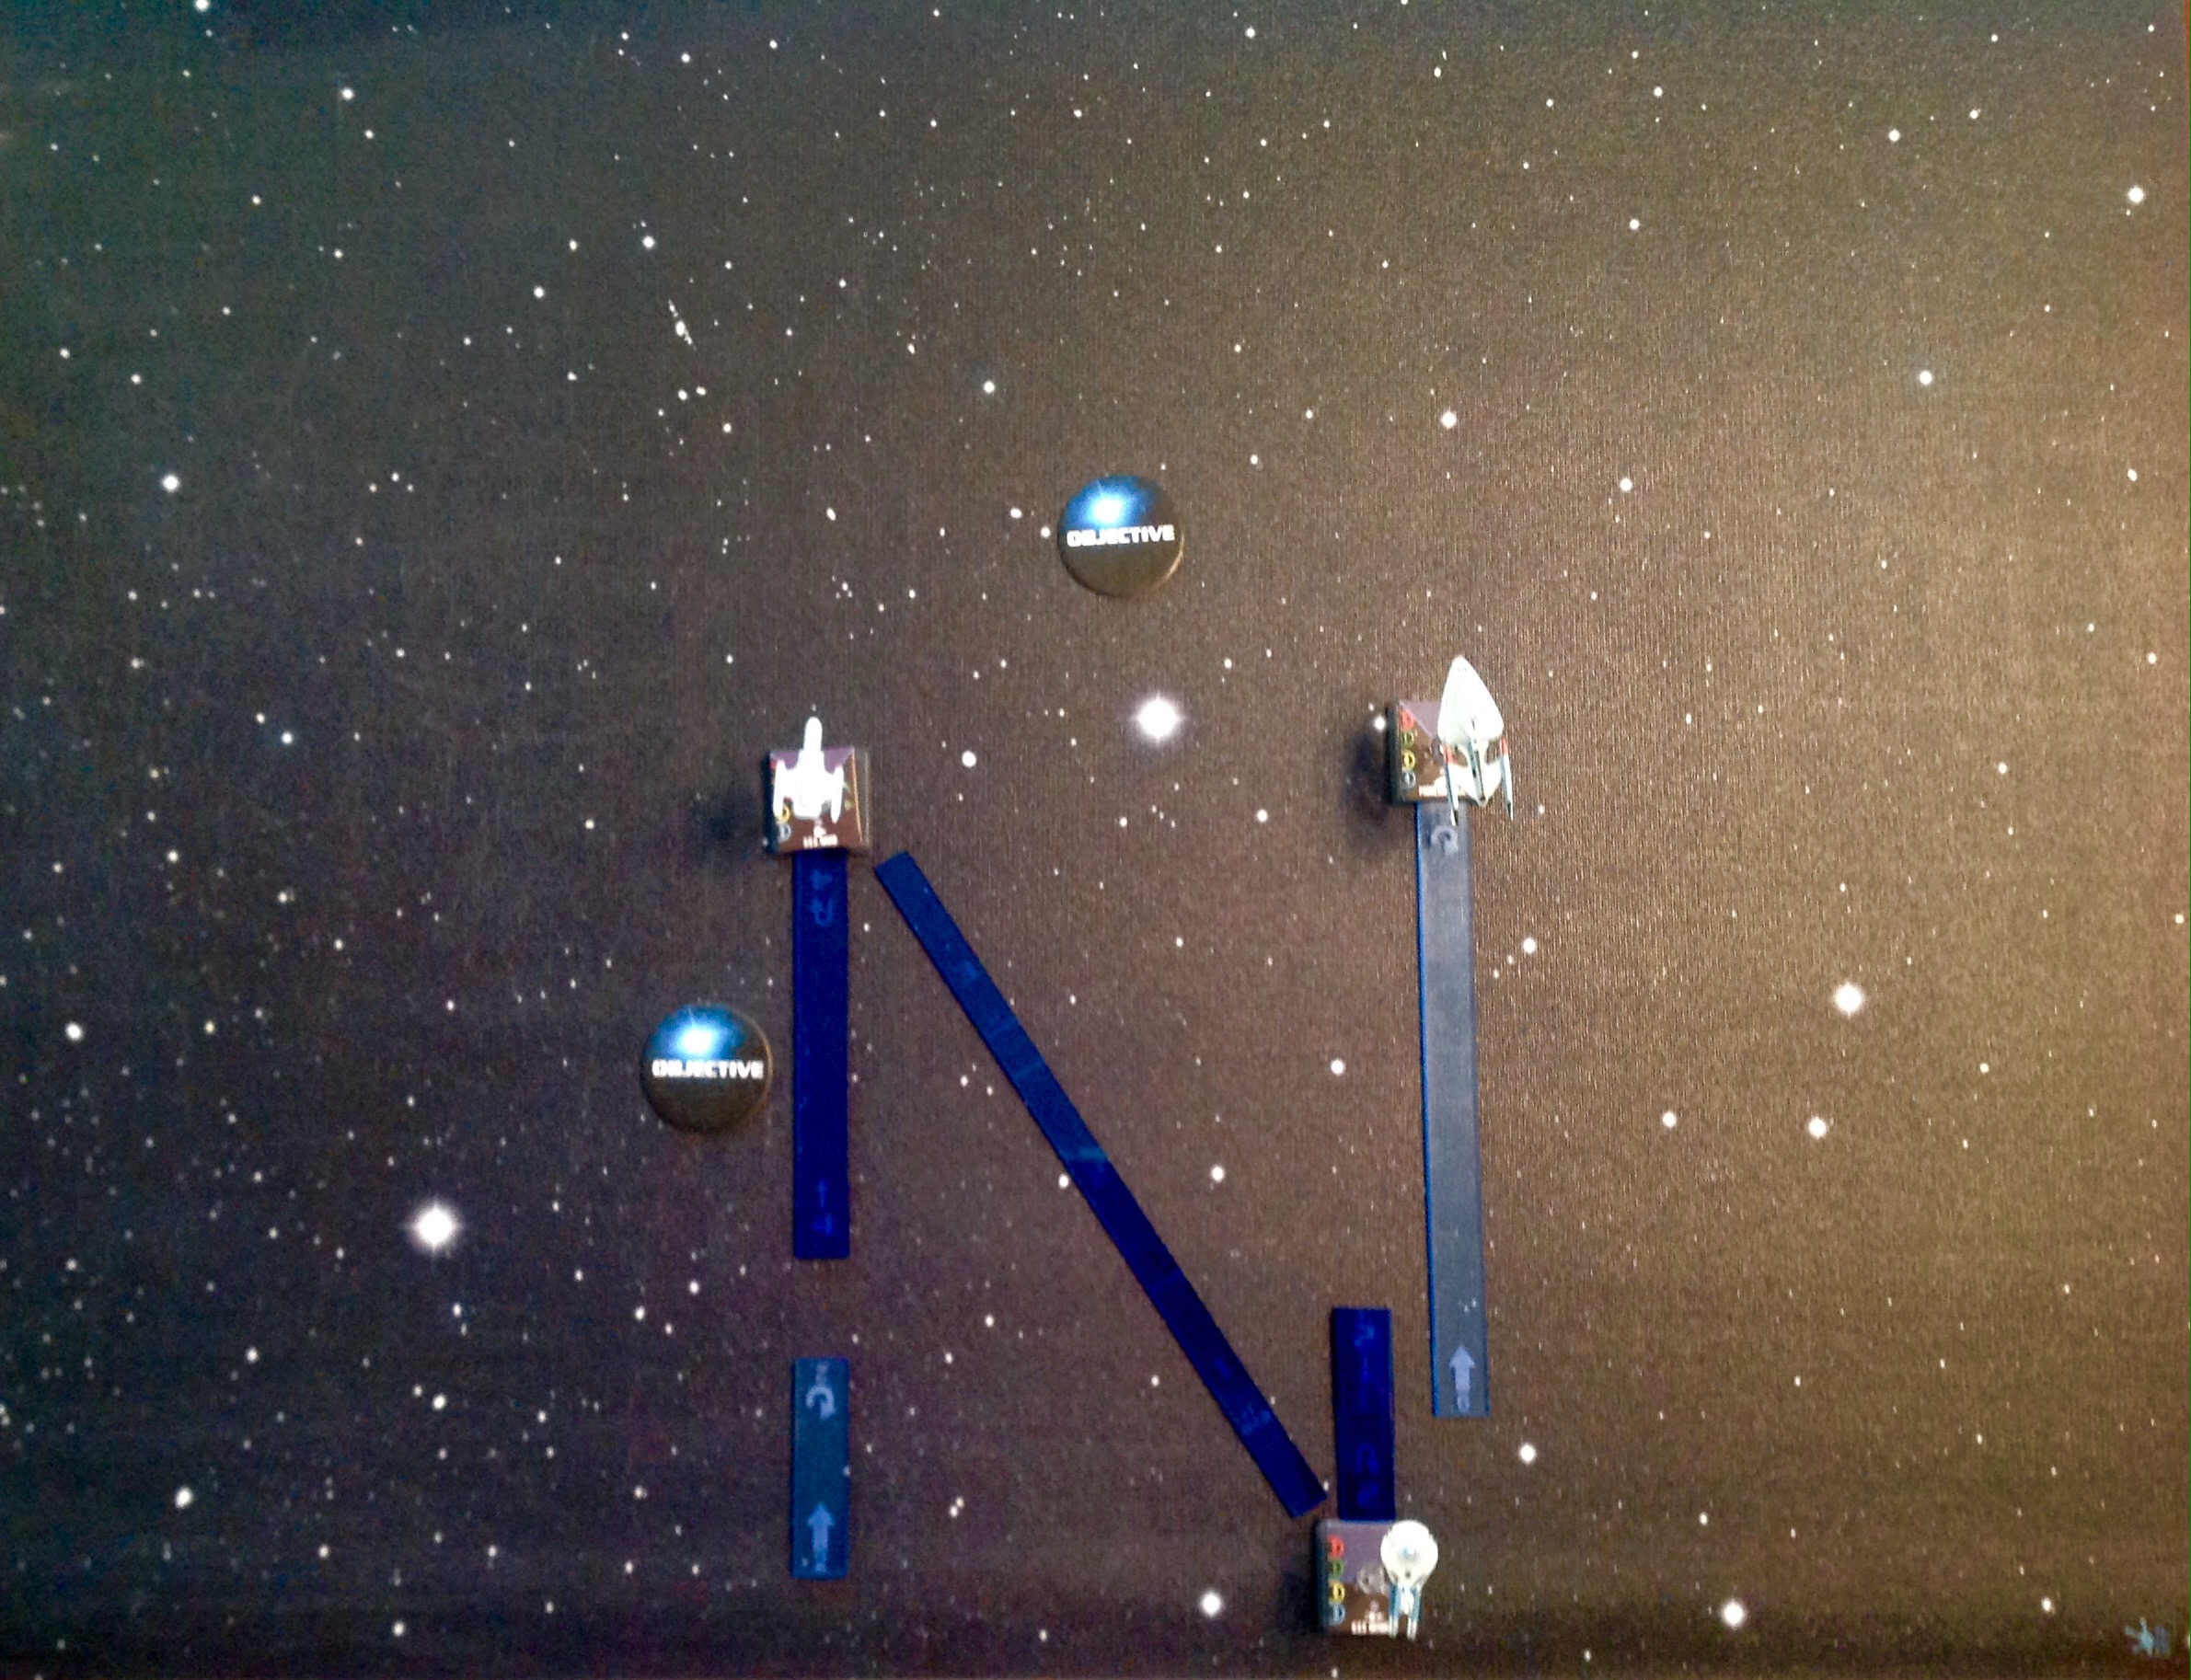
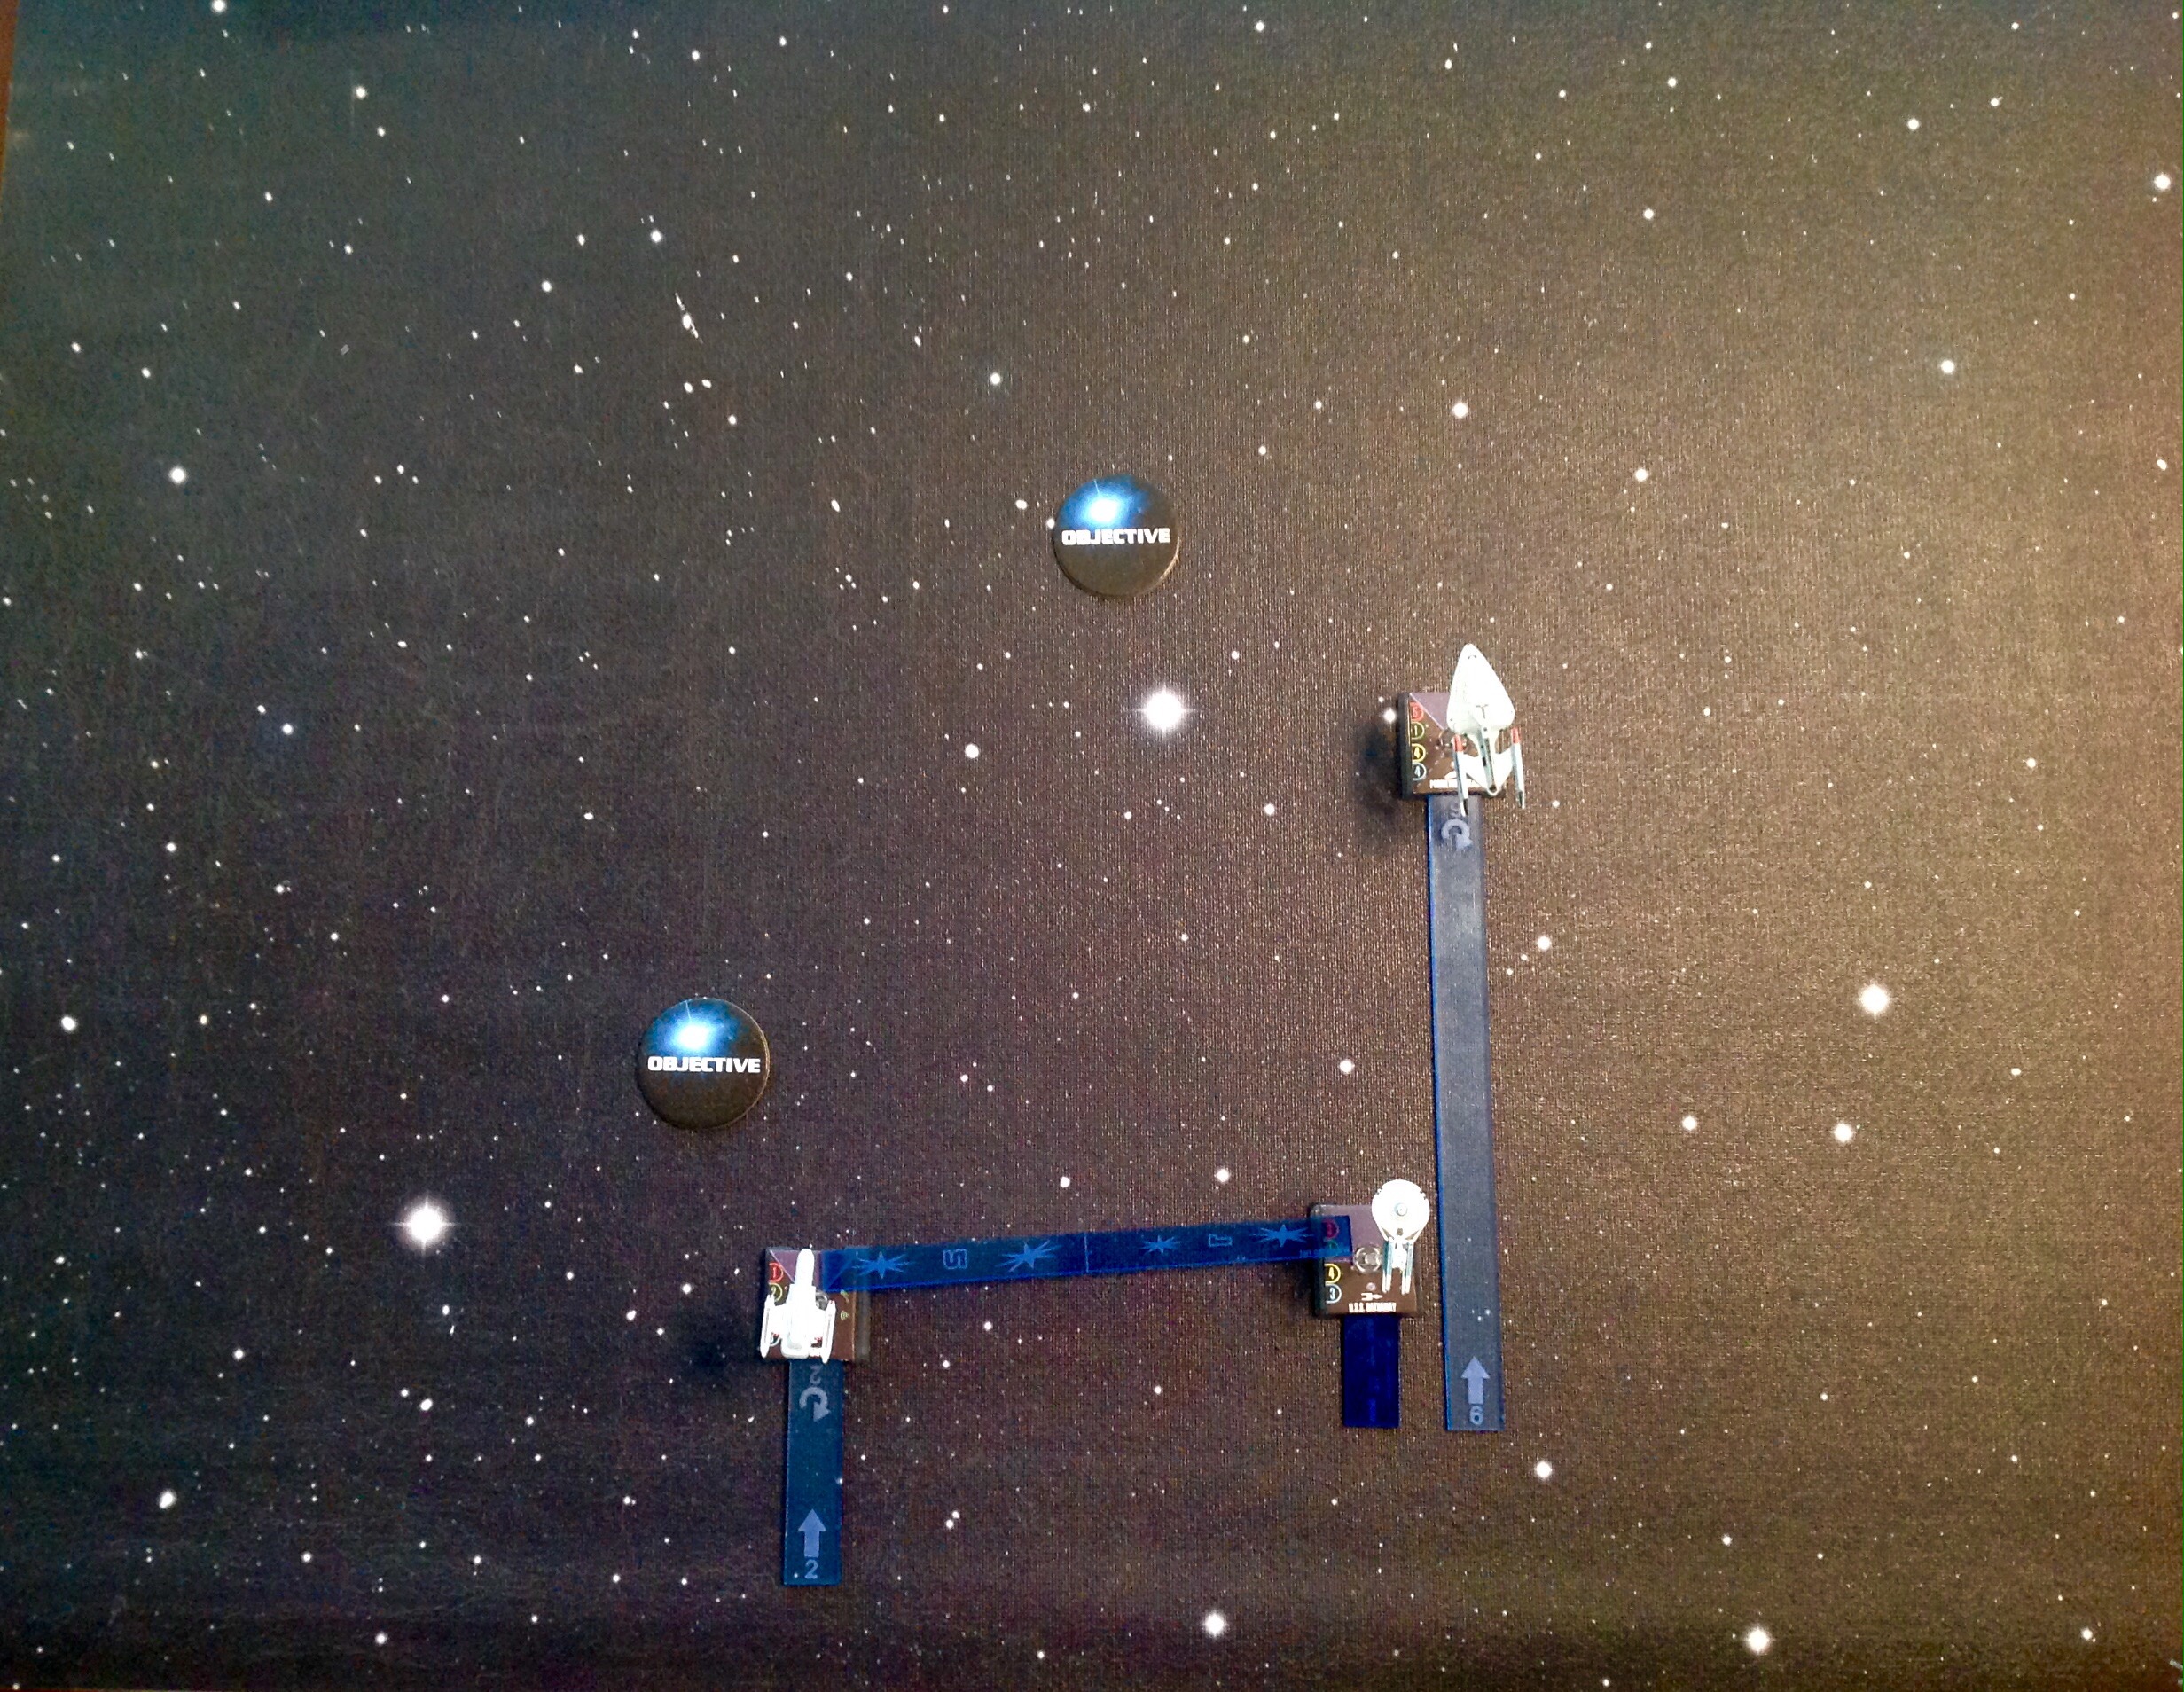
The Hathaway isn’t done. Next, it Disables Montgomery Scott to remove the Aux Token.
With the Aux Token gone and being more than Range 3 from the Rabbit, the Hathaway can activate it’s Action. It uses Automated Distress Beacon to move the Rabbit in a TURN 2 to the right.

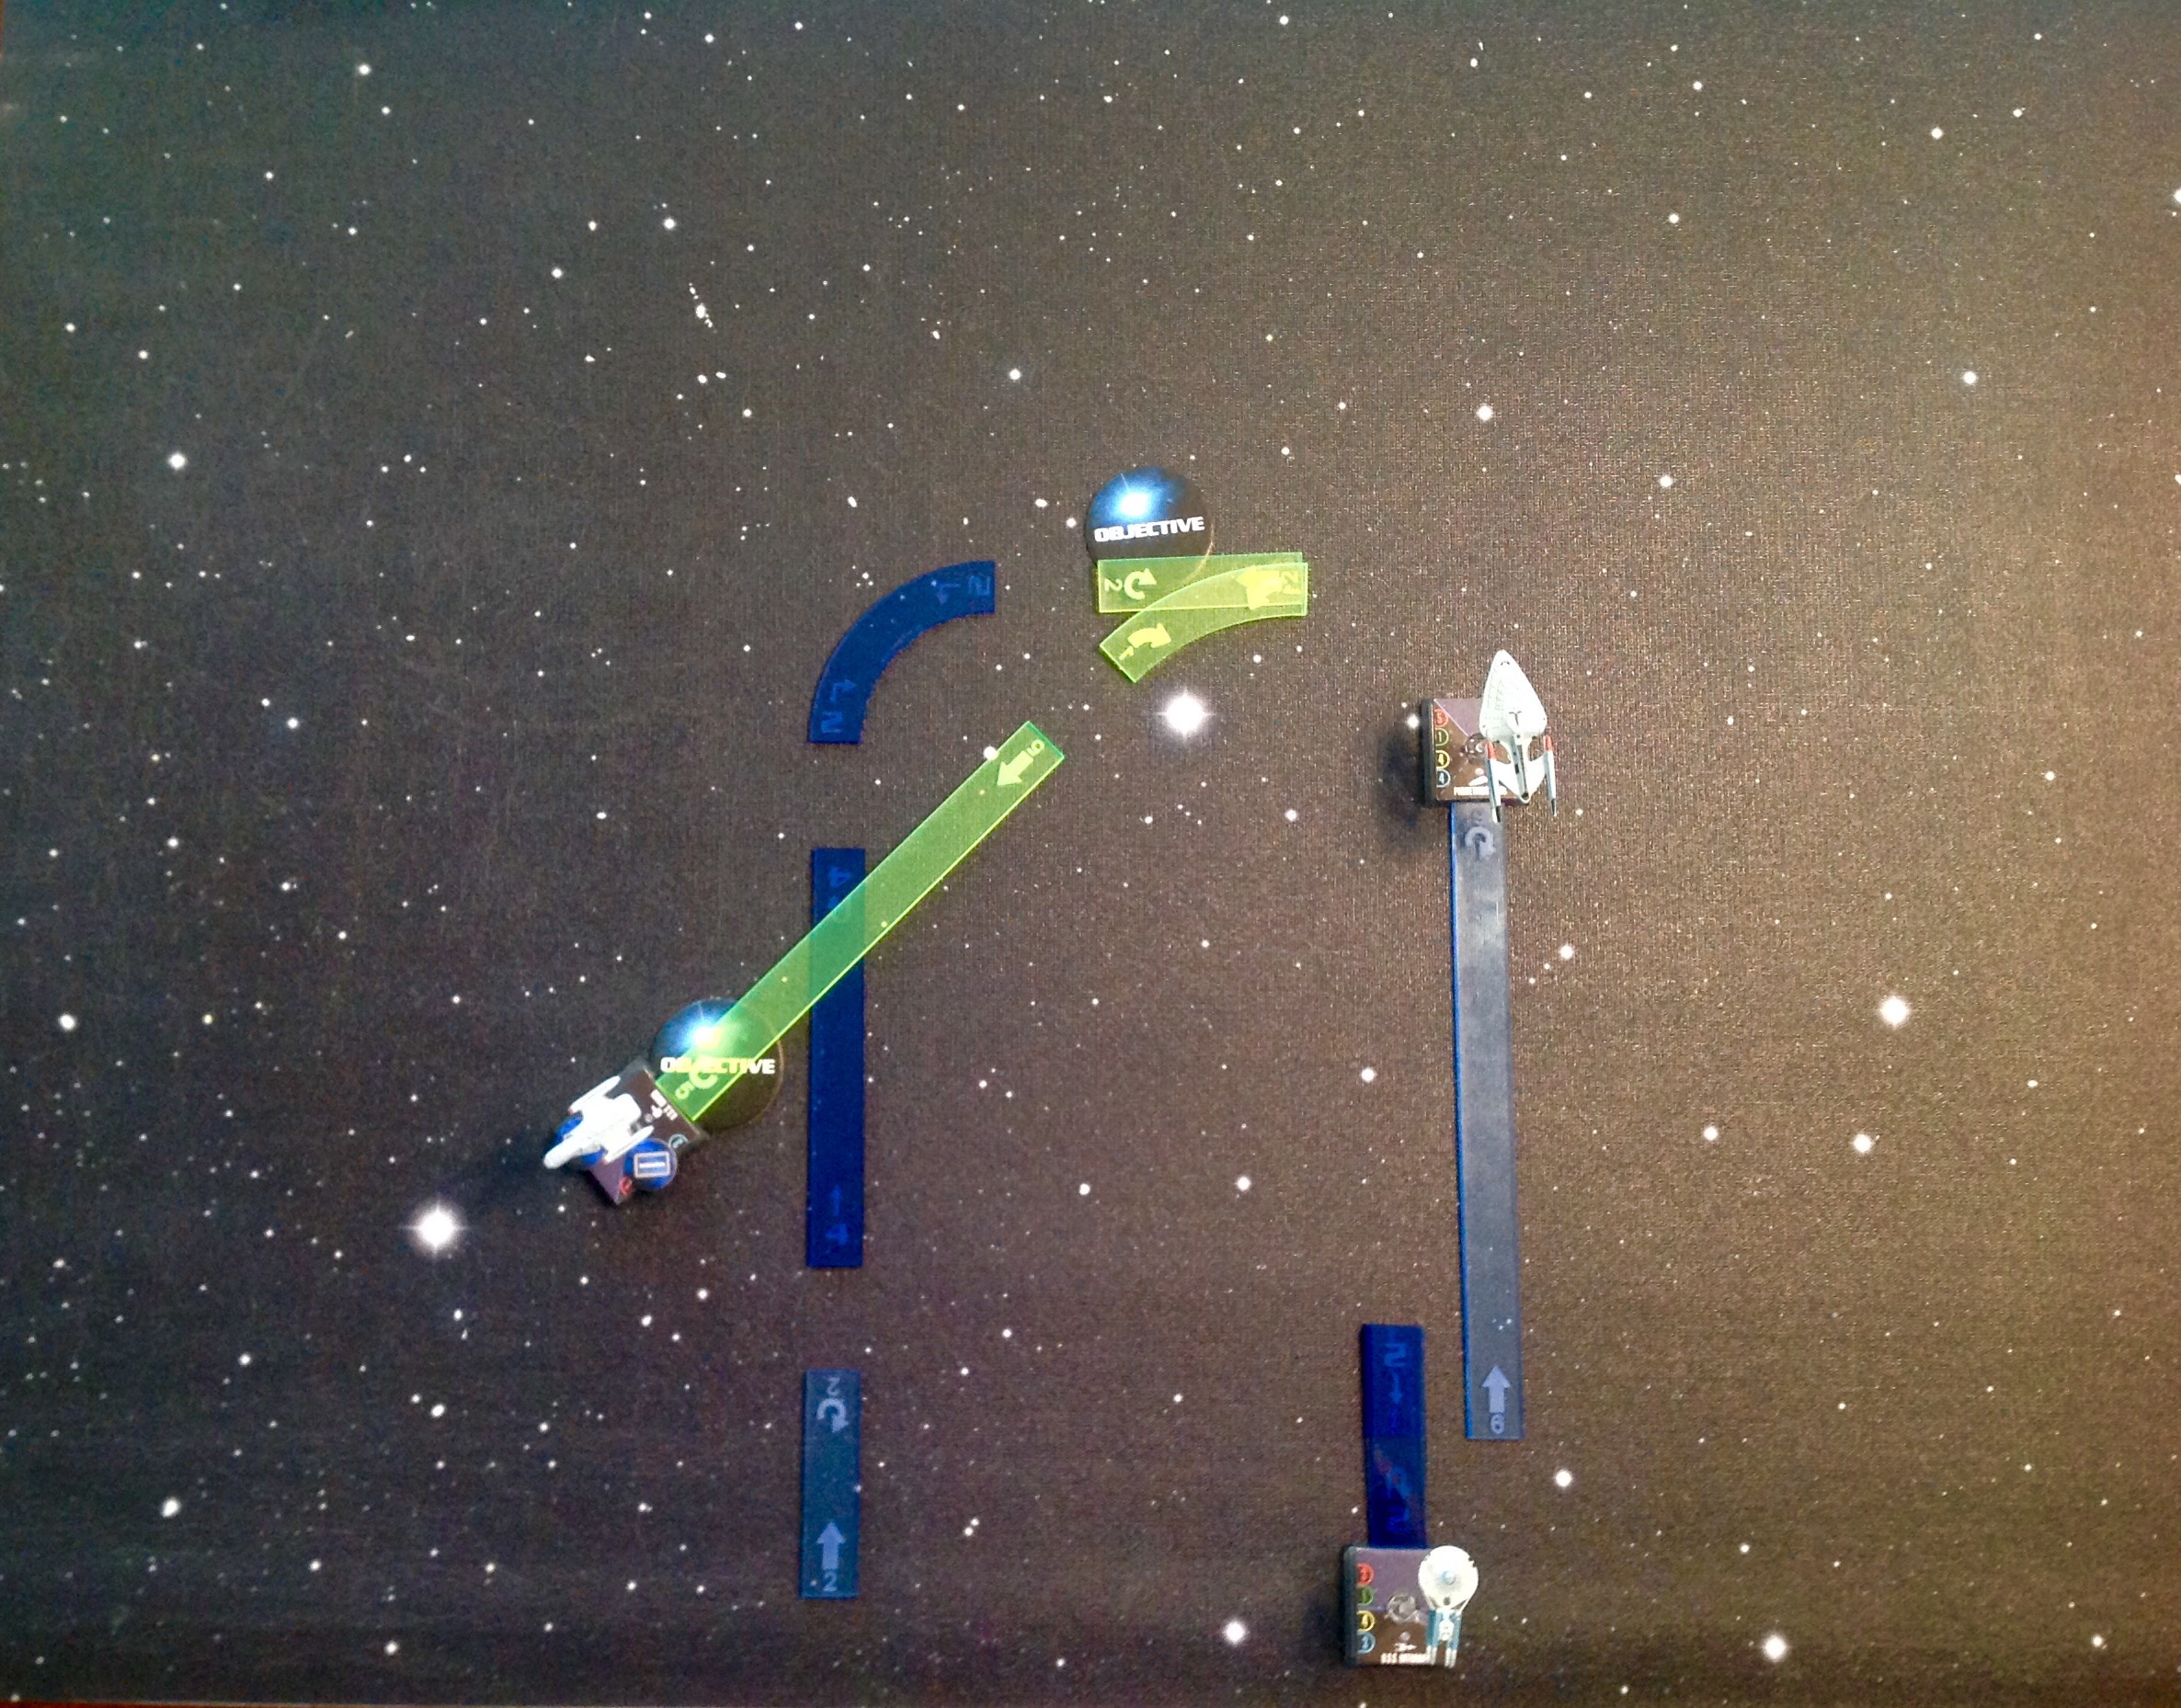
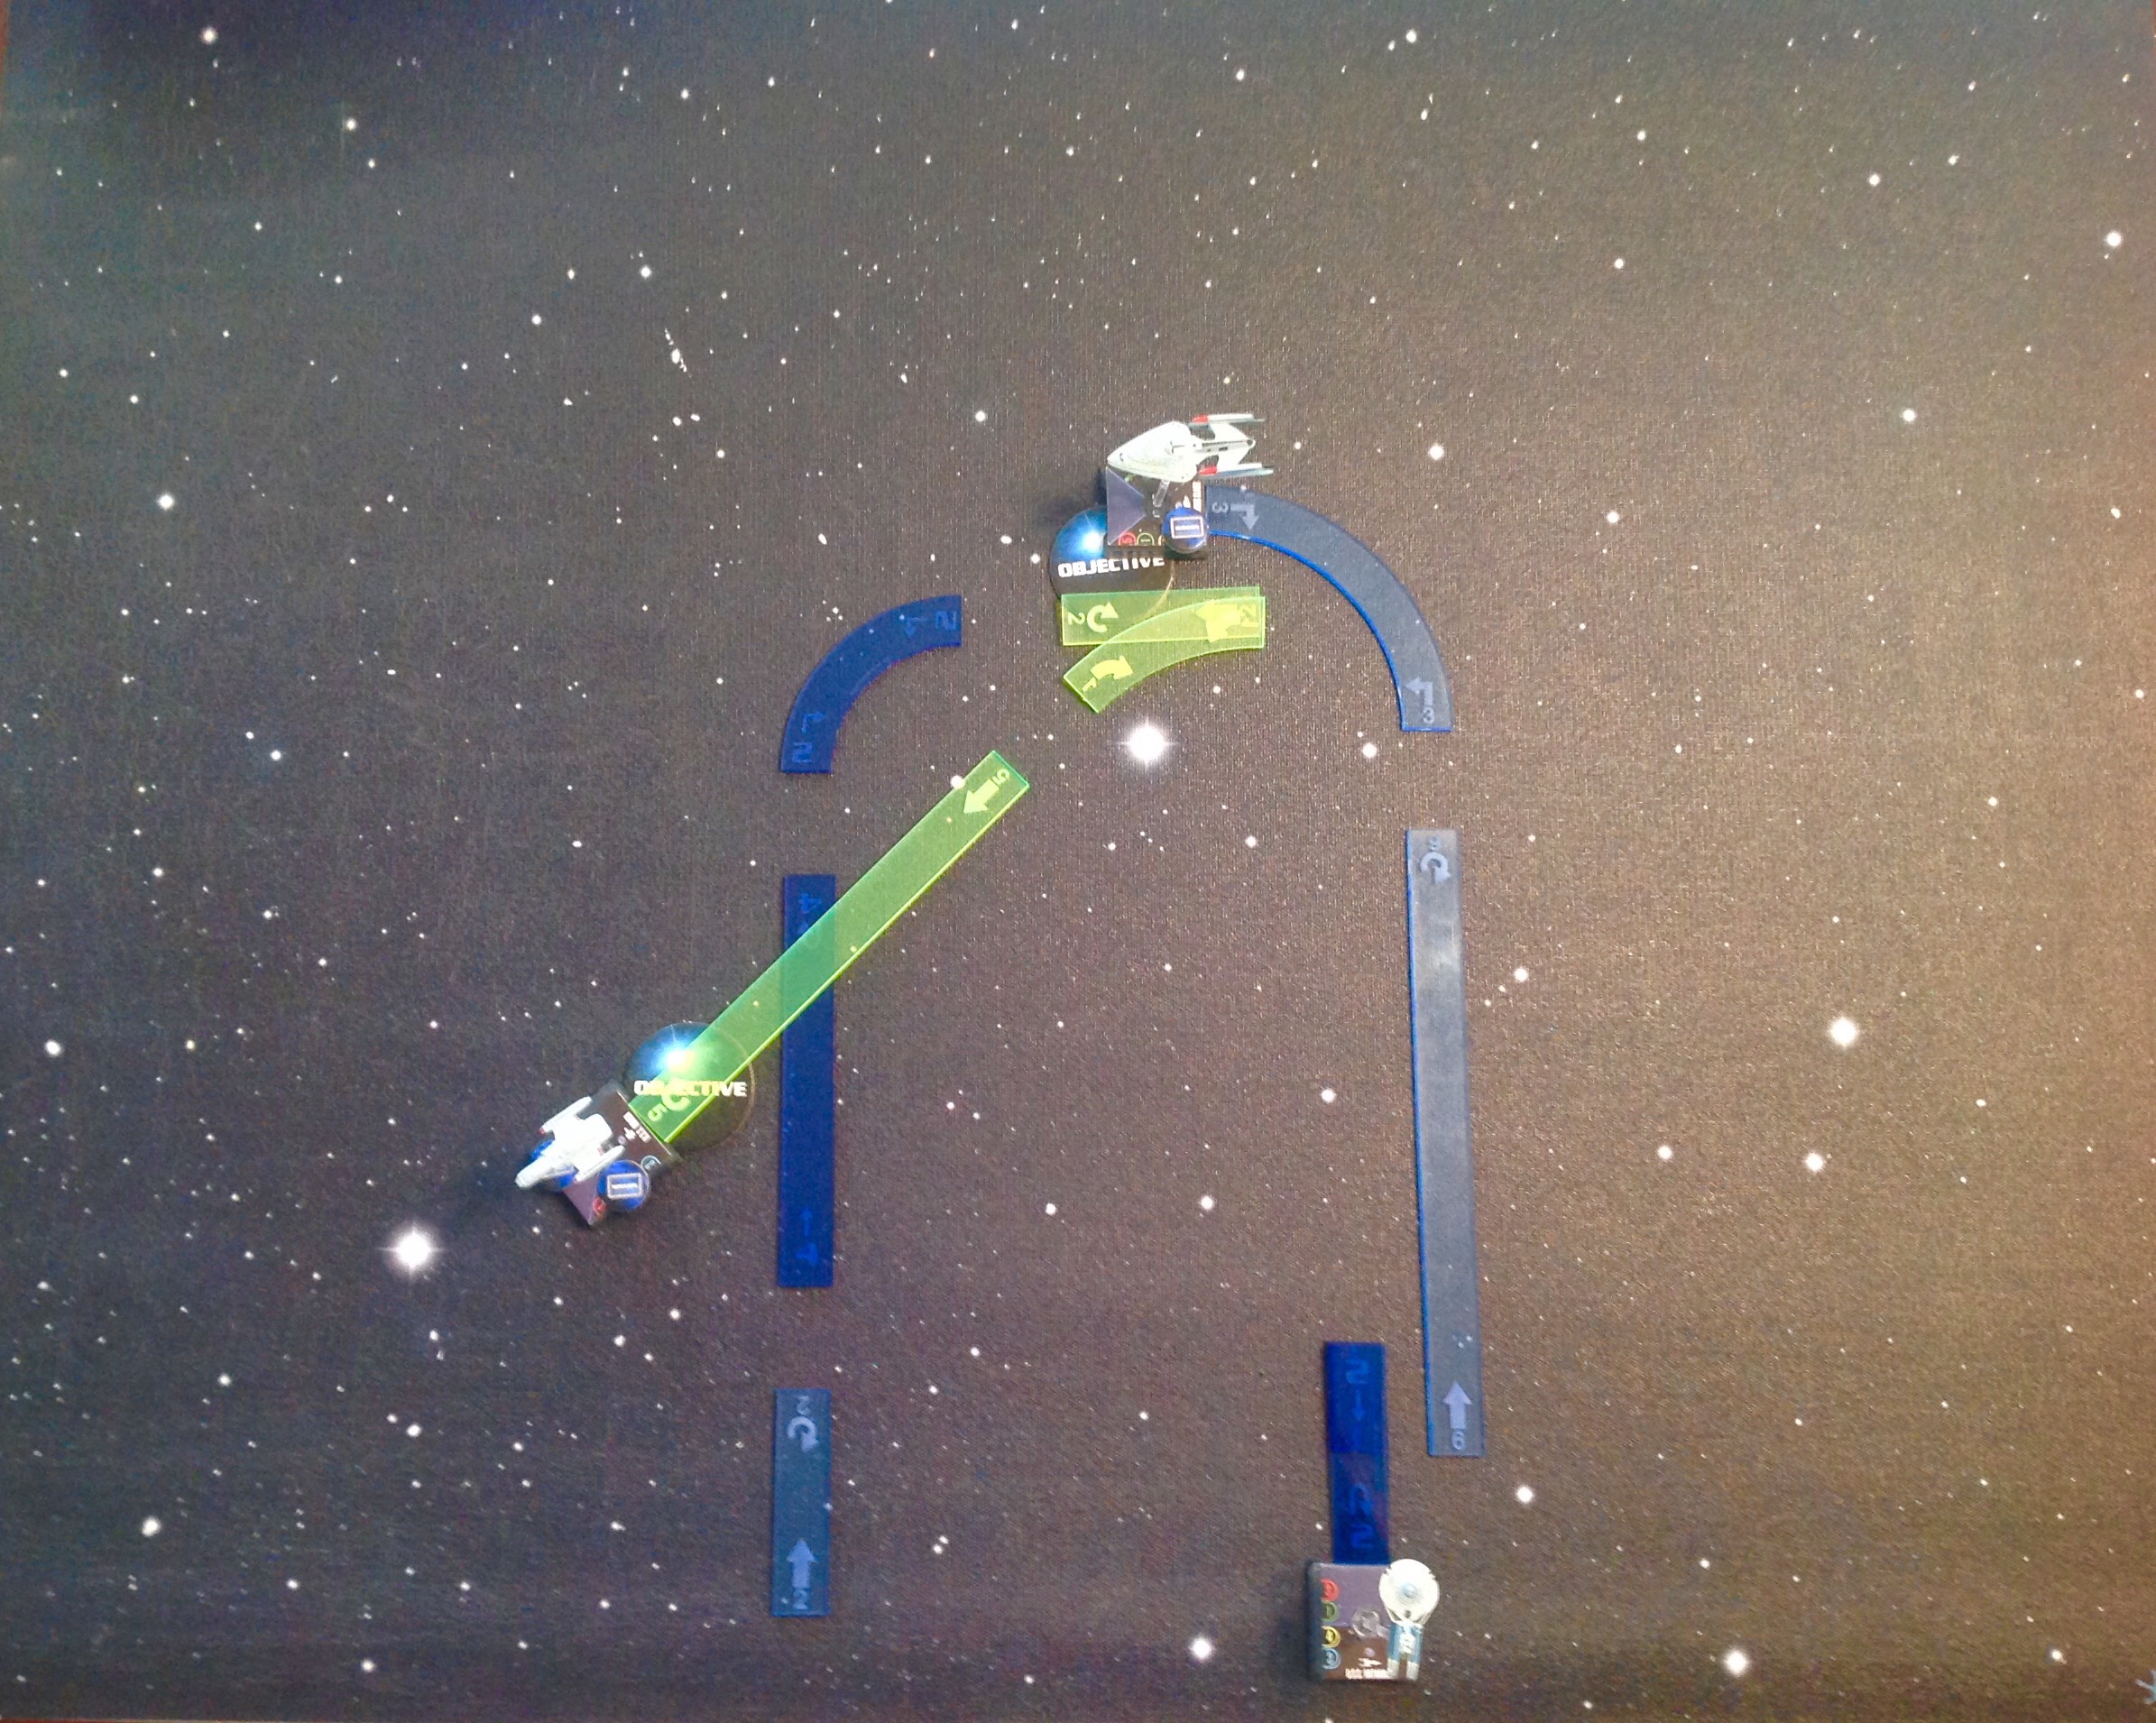
It is now the Rabbit’s turn to move and it’s already through the first portal. In Chronological Chaos, the first portal is in a set location. The second portal could be anywhere on the board. I have placed the second portal in what I consider the worst possible location for the Rabbit. As you’ll see, the Rabbit is going to have to reverse course to get back to the second portal.
The Rabbit first does a COME ABOUT 2.
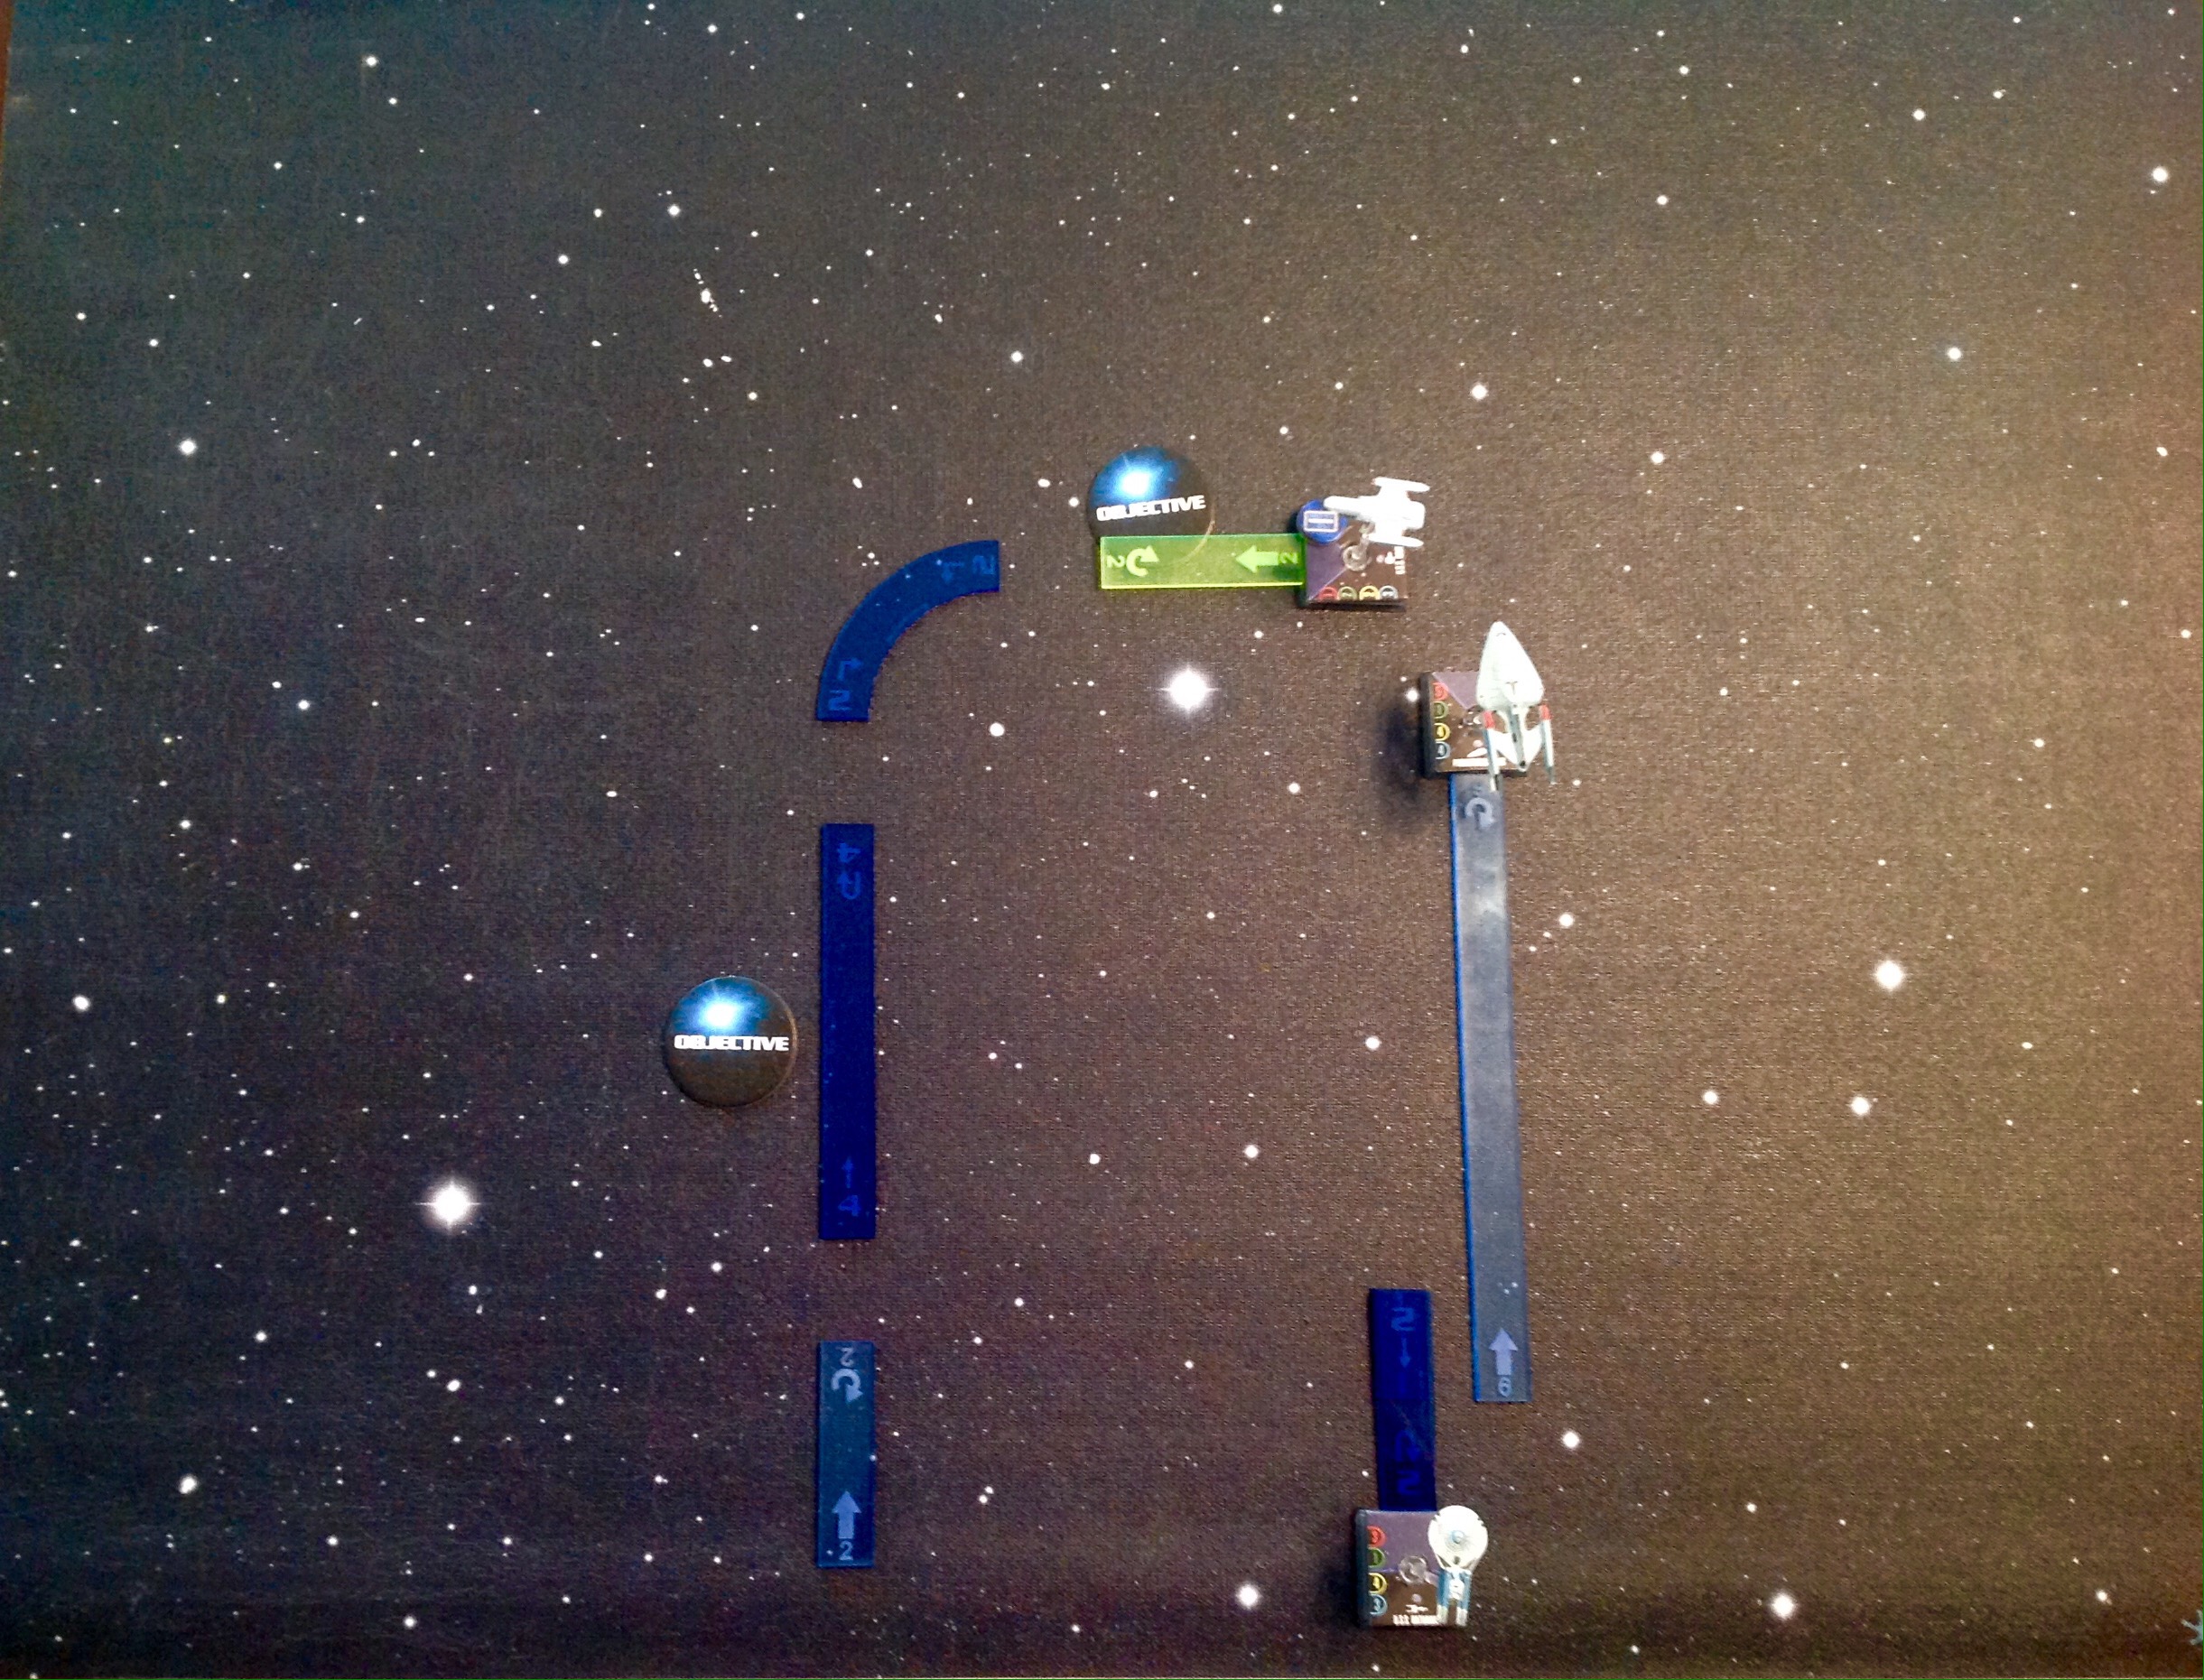
For its Action, the Rabbit uses Admiral Forrest’s Fleet Action to BANK 1 to the left.
This aligns the Rabbit toward the second portal.

Next, the Rabbit disables William Riker to allow it to perform a free Action. Rabbit performs the Picard Maneuver to move STRAIGHT 5.
The Rabbit is done moving and is now through portal 2.
But, the play is not yet over. At the end of the Activation Phase the opposing player will undoubtably be close to Portal 1. And Prometheus will likely be within the forward firing arc of an enemy ship. Prometheus now discards the Obey Orders upgrade to allow it to TURN 3 to the left to move through the first portal.
The Race To The Finish
So, at the end of the first Activation Phase, the Rabbit Build has one ship in the original location. One ship has gone through one portal and the second ship, the Rabbit, is through two portals. The Rabbit has moved the equivalent of 20, about 30″. As the Rabbit makes its run to the finish, the ship will be able to move STRAIGHT 4 and the Transwarp Drive will bump that by STRAIGHT 2, for a base speed of STRAIGHT 6 each turn.

In addition, Captain Picard’s captain Ability will allow an additional STRAIGHT 4. In addition, the Rabbit will be able to use Admiral Forrest’s free movement, as well as the Emergency power.


At the beginning I described this as an unbeatable build. Is it beatable? I don’t think so. I played against it and tried using Jennifer Sisko which allowed me to disable two upgrades on the Rabbit. It slowed him only a little. And I had to build a fleet designed to stop him, not necessarily to win.
It’s always possible that a player might still fly badly. In fact, during the Chronological Chaos OP, my son was so anxious that he ended up flying the Rabbit off the board on his first turn. He still won by racing the Prometheus to the end.
But, barring any mistakes in the execution, I don’t think it’s possible to build a fleet that is faster than the Rabbit, and the fact that the Rabbit ends up through two portals before the end of the first Activation Phase means that no one is going to be able to shoot at it. The Prometheus can act as a blocker, disrupting or firing on any ship chasing the Rabbit. The Hathaway, having fulfilled it’s role in the first Activation Phase simply needs to stay out of the way, but even if it gets killed, when the Rabbit hits the fourth portal, the Federation player wins regardless.
This is the second in a series of posts about Star Trek Attack Wing:
Tuesday: An introduction to Star Trek Attack Wing
Wednesday: Chronological Chaos OP: An Unbeatable Build?
Thursday: Throwback Thursday: Winning the Klingon Civil War OPs with more unbeatable builds
Friday: STAW is DEFINITELY Pay-to-play. . .And players should be grateful it is
Enoch Bliss gets the lion’s share of the credit for designing The Rabbit Build.
Rodney M Bliss is an author, columnist and IT Consultant. His blog updates every weekday. He lives in Pleasant Grove, UT with his lovely wife, thirteen children and grandchildren.
Follow him on
Twitter (@rodneymbliss)
Facebook (www.facebook.com/rbliss)
LinkedIn (www.LinkedIn.com/in/rbliss)
or email him at rbliss at msn dot com(c) 2017 Rodney M Bliss, all rights reserved

Pretty cool. I used to do a lot of “pre-programmed” strategies back when there as a STAW OP scene near me.
What if someone played Lure and/or Faked Messages on you? Would that mess with the plan enough to throw you off?
Actually, it was one of the special rules for the OP that Lure, Fake Messages, Thought Maker, etc were not allowed.
Yeah, they would have messed it up if they hadn’t been allowed.